
Please make sure to book a suite and note that you must complete a quick training in order to use a Podcast Room.
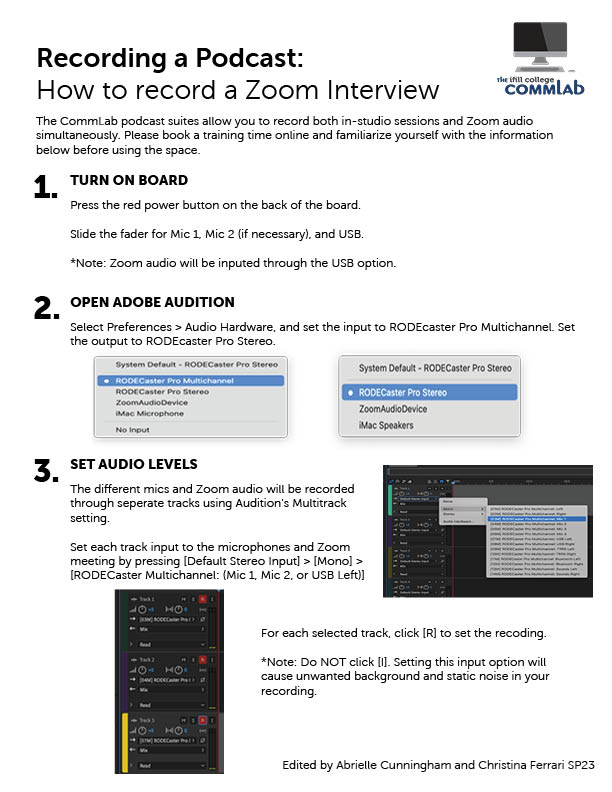
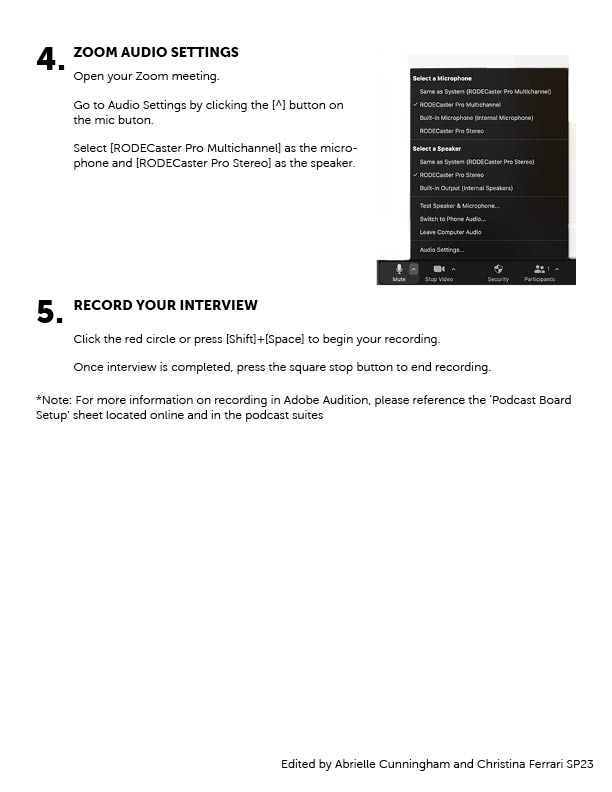
Please make sure to book a suite and note that you must complete a quick training in order to use a Podcast Room.
Watch this video or look at the image to help set up the podcast board!
Make sure to book the space and please note that you must complete a quick training in order to use a Podcast Room.
CLICK HERE to find the RØDEcaster Multitrack Template.
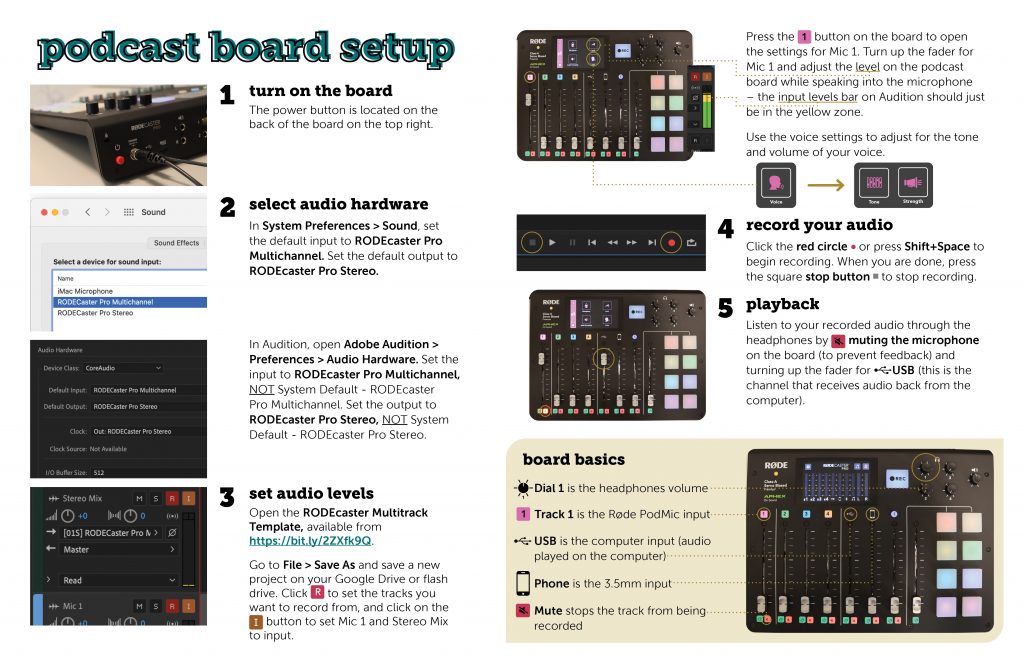
Before you can make a multitrack recording in the podcast rooms, you will need to set up tracks for each of the Rødecaster’s inputs. You can do this easily by downloading our template with preset tracks:
Unzip the file and open it in Audition. Then go to File > Save As to save your new project. Make sure to save it in the same place as any .wav recordings to make sure you do not lose them!
If you are recording by yourself using only the PodMic, you do not need to use multitrack recording. Instead, simply set your input and output to Rodecaster Pro Stereo under Adobe Audition > Preferences > Audio Hardware and record your audio to a .wav file.
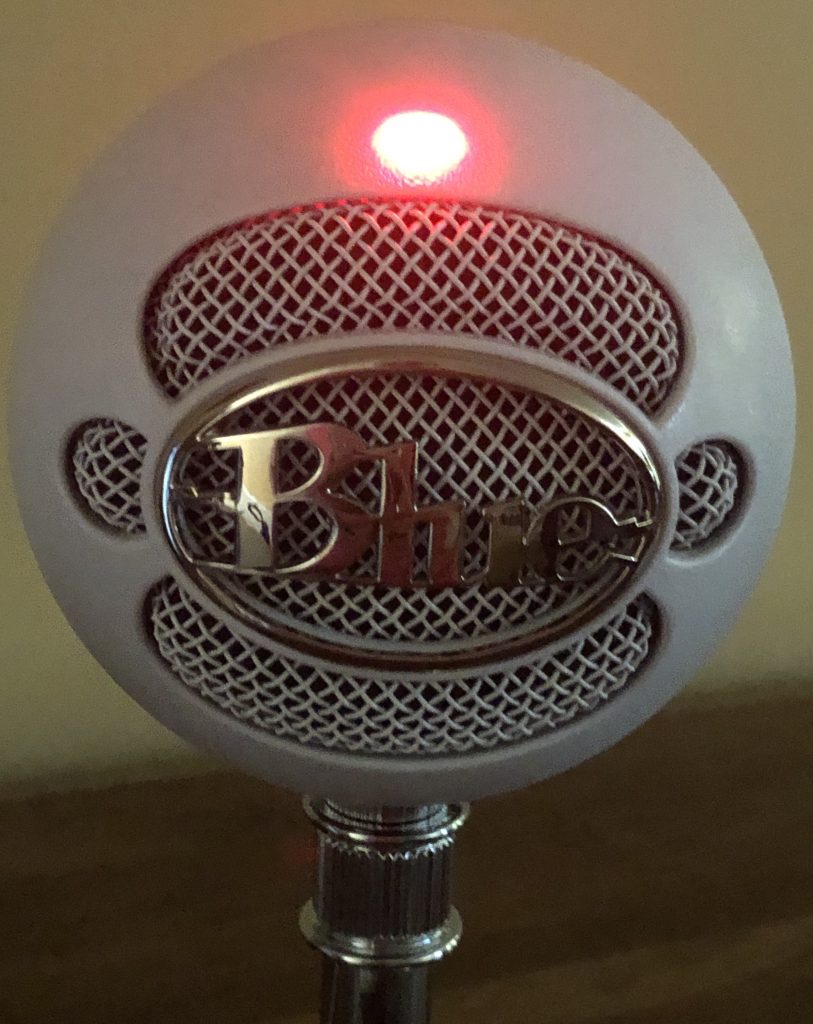
The Snowball mic is one of the easiest and simplest mics to use for audio recording. Better yet, it producers top-tier sound with little fuss.
When you get your Snowball mic, the first thing you want to do is assemble it.
3. Select your desired recording setting
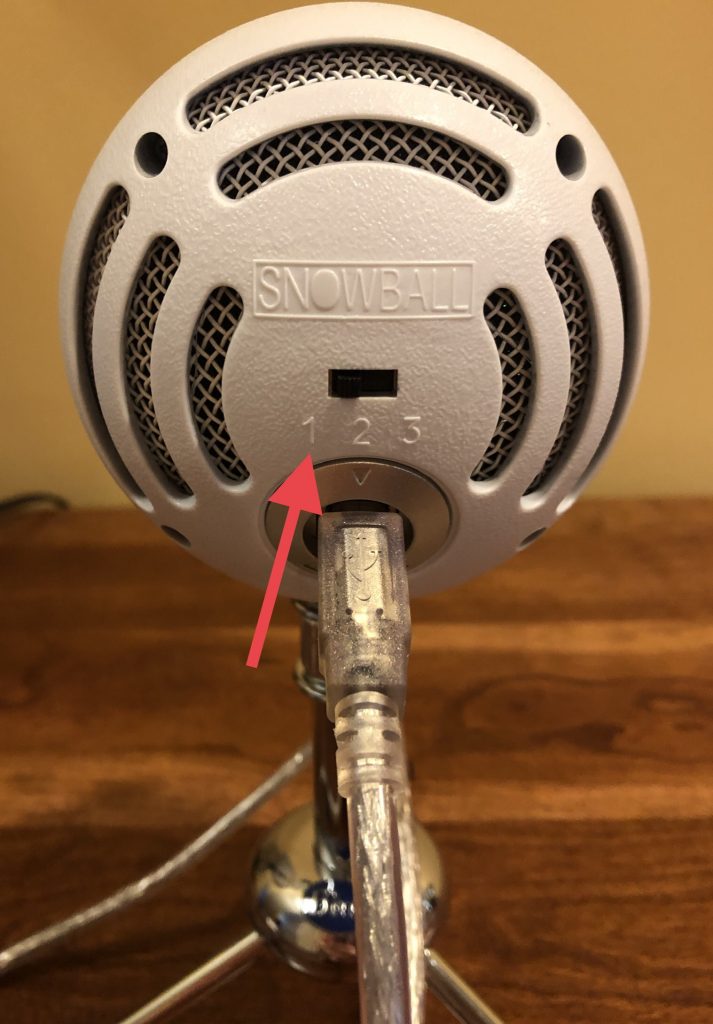
When you open Audition, the Snowball mic should appear as the Host audio track. This means you’re ready to record, all you have to do is hit the red button in Audition and get started!
Here is a helpful video that goes over Snowball mic set up:
Whenever recording more than one person speaking, or when mixing multiple audio files together, it’s important to have a consistent sound level. This way, your listeners won’t have to constantly adjust their headphones or speakers to match the sound level, you’ll have already done it! Plus, matched sound loudness just sounds so much better. Here’s a great video on how to get really precise loudness matching.
Getting really good interview audio is so difficult, even when you and the other person are in the same location. Add social distancing, long distancing, and the zoom? A recipe for bad audio. Here ares some tips to get the best possible audio when doing your distant audio recording.
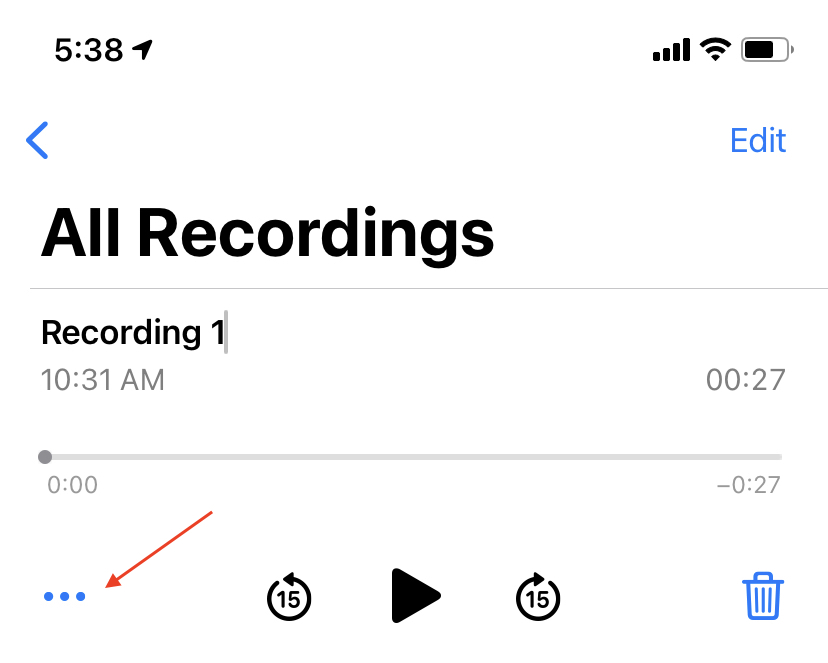
For many first-time audio producers, the Voice Memos app is a great resource to quickly record audio on the go. It is simple to use, just hit the red button and speak! With a good recording set up, your recorded audio can be production-ready.
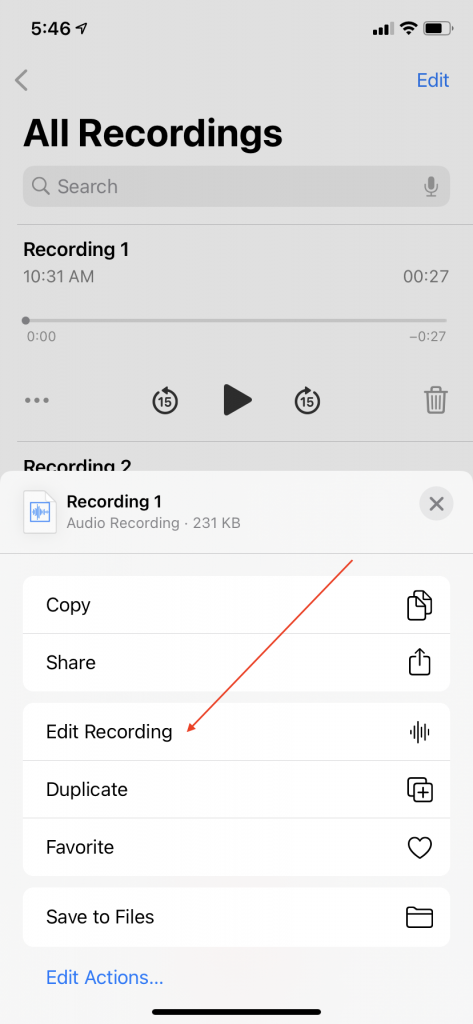
However, there’s not always time to make a blanket fort or makeshift recording booth. Maybe you’re on the go or somewhere that’s windy or noisy. Don’t worry! Here are two quick tips that will improve your Voice Memos audio.
1.) Turn on Enhanced Audio
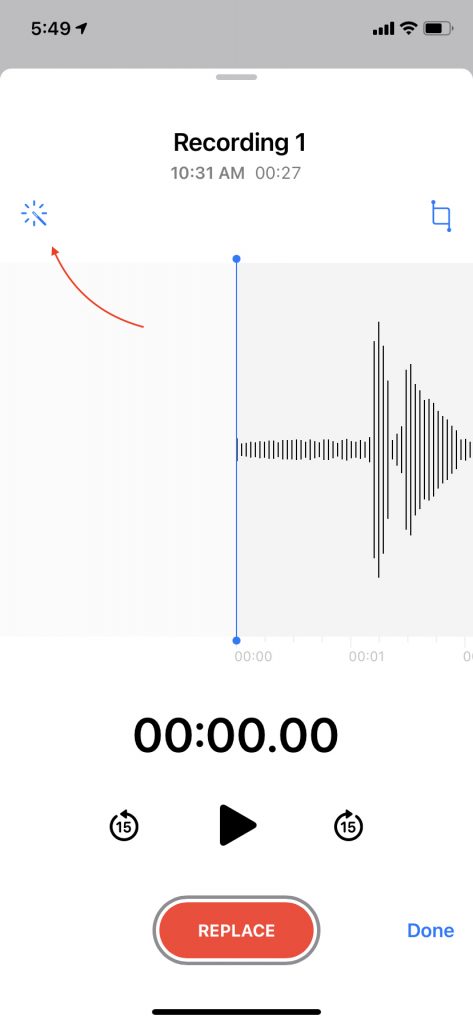
And that’s it! This little wand will help clean up your audio in just one click!
2.) Put a piece of tape over your mic
It’s really that simple.
All you need is a small piece of ordinary tape. Stick it over your phone’s microphone to cut down harsh wind or noise sounds when recording outside!
Check out this great video on beginner audio recording tips by Pocastage on Youtube!
Your phone can be a great tool to record soundbites on the go. Check out this video to see the ten best apps for recording on your iPhone!
Disclaimer: Not all of these apps are free!
However, these apps can help customize and professionalize your audio and decrease editing time later on. Plus, they are super simple to use!
High-quality audio is essential for successful podcasts. Check out this helpful video and blog post from The Podcast Host to learn how to optimize sound quality and record separate audio for you and your guest!
Key Takeaways:
Audio Optimization
To Record Separate Audio for Two Speakers/People
This should leave you with two separate m4a audio files that you can easily upload to iMovie, Garageband, and Adobe Audition!