Checking Your Storage on your Device

A lack of space on your computer can cause a number of problems. Because of this, one of the first things I check when attempting to find the source of an issue is the storage space available.

How to check storage for Mac:

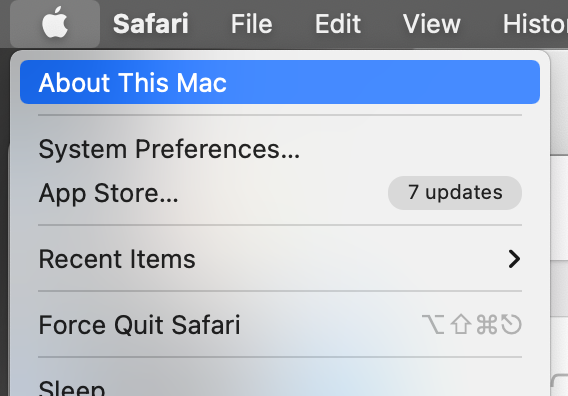
Open the apple symbol in the top left corner of your screen. Select “About This Mac”.

(Picture shows the Apple symbol drop down menu with “About This Mac” highlighted).

Once “About this Mac” is opened, navigate to the “Storage” tab. The amount of storage you still have available is shown above the bar that color codes the percentages of storage being used by specific categories.

(Picture shows annotated screenshot of the Storage tab in the About This Mac window).

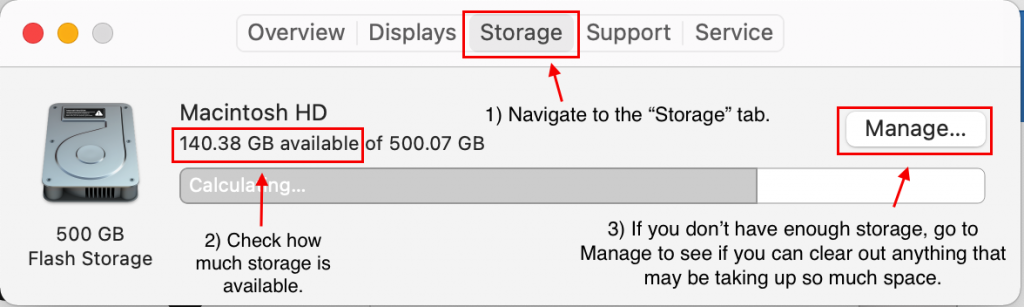
If you are out of storage, the best solution would be to back up your device and then to remove unnecessary files from your device. A short term solution would be to select “Manage…” which will open up a new window.

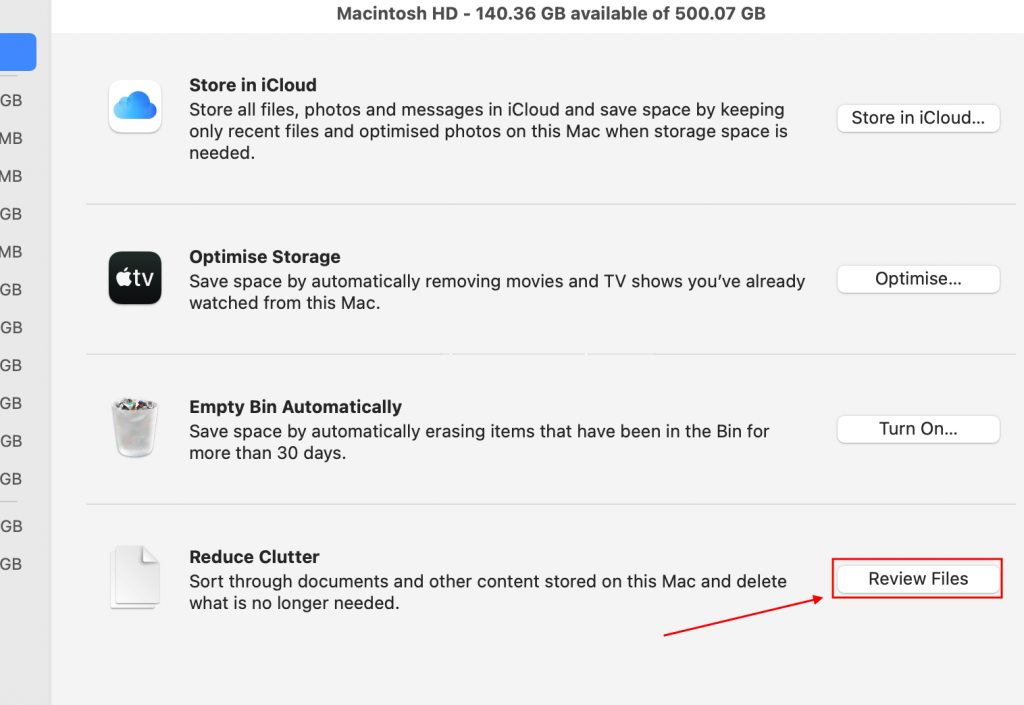
From there, select “Review Files” and you will be presented with the option to sort through your documents and permanently erase those files which are unnecessary.

For Windows 10, there are two ways to check the storage space availability:

First, open file explorer. This can be done by opening any folders or by tapping the file folder icon.

From there, click “This PC” in the navigation column on the left side of the window.

In “This PC”, you should see a section dedicated to Folders and one to Devices and Drives. Select one of the disks or drives in the Devices and Drives section will show you how much storage you have.

Alternatively, you can find the amount of storage on your device through the system settings. To begin, click the Start button and then the Settings icon.

In the settings window, navigate to “System” and then “Storage”. This will show you information about your primary hard drive and more details about how your storage is being used. Similar to the “Review Files” option in macs, this is where you will be given options for sorting through and managing the files and other uses of your storage.

Showing Hidden Files on Mac

Everyone with a mac is at the very least mildly familiar with the general setup of Mac computers and their filing system. However it’s lesser known that Mac computers have hidden files.

This is to prevent the user from accidentally destroying their operating system. But what if you need to access these hidden folders? This tutorial will give you a couple of ways to unhide your hidden files, but be very careful. It can be very easy to mess up your operating system while altering these files.


There are a number of ways that one can go about finding hidden files, but the easiest is to use the keyboard shortcut. To do this, you have to open up Finder and navigate to Macintosh HD (Locations => name of your computer => Macintosh HD) and press command+shift+period. You should now be able to see your hidden files.

The hidden files will appear transparent or washed out in comparison to your normal files.

To hide them once more, simply press command+shift+period again.

If you know that the file you’re looking for is in the hidden ~/Library folder (which is not the same as the Library folder you see in the screenshot above) you can go directly to it using the Go tab at the top of your screen. While there, hold down the alt/option key.

While holding alt/option, the Library folder should show up under Home and above Computer in the Go list. (Not shown in screenshot)

This will take you directly to the hidden Library folder.


Another way to find hidden files is through Terminal commands. You can find the Terminal in several ways, but the simplest is to use Spotlight Search. To find the terminal, first open Spotlight Search with command+space bar and then type in Terminal.

Once you have Terminal open, write the following:

defaults write com.apple.Finder AppleShowAllFiles TRUE (then Press Enter for a new line) killall Finder

To hide files again, write the same thing as above, but instead of “TRUE” use “FALSE”.


And there you have it. Those are the two and a half easiest ways to find hidden files on your mac computer. (I count the Go shortcut as the half).