Checking Your Storage on your Device

A lack of space on your computer can cause a number of problems. Because of this, one of the first things I check when attempting to find the source of an issue is the storage space available.

How to check storage for Mac:

Open the apple symbol in the top left corner of your screen. Select “About This Mac”.
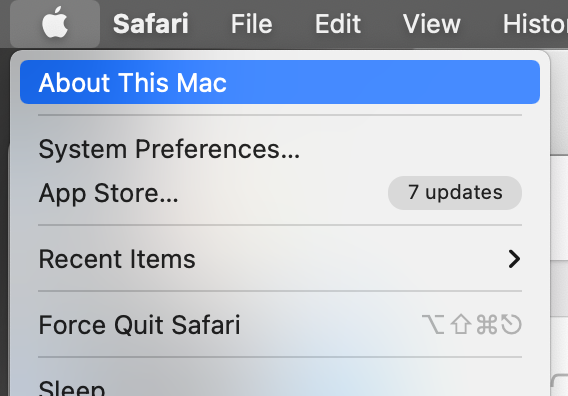
(Picture shows the Apple symbol drop down menu with “About This Mac” highlighted).

Once “About this Mac” is opened, navigate to the “Storage” tab. The amount of storage you still have available is shown above the bar that color codes the percentages of storage being used by specific categories.

(Picture shows annotated screenshot of the Storage tab in the About This Mac window).

If you are out of storage, the best solution would be to back up your device and then to remove unnecessary files from your device. A short term solution would be to select “Manage…” which will open up a new window.
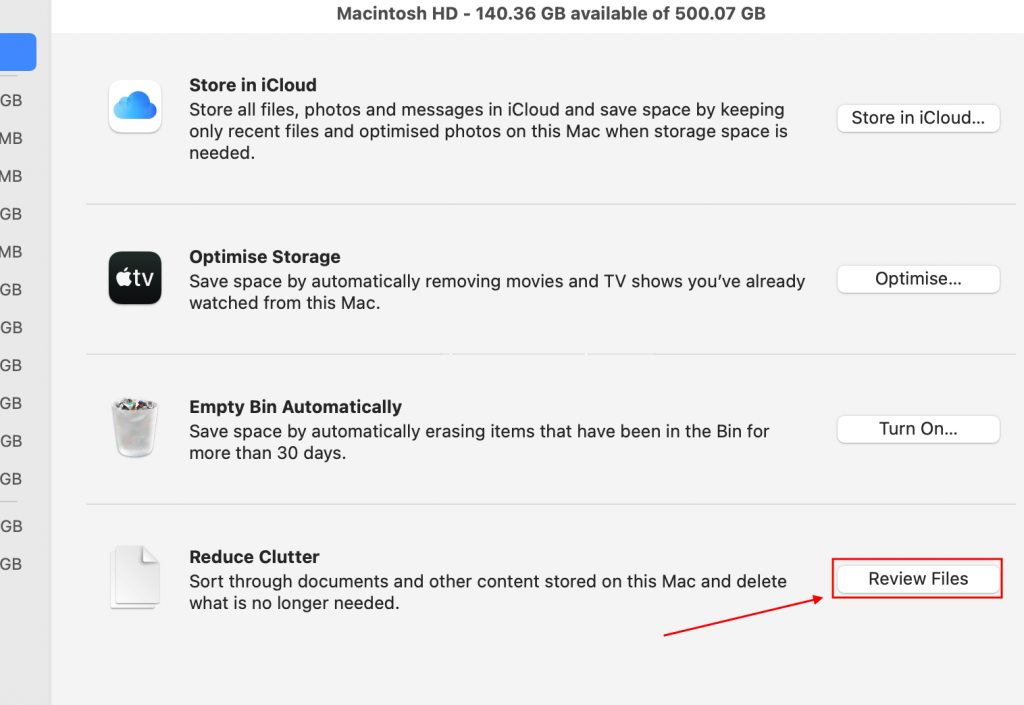
From there, select “Review Files” and you will be presented with the option to sort through your documents and permanently erase those files which are unnecessary.

For Windows 10, there are two ways to check the storage space availability:

First, open file explorer. This can be done by opening any folders or by tapping the file folder icon.

From there, click “This PC” in the navigation column on the left side of the window.

In “This PC”, you should see a section dedicated to Folders and one to Devices and Drives. Select one of the disks or drives in the Devices and Drives section will show you how much storage you have.

Alternatively, you can find the amount of storage on your device through the system settings. To begin, click the Start button and then the Settings icon.

In the settings window, navigate to “System” and then “Storage”. This will show you information about your primary hard drive and more details about how your storage is being used. Similar to the “Review Files” option in macs, this is where you will be given options for sorting through and managing the files and other uses of your storage.

The Importance of Clearing the Trash

Need to clear up some space? Let’s just throw some files in the bin then! But the problem is, that still hasn’t cleared up the space. So long as the trash has yet to be emptied, those files are still sitting on your computer, taking up space.

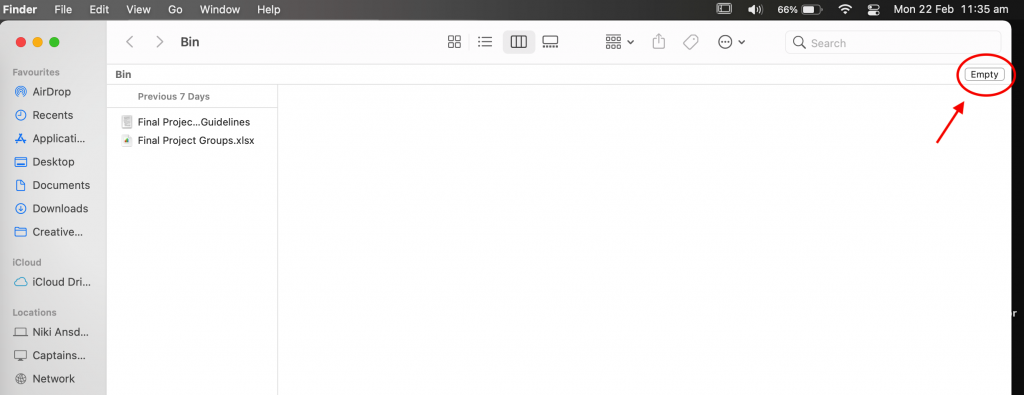
So how do you fix that? It’s fairly simple. If you have a mac, start with opening your trash bin.

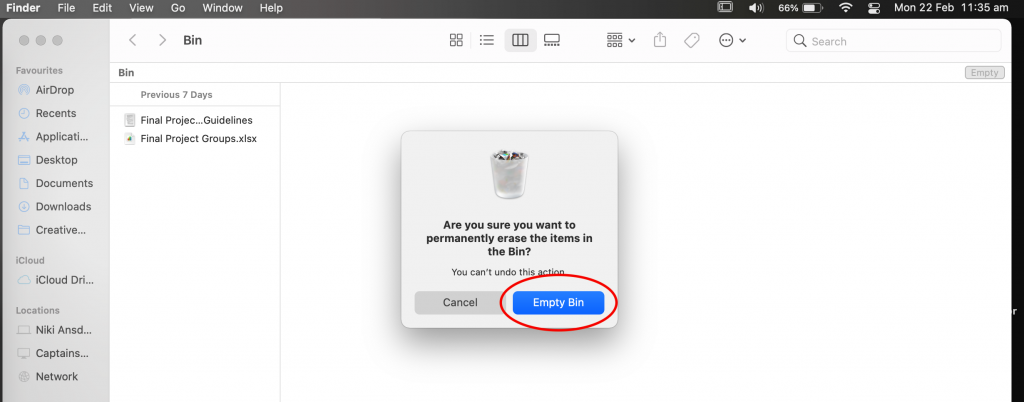
On macs, when you open your trash, it’ll look something like this.

Click on the empty button in the top right corner.

It should ask for conformation before deleting your files. This can be changed in finder preferences.

Click the Empty Bin button and voila! You have emptied your trash and have gained all that space.


But what about for a Windows computer? (specifically windows 10 but I’m sure it can be applied to other iterations too) When you open the trash it doesn’t have a fancy empty button.

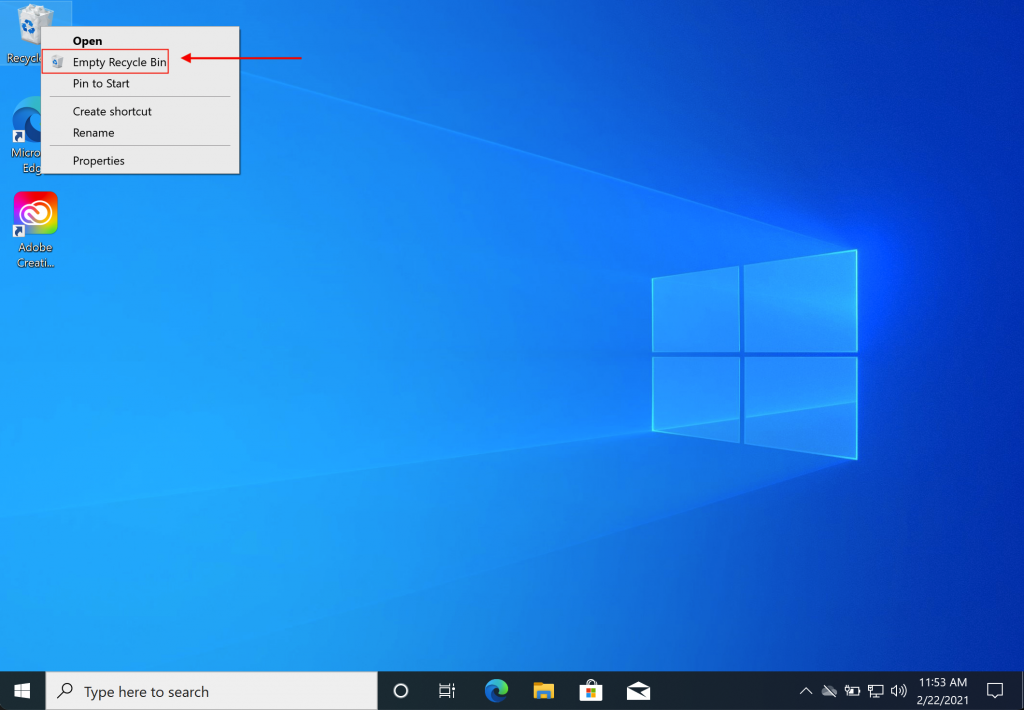
Well to start, you won’t open the trash, you will instead right click on it and find “Empty Recycle Bin”.

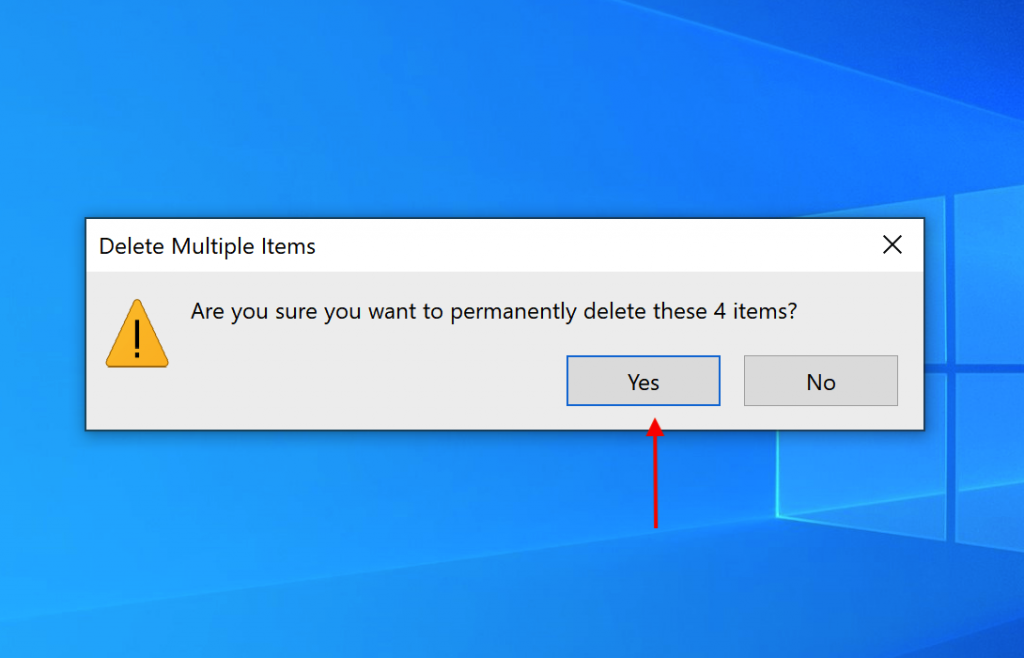
Click on that and a confirmation message should pop up.

Confirm that Yes you do in fact want to permanently delete these files.

And once again, voila, your problem is solved. You have permanently deleted the pesky files that were taking up space. Rather like the physical trash bin, the digital one should be emptied periodically in order to keep the clutter from taking up too much of your valuable space.

Reformatting A USB Drive

No matter what project you’re working on, most everyone has had to use some sort of external drive to store and transfer data before. Due to the versatility of the computers available to people today and their various operating systems, it should come as no surprise that there is no one “perfect” filing system to be found. Thus, external drives all have different default filing systems and you may need to reformat them to be more compatible with the device you’re using.


Reformatting:

For Apple devices, follow these steps:

Connect your UBS drive to your computer. Then open the Disk Utility app. This can be done either by finding it on the Launchpad or through Spotlight Search (command+space then type in “Disk Utility”).

Select your USB drive from the panel on the left. (It should be under “External”).

At the bar on the top of the window, select the “Erase” tab. In the “Volume Format” selection box, select the file system you want your drive to be.

Confirm you want to Erase (Note: This will permanently erase all the data on the device).

Close the Disk Utility window and feel free to use that newly reformatted USB drive.

For Windows 10 devices: 

Open File explorer and navigate to “This PC”.

Under This PC you will find a “Devices and drives” section. Once there, find the icon for the USB drive you wish to reformat. Right-click on it and from the drop down menu select the “Format” option.

As it does with the Apple devices, reformatting your USB drive will erase any content still on it.

Use the “File system” drop-down menu and select the storage type that you need. Then, click “Start”. A warning message will pop up. Click “Ok”. Another popup will inform you that the format is complete.

Close out of the formatting window and the USB has been reformatted.

(suggested reading: https://www.windowscentral.com/how-format-usb-flash-drive-windows-10 for more Windows options.)


File Systems:

File systems are used to control how data is stored and retrieved. The most likely to be used options that are available are FAT32, exFAT, and NTFS. FAT32 is compatible with Windows XP, 7, 8, and 10 as well as Linux and MacOS. exFAT is compatible with all except the MacOS 10.6.4 and earlier. NTFS is fully compatible with Windows XP, 7, 8, and 10 as well as Linux. It’s read only with Macs.

FAT32: high compatibility, small file size only (4GB max).

exFAT: high compatibility, large file size available (Recommended choice).

NTFS: not recommended for flash drives despite the ability to hold large files. Best for Windows system drives.