Backing Up Your Work

Backing up your work is essential in our current day and age. There are so many ways that files can be lost or damaged that it is nearly guaranteed that it will happen at some point or another.

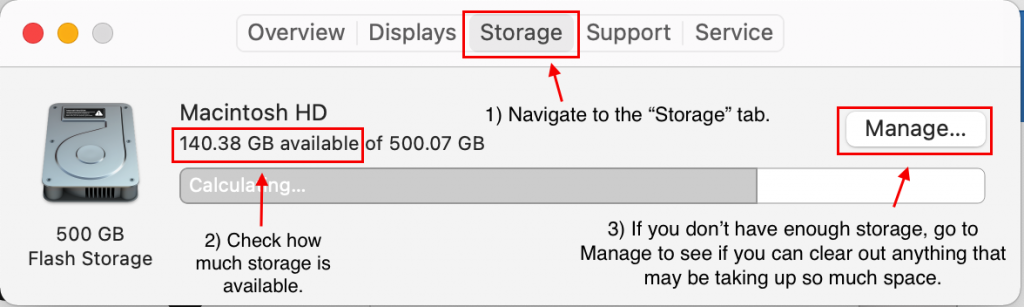
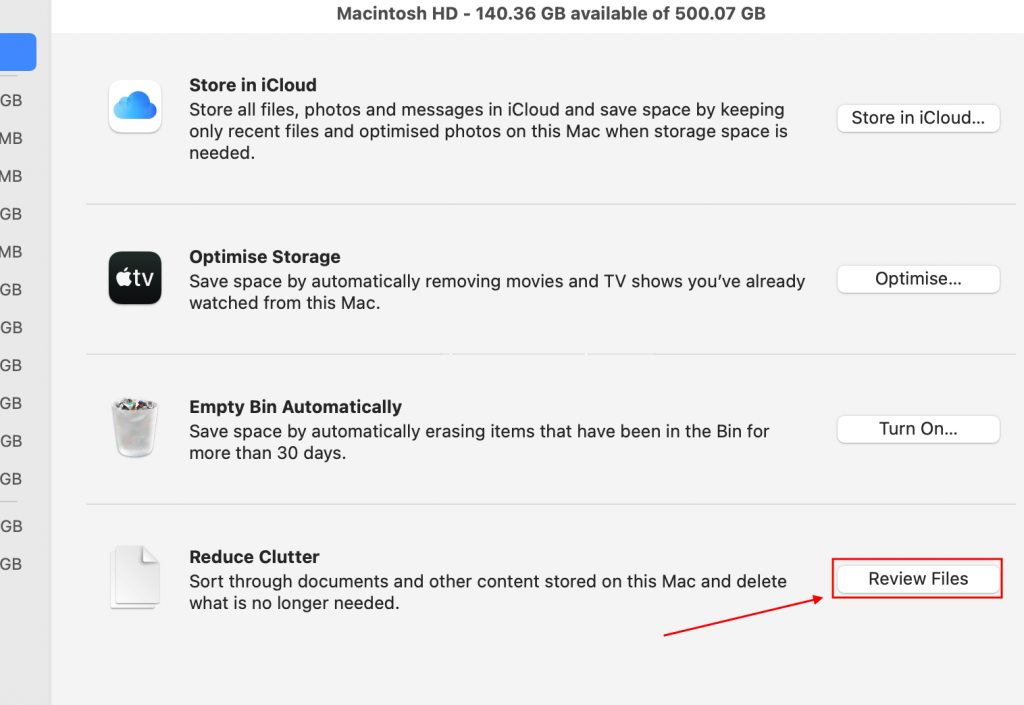
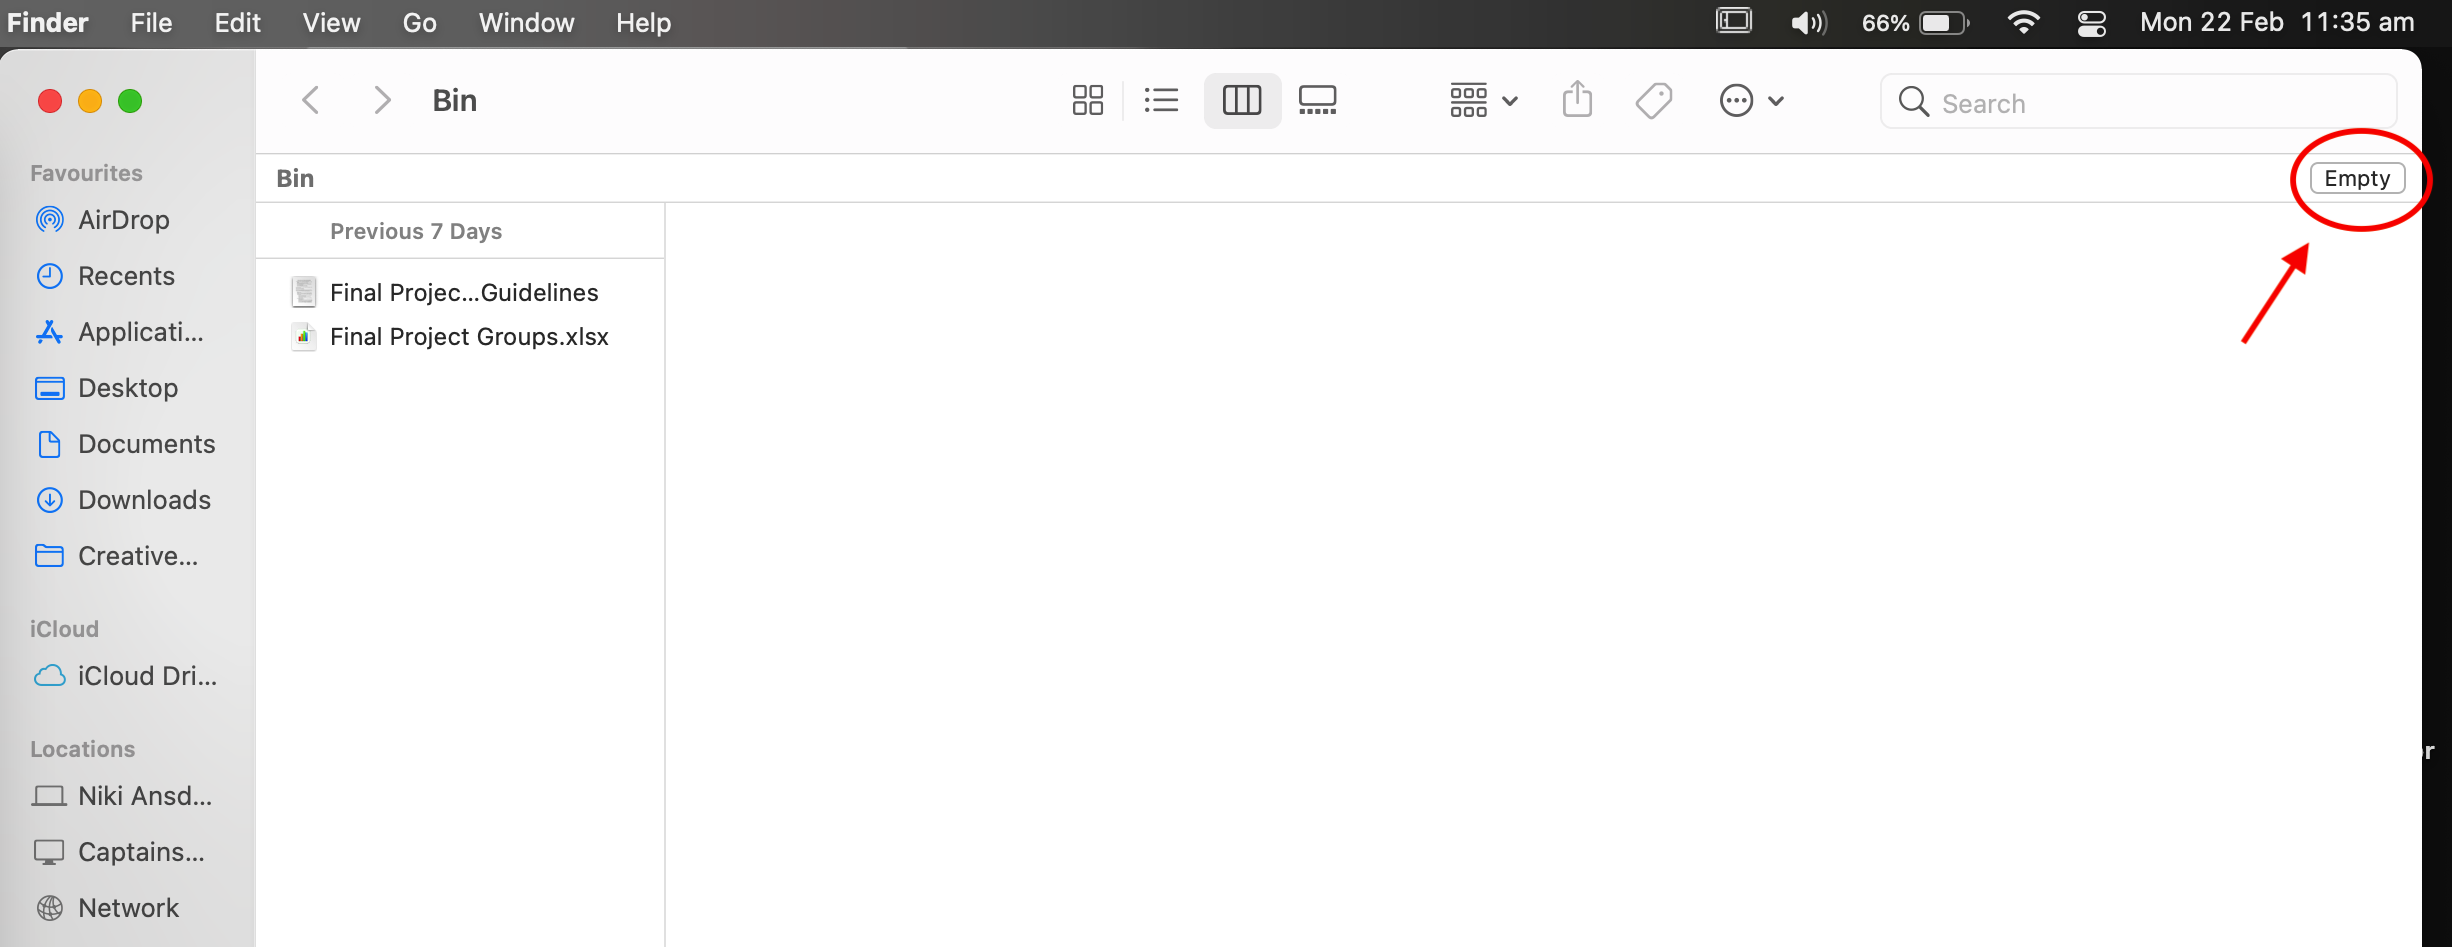
Another great reason to back up your files is because devices have limited storage. If the internal storage is full, this can cause many issues. Being able to clear out the less used files while still knowing that you have them stored in a back up is the perfect solution for that situation.

How To Geek has an excellent article that outlines not only why you should have multiple backups but also provides you with several different ways to back up your files.

Backblaze has a quick video that gives an overview of the different forms of back up that you can use and mentions pros and cons for each.

This video does imply that dropbox, google drive, or other similar online drives aren’t good backup solutions. And while you shouldn’t rely on them as your only form of backup (for the reasons stated in the video) they are still valid options for backing up your work as they are secure and easy to access.

Checking Your Storage on your Device

A lack of space on your computer can cause a number of problems. Because of this, one of the first things I check when attempting to find the source of an issue is the storage space available.

How to check storage for Mac:

Open the apple symbol in the top left corner of your screen. Select “About This Mac”.

(Picture shows the Apple symbol drop down menu with “About This Mac” highlighted).

Once “About this Mac” is opened, navigate to the “Storage” tab. The amount of storage you still have available is shown above the bar that color codes the percentages of storage being used by specific categories.

(Picture shows annotated screenshot of the Storage tab in the About This Mac window).

If you are out of storage, the best solution would be to back up your device and then to remove unnecessary files from your device. A short term solution would be to select “Manage…” which will open up a new window.

From there, select “Review Files” and you will be presented with the option to sort through your documents and permanently erase those files which are unnecessary.

For Windows 10, there are two ways to check the storage space availability:

First, open file explorer. This can be done by opening any folders or by tapping the file folder icon.

From there, click “This PC” in the navigation column on the left side of the window.

In “This PC”, you should see a section dedicated to Folders and one to Devices and Drives. Select one of the disks or drives in the Devices and Drives section will show you how much storage you have.

Alternatively, you can find the amount of storage on your device through the system settings. To begin, click the Start button and then the Settings icon.

In the settings window, navigate to “System” and then “Storage”. This will show you information about your primary hard drive and more details about how your storage is being used. Similar to the “Review Files” option in macs, this is where you will be given options for sorting through and managing the files and other uses of your storage.

The Importance of Clearing the Trash

Need to clear up some space? Let’s just throw some files in the bin then! But the problem is, that still hasn’t cleared up the space. So long as the trash has yet to be emptied, those files are still sitting on your computer, taking up space.

So how do you fix that? It’s fairly simple. If you have a mac, start with opening your trash bin.

On macs, when you open your trash, it’ll look something like this.

Click on the empty button in the top right corner.

It should ask for conformation before deleting your files. This can be changed in finder preferences.

Click the Empty Bin button and voila! You have emptied your trash and have gained all that space.


But what about for a Windows computer? (specifically windows 10 but I’m sure it can be applied to other iterations too) When you open the trash it doesn’t have a fancy empty button.

Well to start, you won’t open the trash, you will instead right click on it and find “Empty Recycle Bin”.

Click on that and a confirmation message should pop up.

Confirm that Yes you do in fact want to permanently delete these files.

And once again, voila, your problem is solved. You have permanently deleted the pesky files that were taking up space. Rather like the physical trash bin, the digital one should be emptied periodically in order to keep the clutter from taking up too much of your valuable space.