
All the adobe applications have a lovely feature called the layer lock. Layer locks are used to prevent working on the wrong layer. It’s frustratingly easy to work on layer thinking it’s a different one entirely. Fully locking layers or partially locking layers prevents you from making changes to the layers that are already completed.
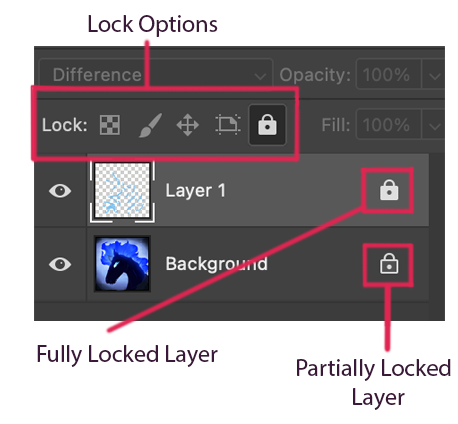
Fully locking your layer locks all four of the lock options available as well as preventing you from making selections. These are “Lock Transparent Pixels”, “Lock Image Pixels”, “Lock Position”, and “Lock All”.
The Lock Transparent Pixels does what the title suggests and prevents the user from changing any of the transparent pixels on your layer. A shortcut for this is the forward slash key (/).
The Lock Image Pixels prevents the user from painting or editing any of the layer. You can still move, transform, or select items on your layer.
The Lock Position prevents the user from moving or transforming anything on the layer, however it allows anything else.
The Lock All option prevents everything except making selections on the layer.
To apply a lock option to a layer of your choice, you must first make sure you’re on the layer. Select the layer you want to lock and click one or more of the lock options. If you select the Full Lock option (far right), the other four options will turn grey because they are unnecessary with the Full Lock option selected.