Royalty-free—what it is and is not

(Plus a list of RF stock sites!)

We’ve all been there—you’re working on a project and need some stock media. You know you can’t use just anything off of the internet because of copyright law. But even when you go to sites that offer stock media, it can be confusing understanding what you can use and how.

Royalty-free does not always equal fee-free.

While we might think that royalty free (rf) media is free to use. This is not always the case. The term simply means that you do not have to pay the creator royalties. Think how authors get paid for every copy of a book sold, or how a musician gets paid for every stream on Spotify. Those payments based on the number of times a work is used are royalties. You can check out this post by Amos Struck for a more comprehensive explanation.

For RF media you pay* once and that’s it. Sometimes the payment is $0. Sometimes it’s crediting the creator. Sometimes you have to pay a one-time fee. Many RF stock sites contain images that fit into multiple categories. Whenever on a stock website, always check that you have set your filters to only show you free content if that is what you are looking for.

I’ve compiled a list of sites that provide royalty-free (RF) images, video, and/or audio below.

I’ve also included some creative commons (CC) sites. Those are special licenses that allow you to use the media for free, but there are sometimes limitations on how you can use the media, and how to credit the author. See more on creative commons and the various types of licenses here. Or you can check out the Comm Labs resources on Creative Commons here.

General Stock Sites

These sites have images along with video, and sometimes audio

Openverse Creative Commons Search

Adobe Stock (Note: there do not appear to be free audio files, only images and video) Not all stock on the site is free, but there’s a good selection that is. Just make sure to check the ‘free’ box in the filters when searching. If it asks you for payment when you click license, then you know you need to search again.

PixaBay is free to use without attribution in most cases. Check their license for more.

Canva also has plenty of free images you can use, along with some video, animations, and their templates. Items with crowns next to them are only available with paid accounts. Note: you get more stuff for free if you sign up with your Simmons email address, since education accounts get access to many (but not all) premium features.

DepositPhotos focuses on imagery, but also has some free videos and music. Just be aware that not all works on the site are free, much like Adobe stock. So make sure to stick to the free filter. All their free content requires attribution.

Audio

BenSound has a section of the site with music that is free with attribution

Purple Planet music is free with attribution in most cases. Check out their license page for more info.

Free Sound is good for sound effects and the like

Zap Sounds free sound effects 

Images

Unsplash is my go-to. RF with attribution, so make sure to credit the person who made your media!

Burst from Shopify has good stock images. The collection is geared towards supporting its main business as a platform for independent e-commerce shops, so the stock does tend to reflect that.

Jopwell has a selection of stock photography available focusing on BIPOC in business and education settings. It’s fairly specific, but useful when you need corporate imagery.

WOC in Tech Flickr page similarly focuses on a narrow remit but does it well. Note that not all images on Flickr are RF or CC, but images by/on this particular page are. (If using Flickr, always check the copyright status of the individual image you are interested in using)

Gratisography has funky imagery that is off-beat

KaboomPics is good for lifestyle and interior design shoots

StockSnap.io has images that are licensed as CC0, meaning free of all copyright restrictions.  

iStock. Be VERY careful about which images you are selecting. iStock is owned by Getty images—one of the largest and most prestigious photo libraries in the world. They want to funnel you to their paid site, but there is a lot of microstock that is free, if you make sure to search carefully.

Pexels. Note: some photos are free. Others and videos are RF (for a fee)

Using the Dry Mount Press

The dry mount press in the CommLab is an easy way to neatly mount your artwork on matte board without messy tape, drippy glue, or curling paper. Just follow these steps to create perfectly mounted artwork.

Tools and Materials

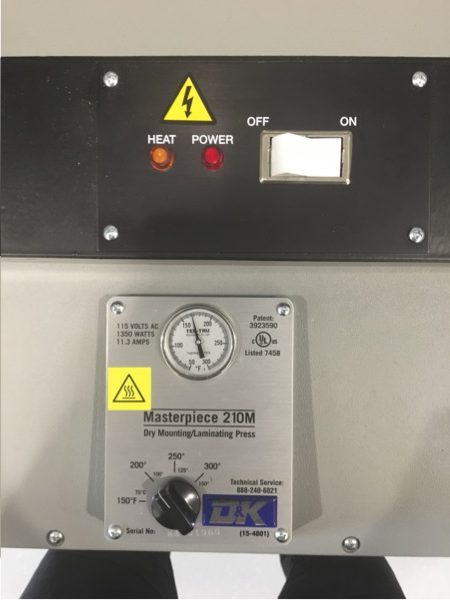
Dry mount press: Before you begin, make sure the press is turned on, as it takes 20 minutes to heat up. The on switch is located on the top next to the indicator lights. The temperature for permanent adhesion is 200F.

Release paper pocket: You will need a release paper pocket to prevent your project from sticking to the inside of the dry mount press. These are located in the drawer underneath the dry mount press.

Dry mount tissue: Ask the Lab Agent for the right size dry mount tissue for your artwork. The CommLab has pre-cut tissue sheets in a number of sizes, but we can cut custom sizes too.

Steps

  1. Open your release paper pocket and place your artwork inside face down. Lay the dry mount tissue over top, making sure to cover the entire artwork, as any paper left uncovered will not stick to the matte board. Close the release paper pocket, taking care not to move the layers around. Use the tacking iron to tack down a corner of the dry mount tissue to keep it from moving around when you place it inside the dry mount press.
  2. Place the release paper pocket inside the dry mount. Close the lid, pushing firmly to make sure it is down all the way. Leave the pocket in the dry mount press for about 35 seconds, then remove the pocket and let it cool for 20-30 seconds.
  3. Trim the excess tissue from the edges of your artwork – once you mount the artwork, you will not be able to remove it. Then, place your matte board inside the release paper pocket. Line up your artwork on top of the matte board with the tissue side facing down, then carefully close the release paper pocket. Use the tacking iron to tack down a corner of the artwork so the layers do not move around. Then, place the entire folder back into the dry mount press, and set the timer on top for 2 minutes. When it’s done, remove the pocket and place the metal weights on top while it cools, about 5 minutes.

Locking and Unlocking Layers in Adobe Applications

All the adobe applications have a lovely feature called the layer lock. Layer locks are used to prevent working on the wrong layer. It’s frustratingly easy to work on layer thinking it’s a different one entirely. Fully locking layers or partially locking layers prevents you from making changes to the layers that are already completed.

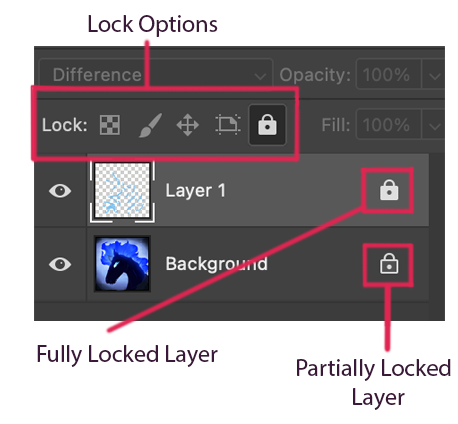
From left to right in the Lock Options: Lock Transparent Pixels, Lock Image Pixels, Lock Position, Lock All, and Full Lock.

Fully locking your layer locks all four of the lock options available as well as preventing you from making selections. These are “Lock Transparent Pixels”, “Lock Image Pixels”, “Lock Position”, and “Lock All”.

The Lock Transparent Pixels does what the title suggests and prevents the user from changing any of the transparent pixels on your layer. A shortcut for this is the forward slash key (/).

The Lock Image Pixels prevents the user from painting or editing any of the layer. You can still move, transform, or select items on your layer.

The Lock Position prevents the user from moving or transforming anything on the layer, however it allows anything else.

The Lock All option prevents everything except making selections on the layer.

To apply a lock option to a layer of your choice, you must first make sure you’re on the layer. Select the layer you want to lock and click one or more of the lock options. If you select the Full Lock option (far right), the other four options will turn grey because they are unnecessary with the Full Lock option selected.

Artwork Presentation in InDesign

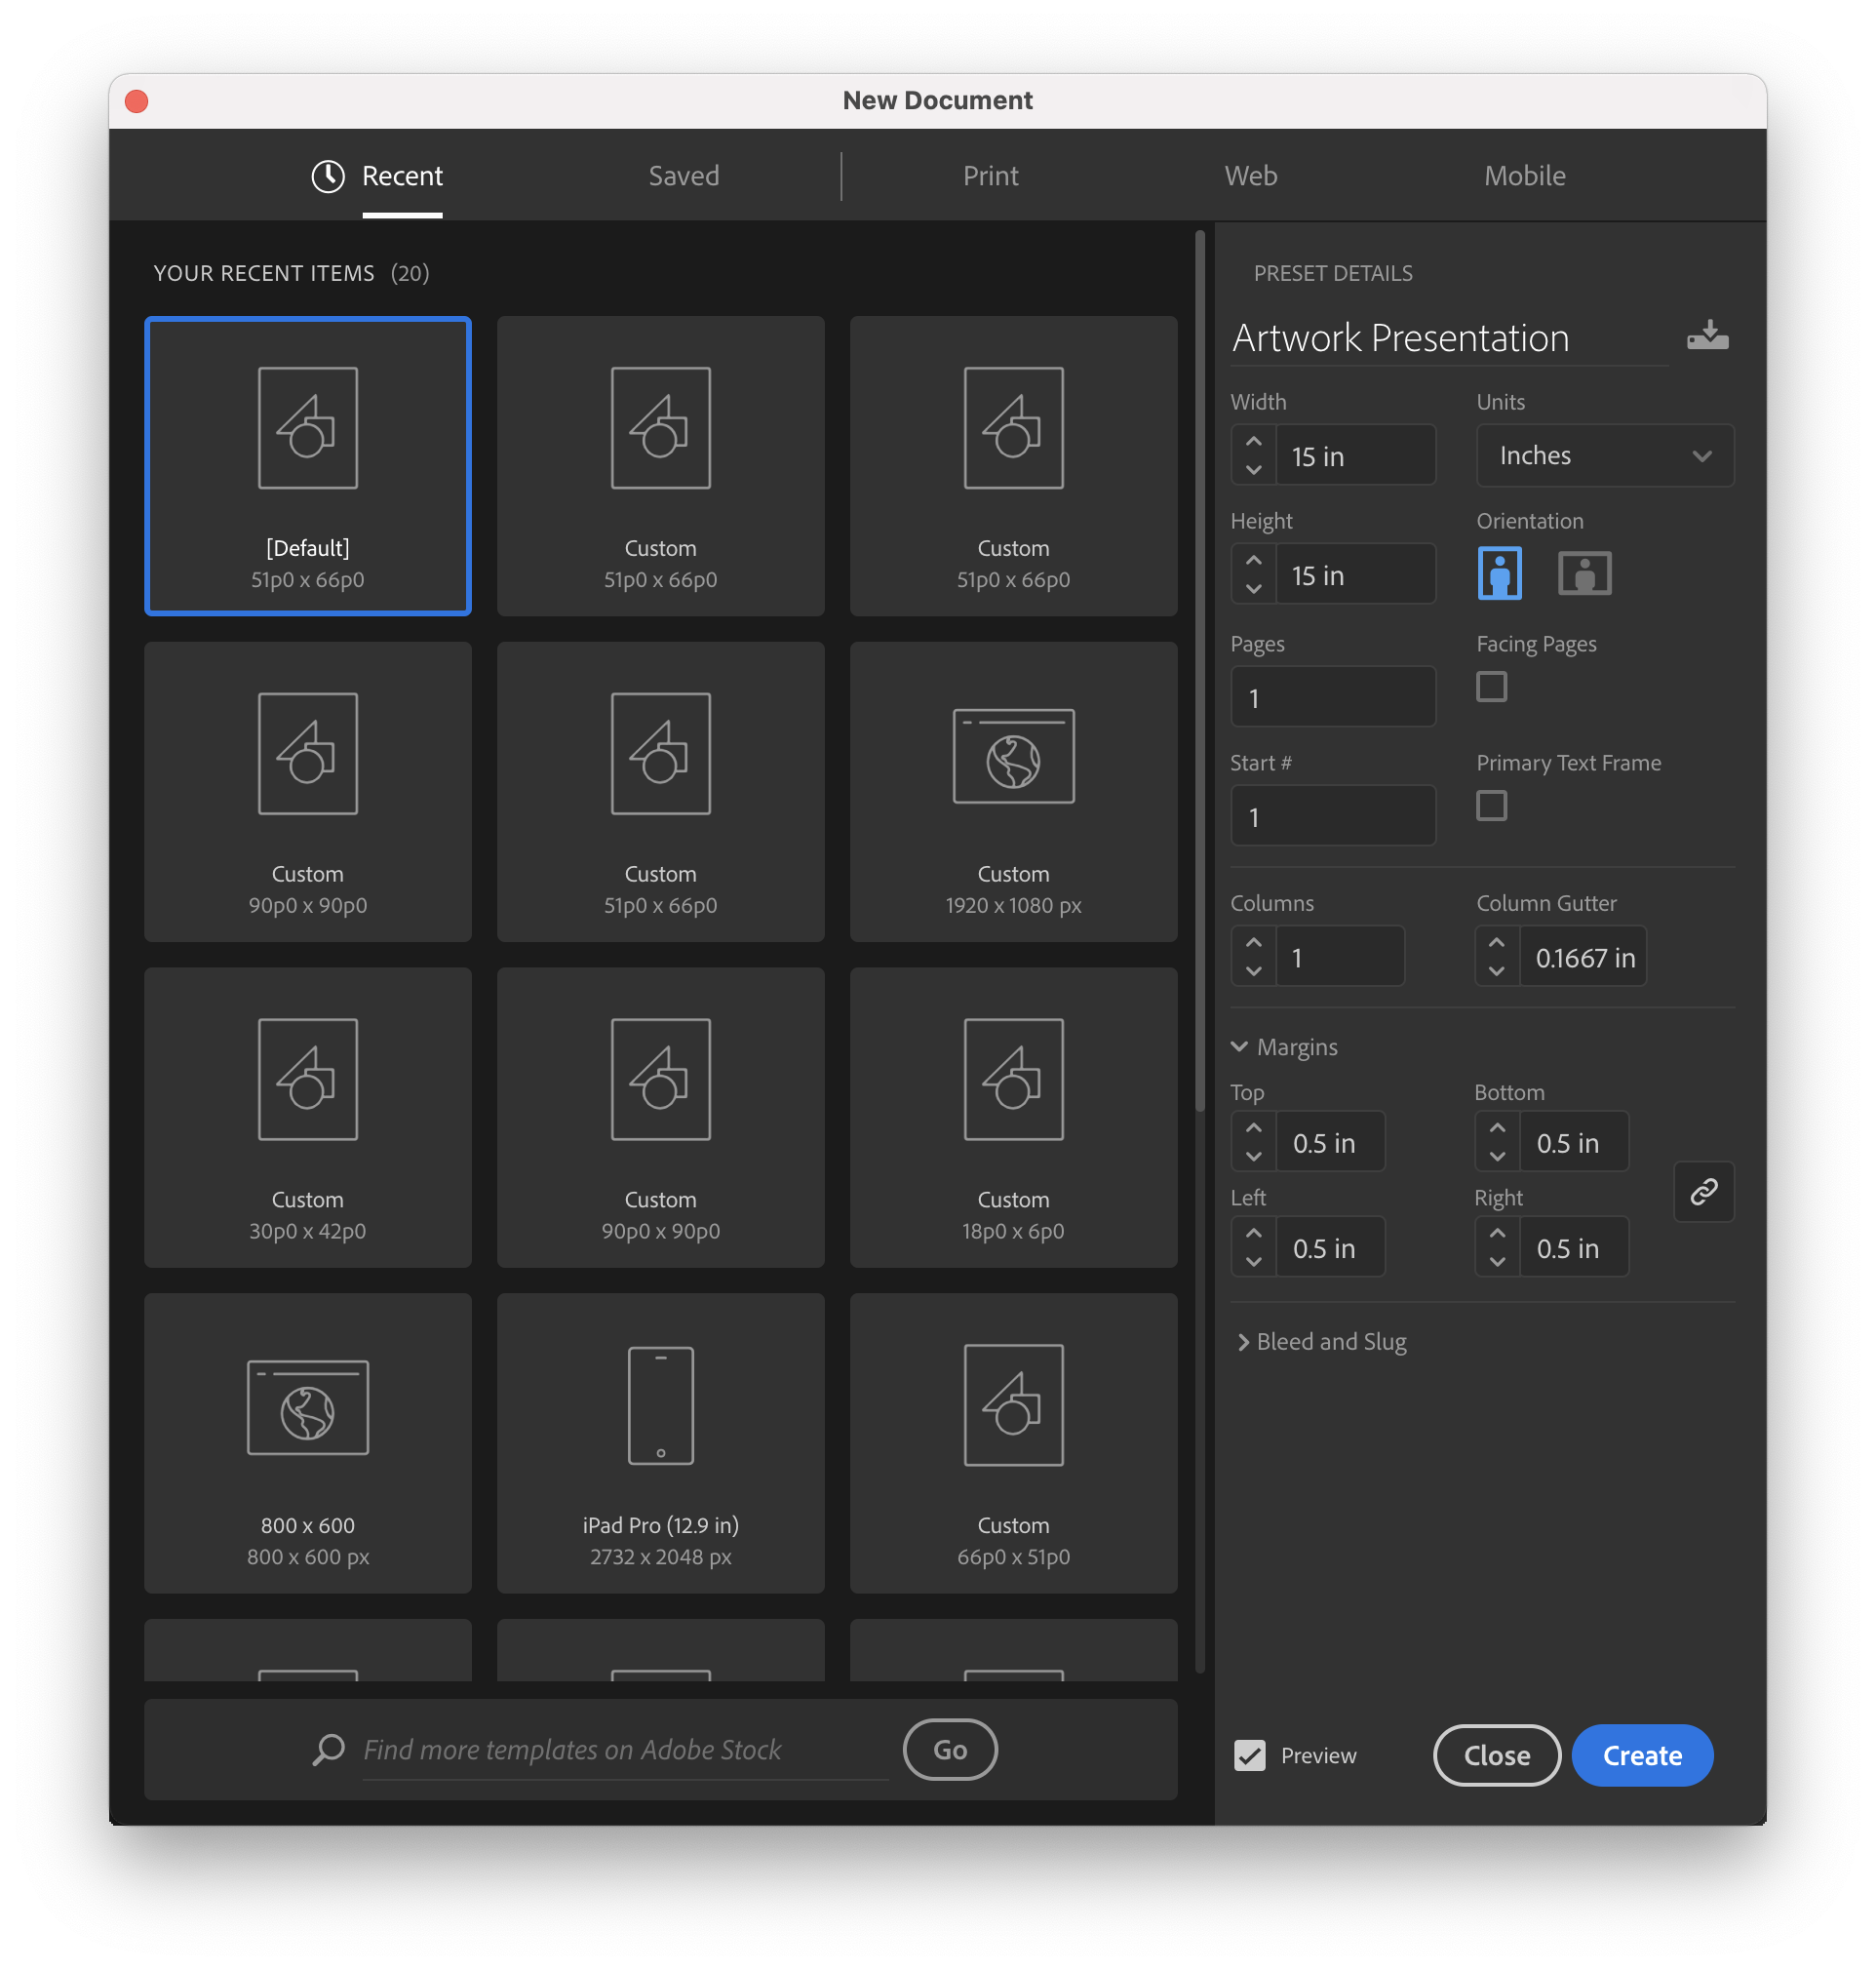
Open up InDesign and enter in your values for your document settings. If you are placing your photograph or artwork onto a 15×15 inch black square, see the image below for the preset details. Once you’re happy, click “Create”.

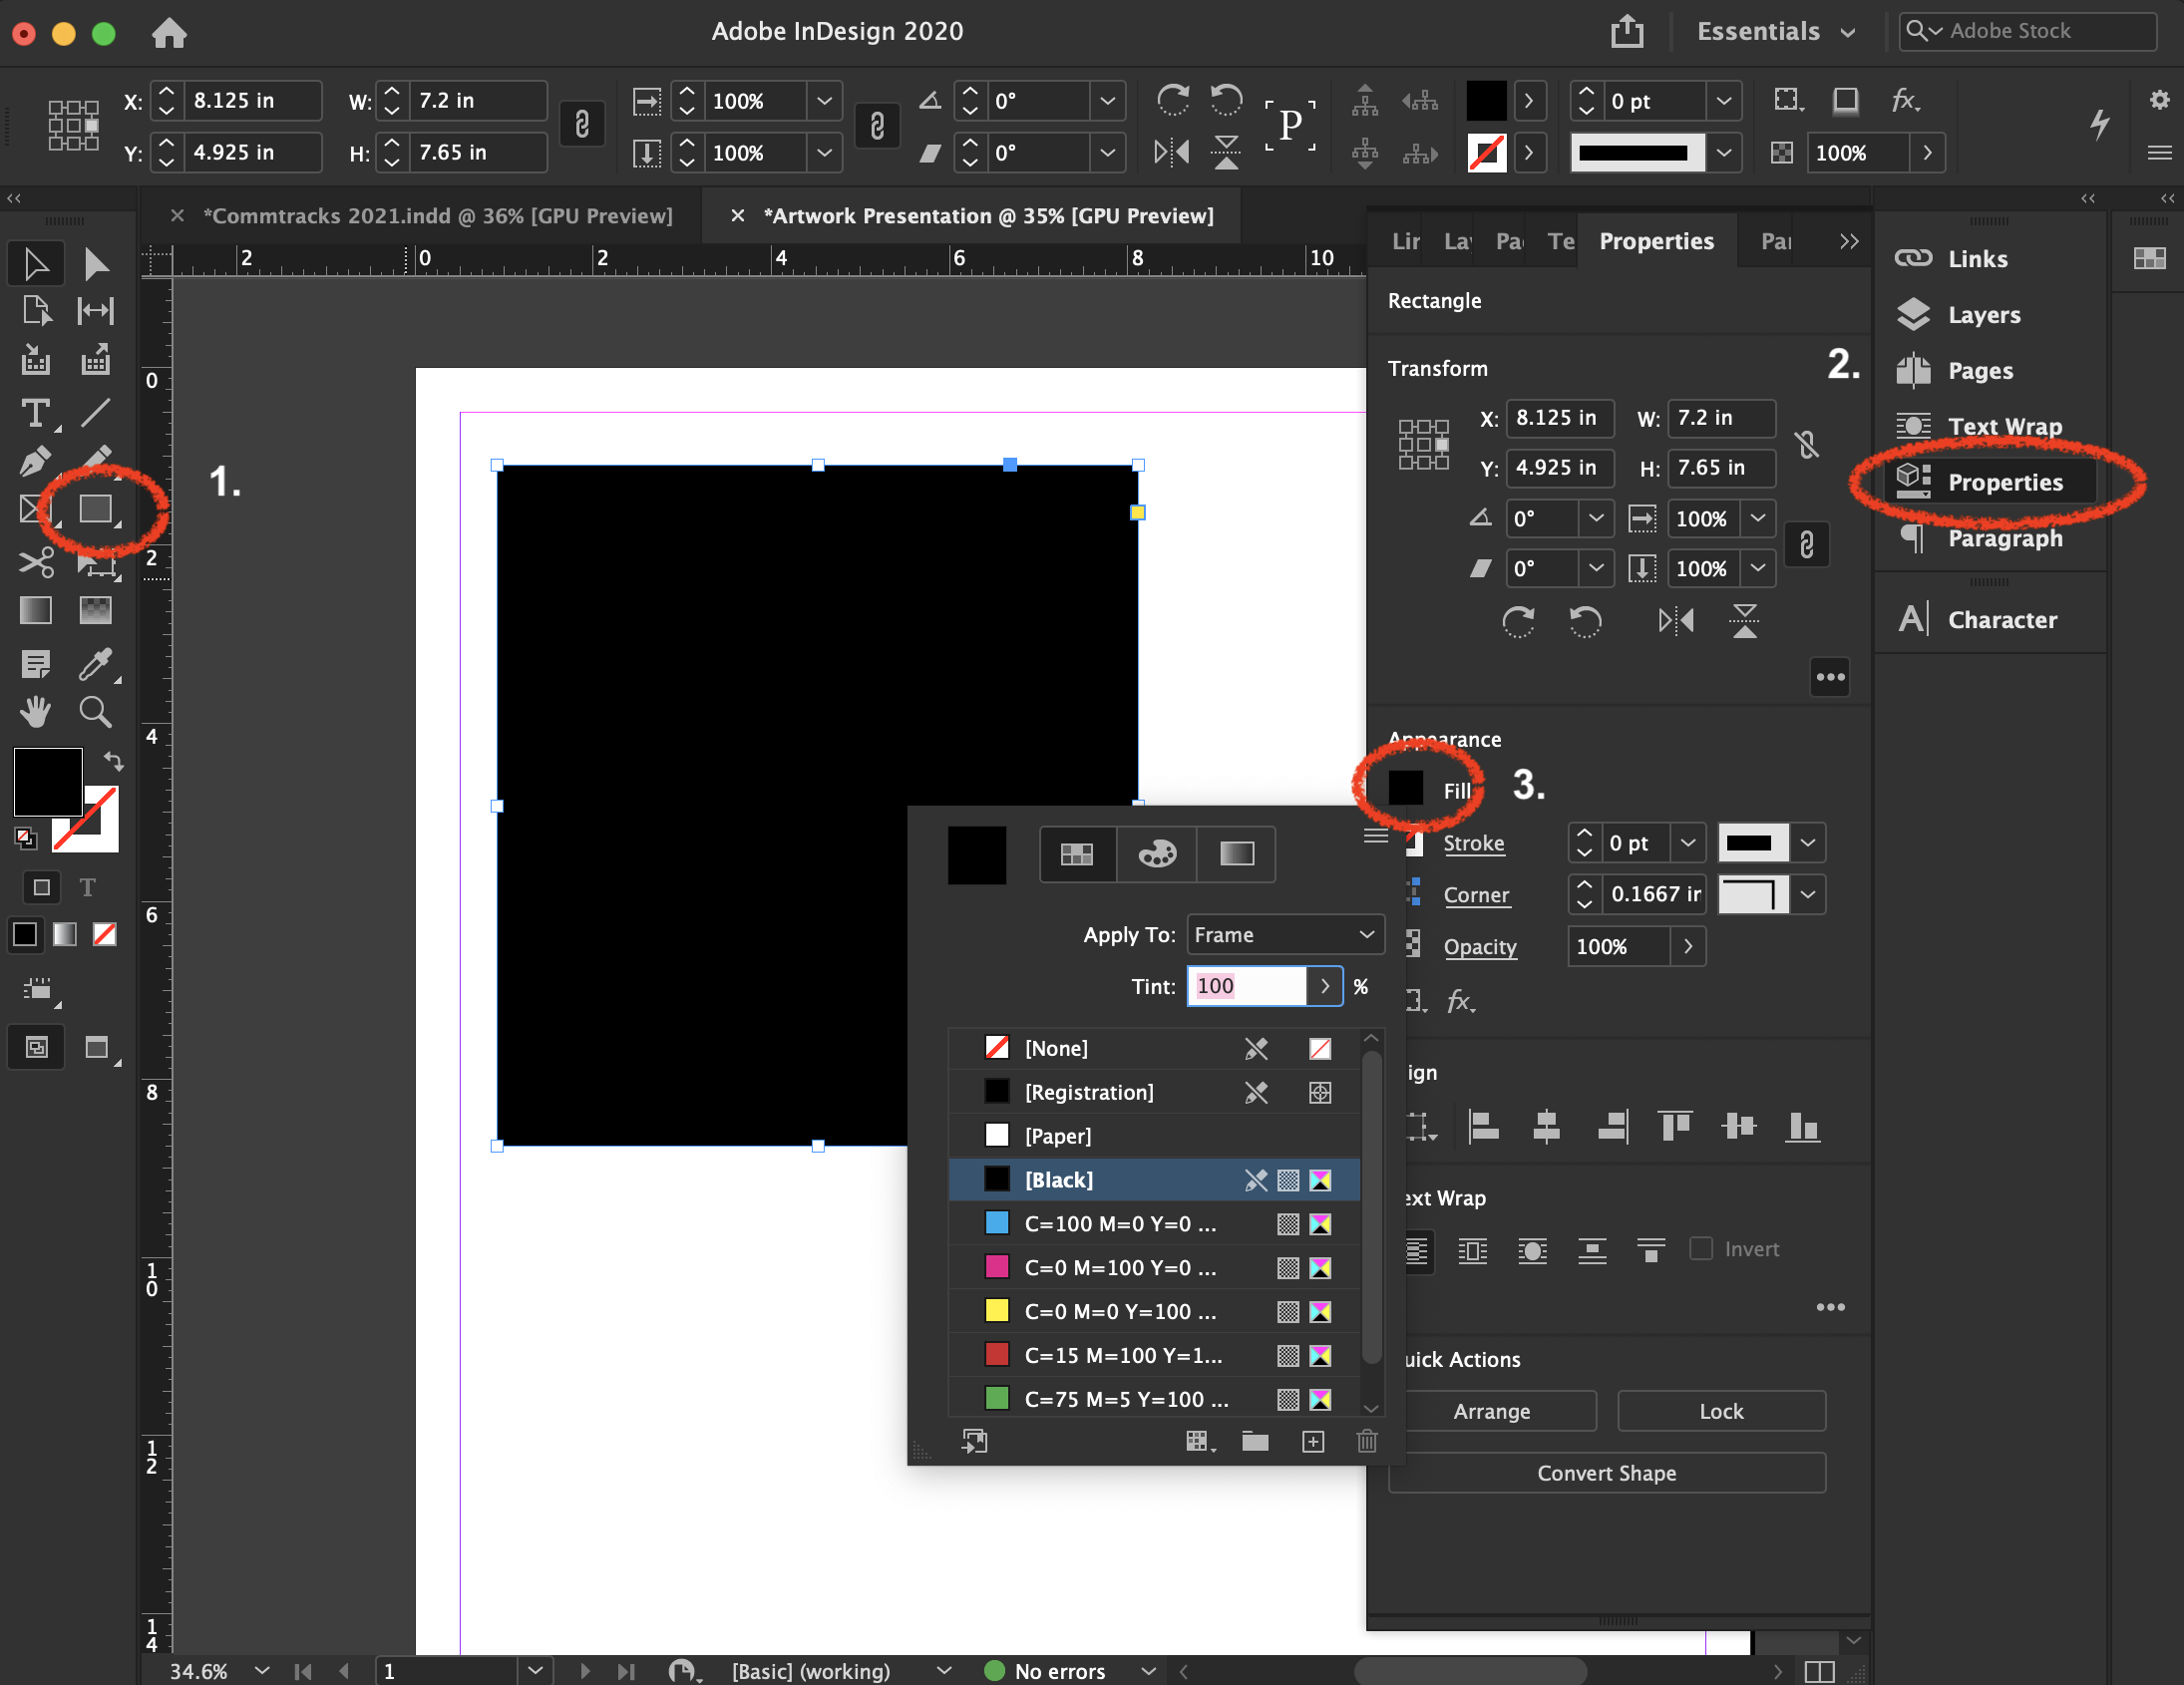
With the rectangle tool, create a square to cover your whole board, go into the “Properties” panel and set the color to your what you need.

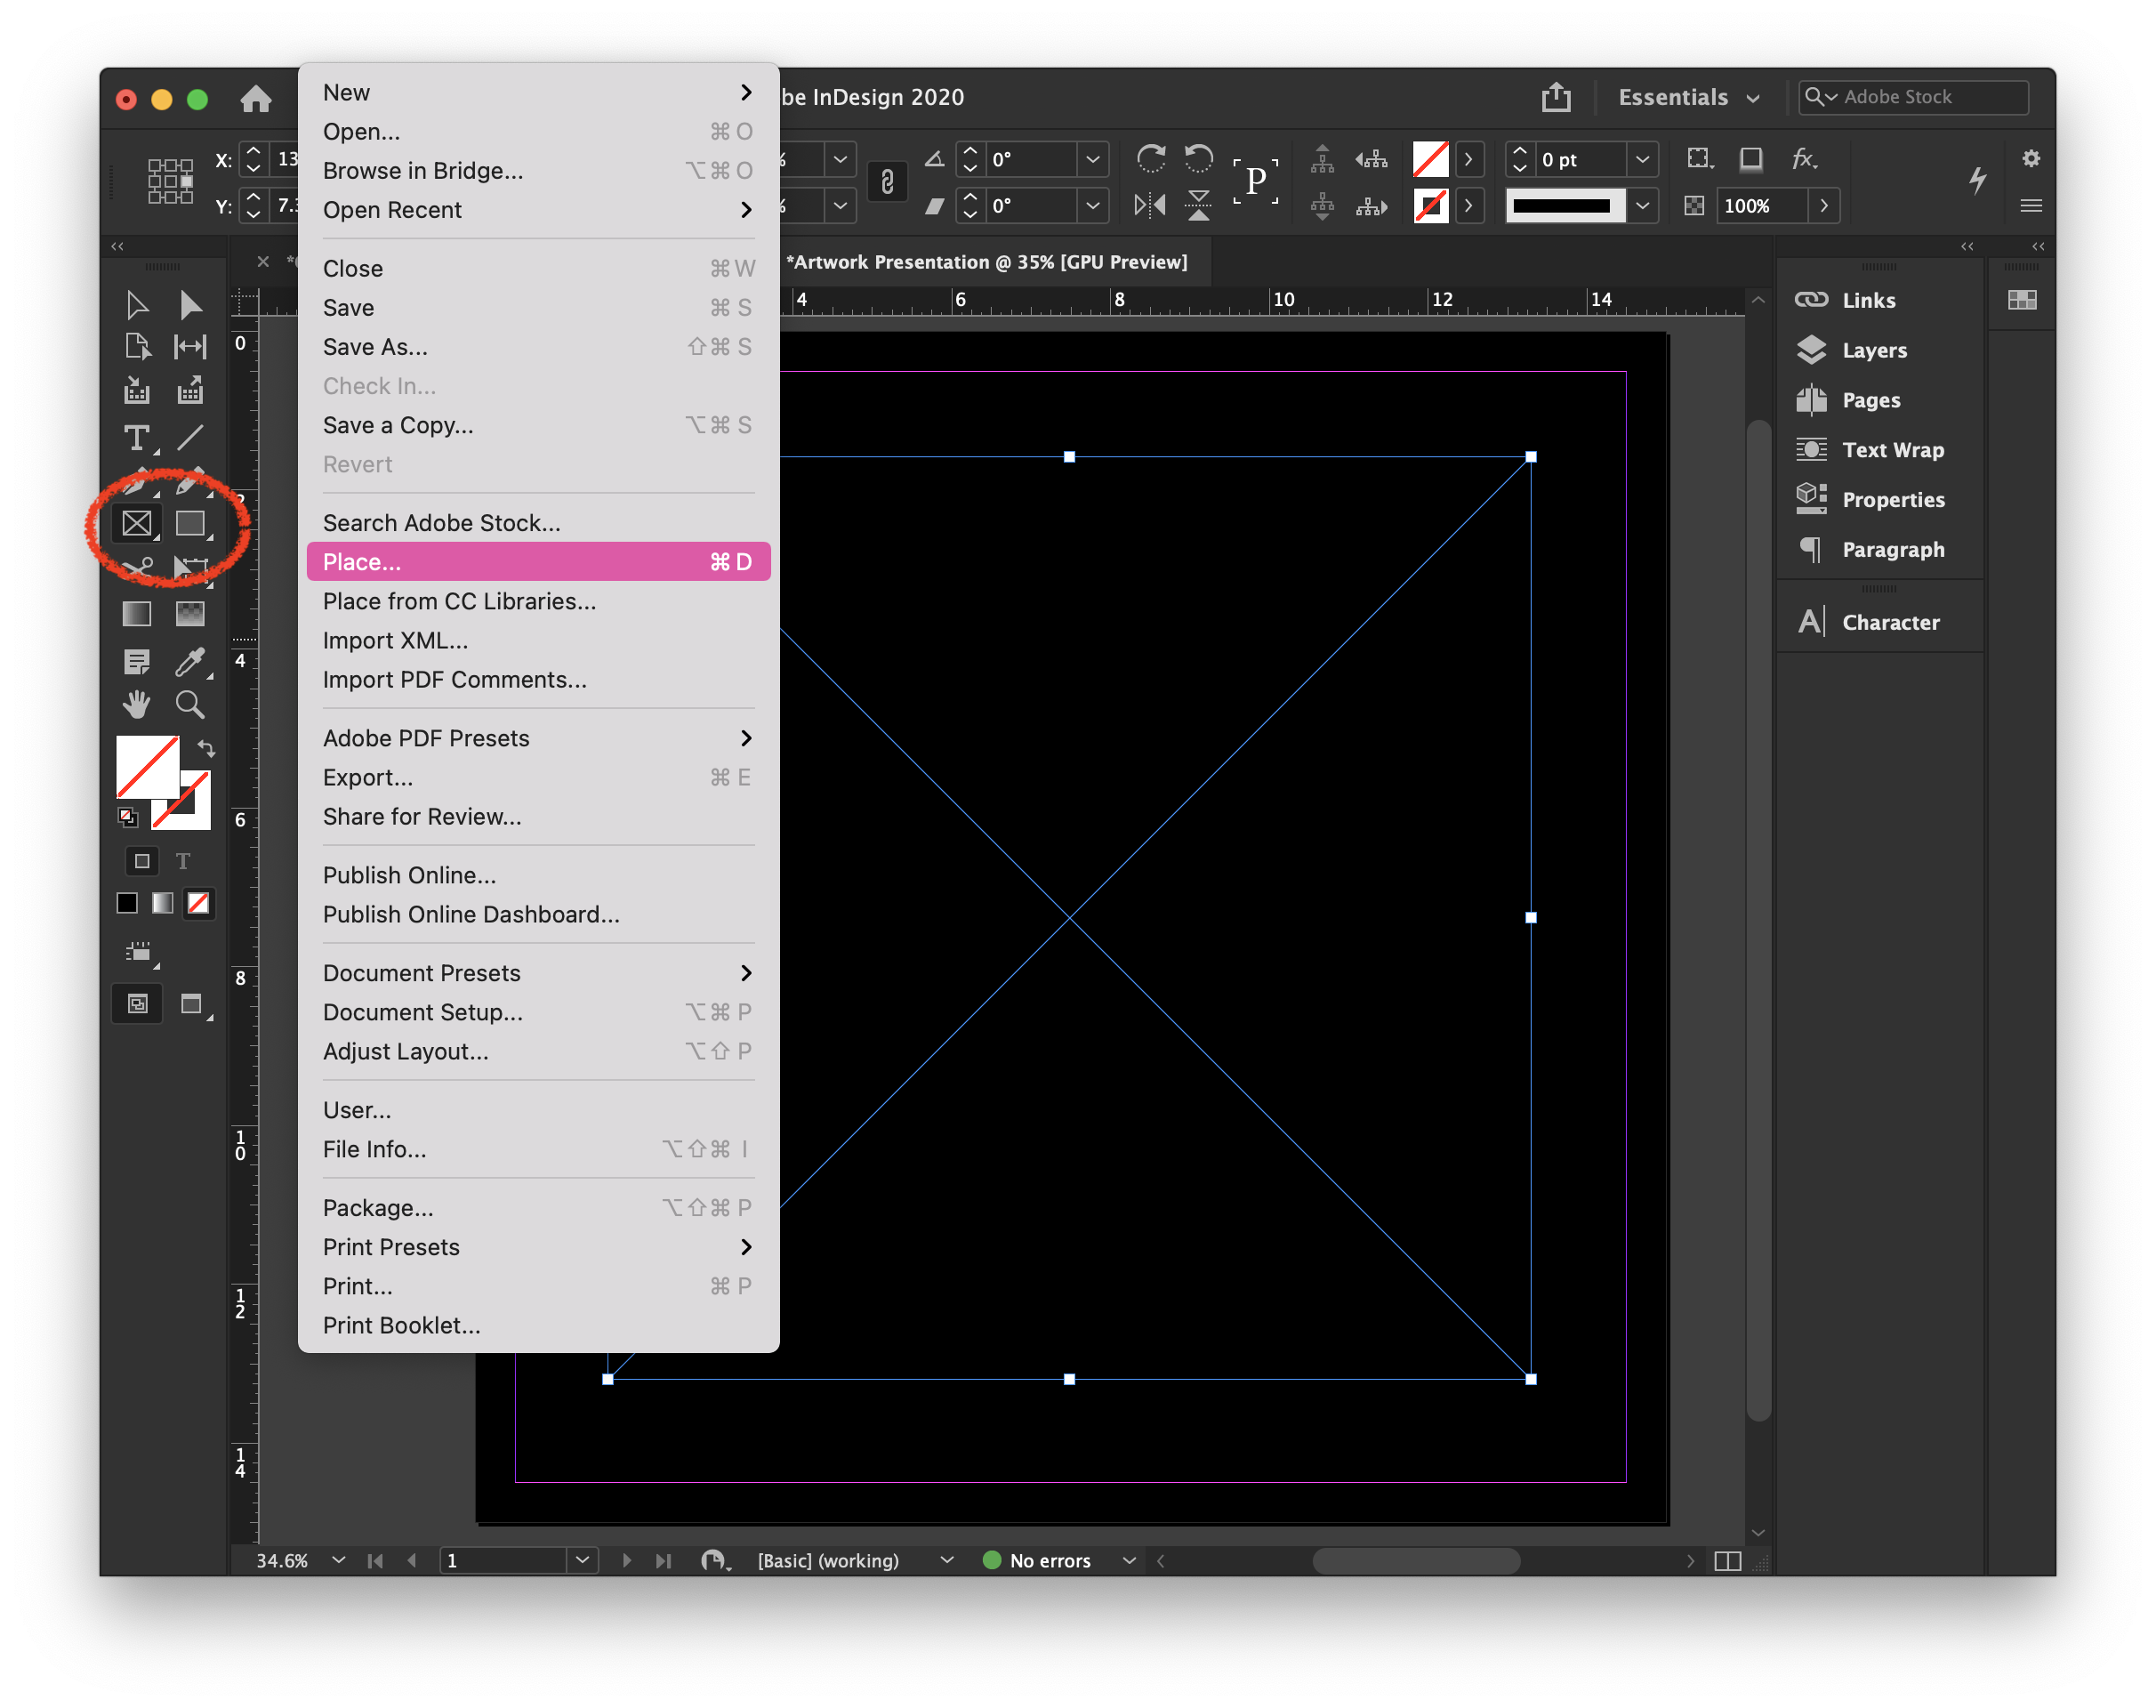
To place your artwork or photography, select either the Frame Tool or Rectangle Tool, hold “SHIFT” as your click and drag where you want your image to be. Click “File” and “Place” to insert your image (or Command/Control+D).

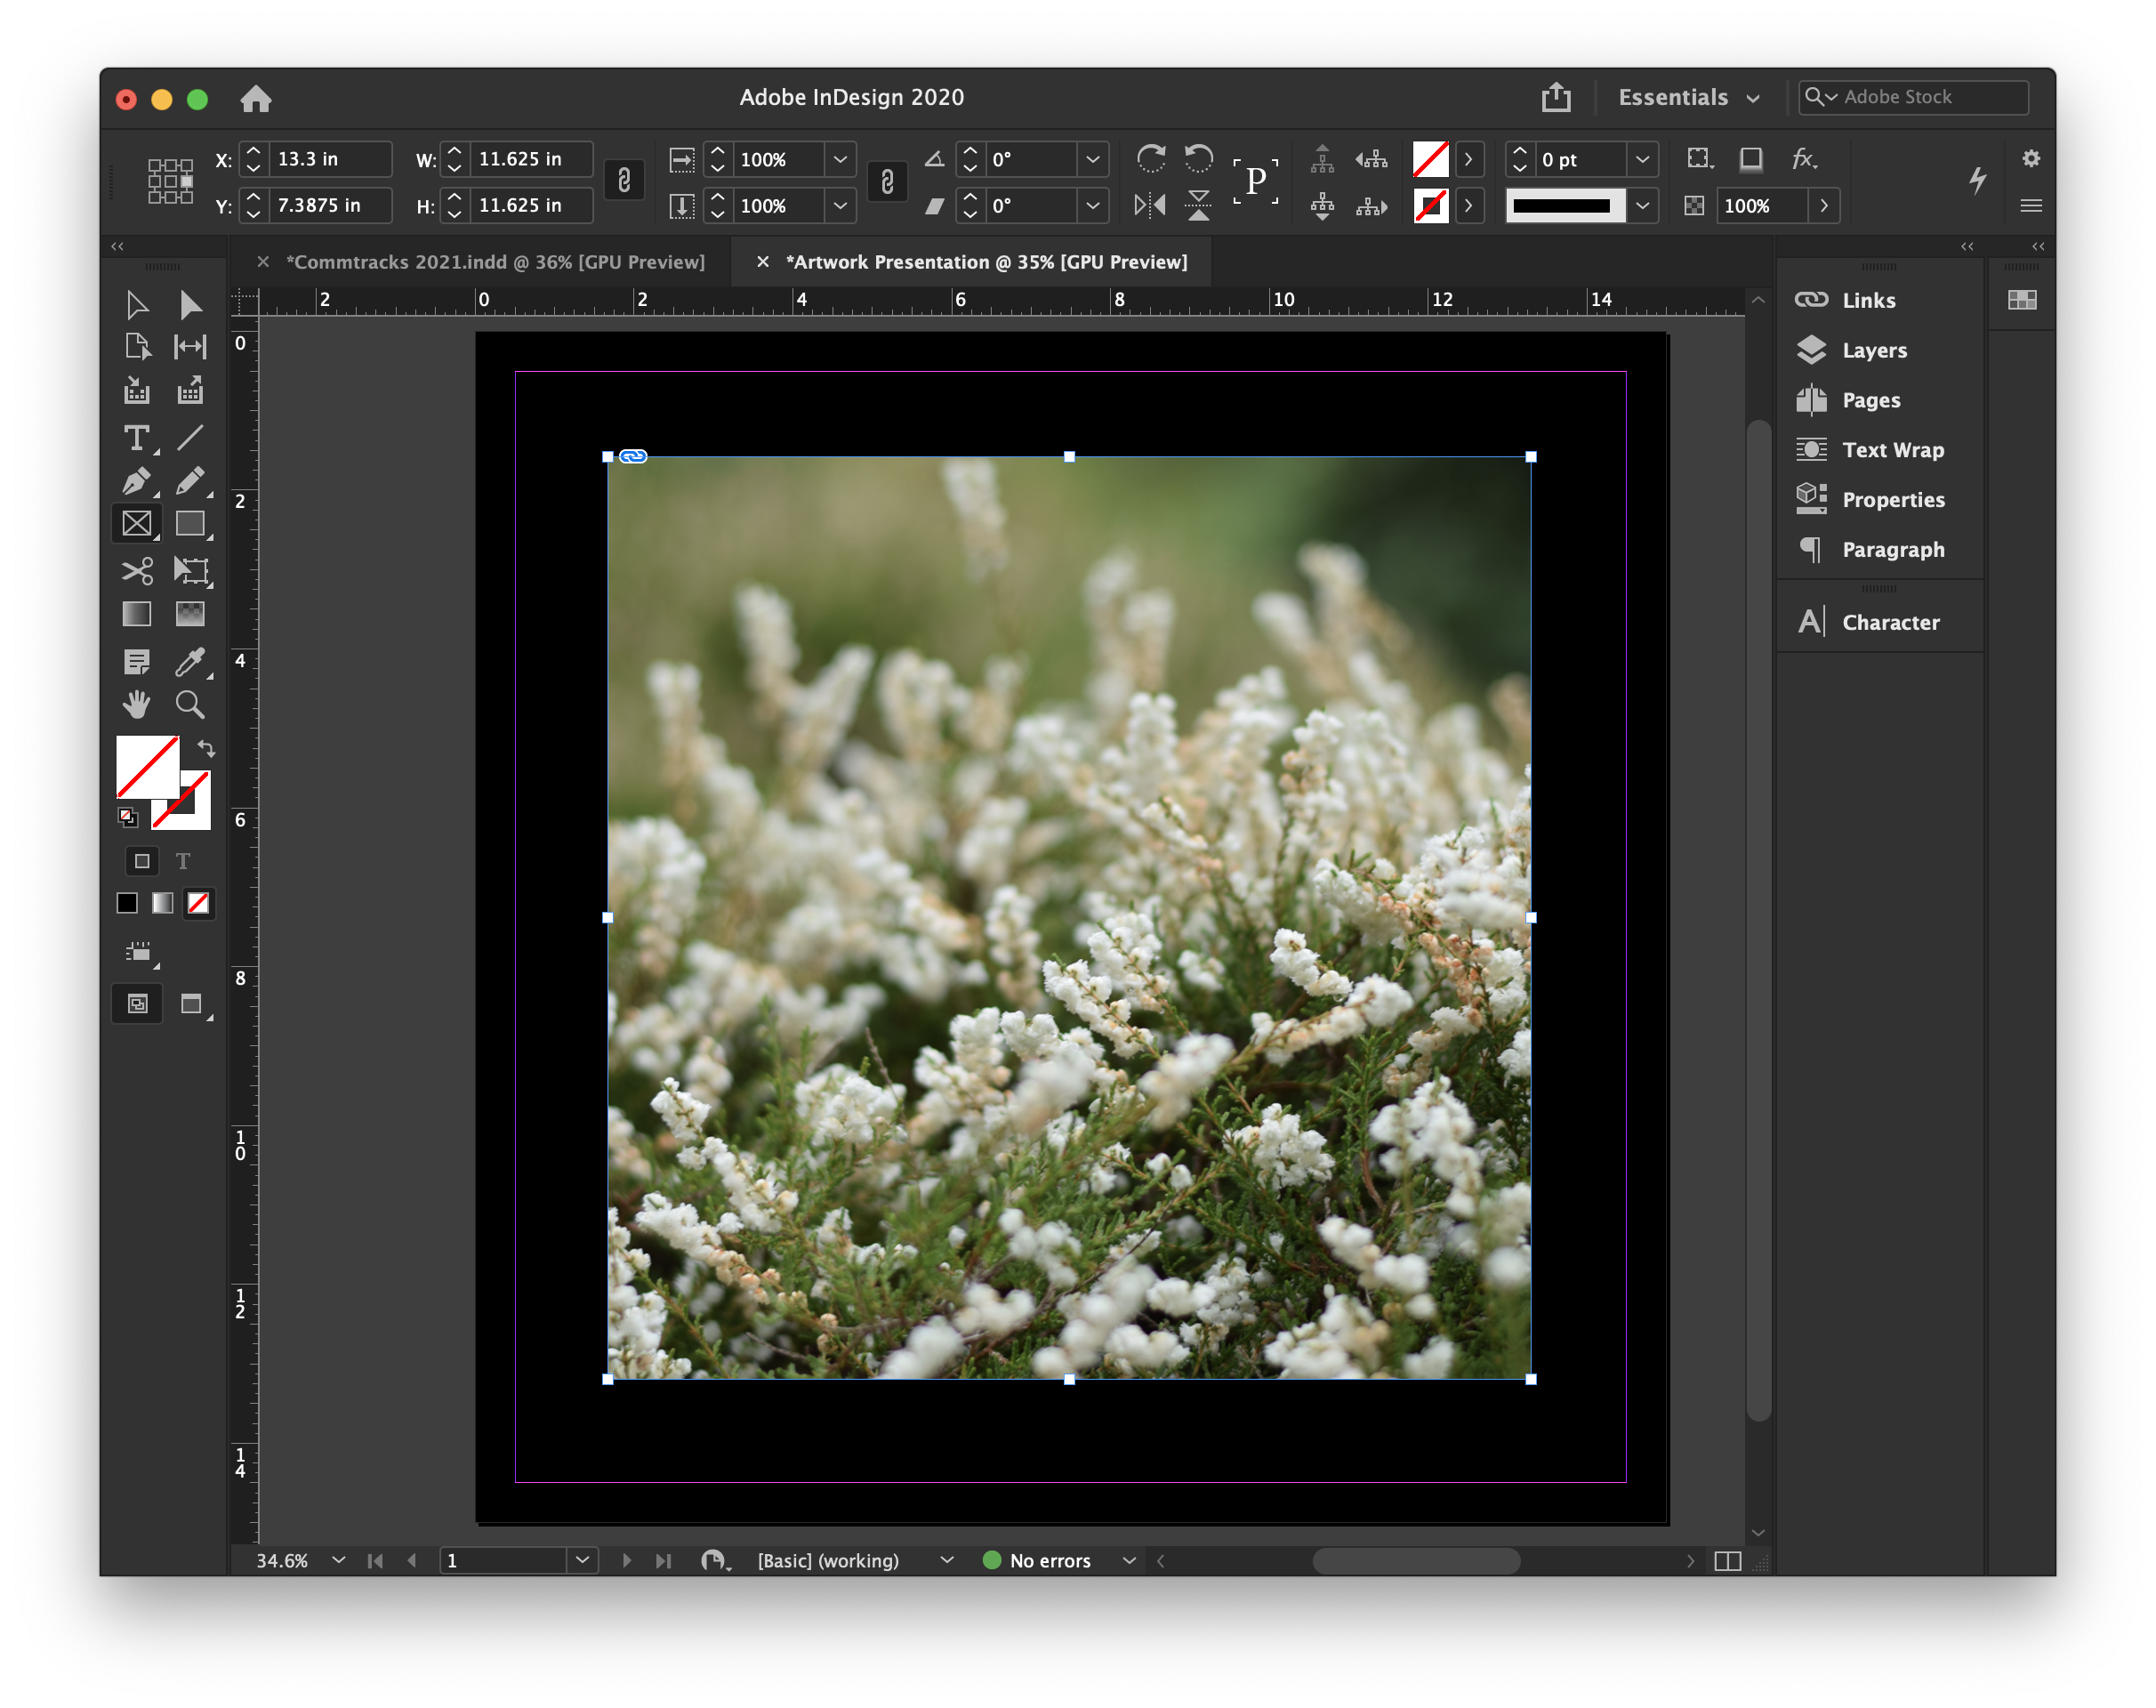
Use the “Align” tool under the “Properties” panel to center your elements. Now you’ve successfully placed your work into InDesign.

Make a Learning Journal in Adobe CC Express (Adobe Spark)

Updated 2/14/2022

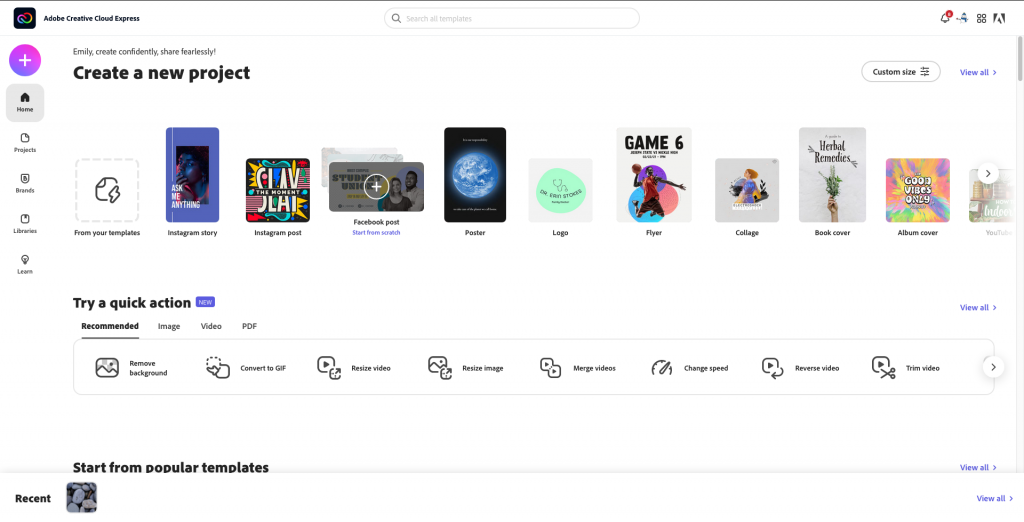
The first step is to make sure you are logged into your student Adobe account. Adobe Creative Cloud Express can be found here: https://express.adobe.com/sp. Your home page should look like the image below.

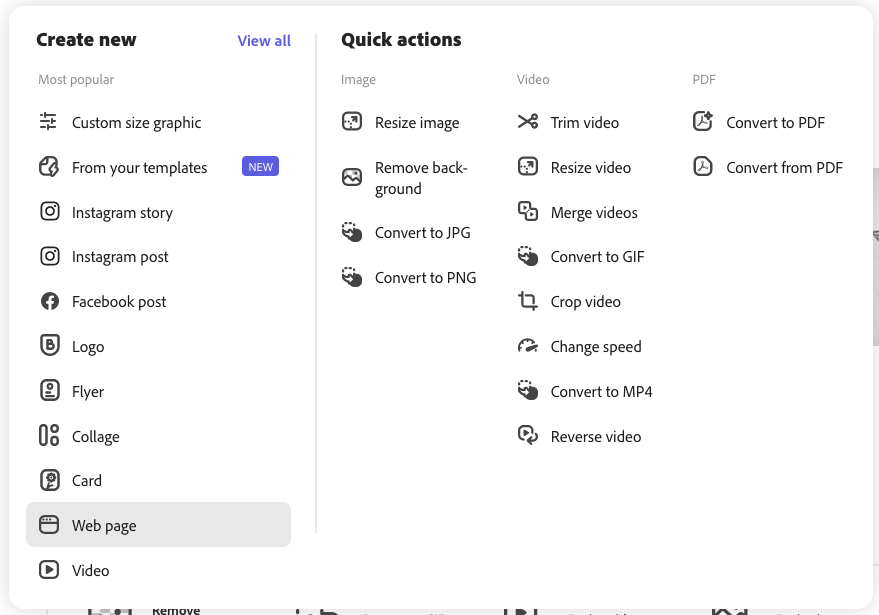
Click on the pink plus sign in the top left corner to start a new project and select Webpage from the menu, under Create new.

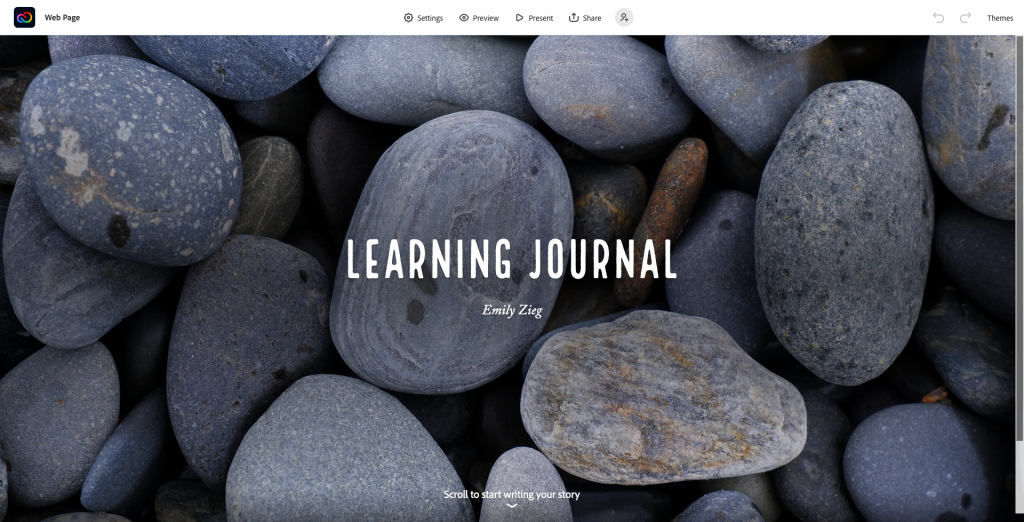
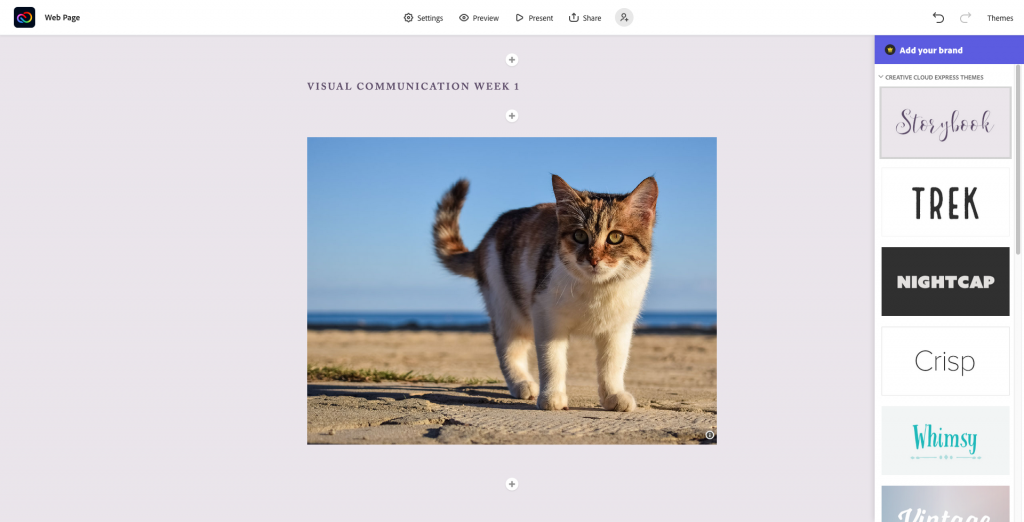
From here, you can add a cover photo, a title, subtitle.

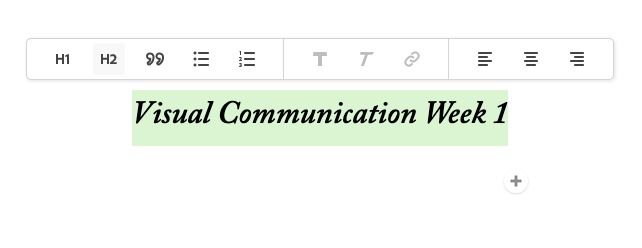
Click on the plus signs to add elements like text and images. Format text by highlighting it to bring up the text menu.

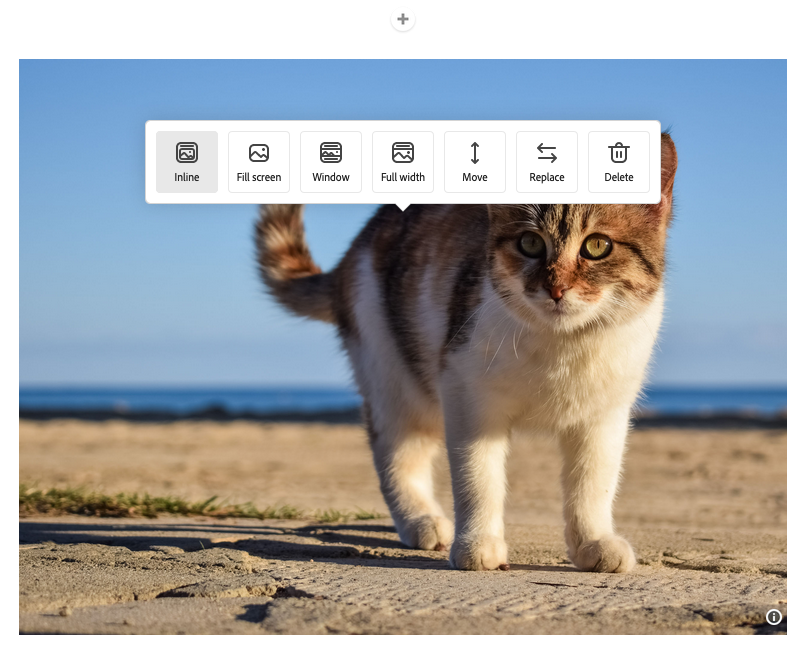
Format an image by clicking on it to bring up the image menu. You can have it display inline (small and centered), take up the full width of the page, or create a “window” that only displays part of the image.

Adobe CC Express offers some themes for styling your learning journal. Click on Themes in the upper right corner to select a different theme.

Sharing

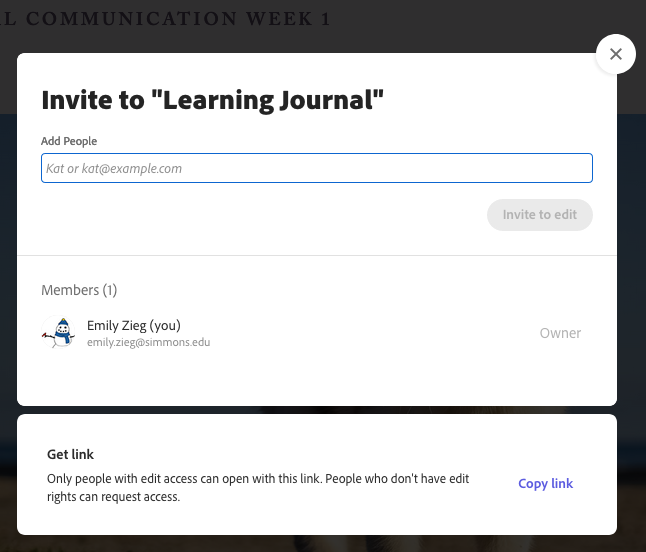
When you are ready to submit your journal, click on the Share button at the top of the page. You can either Publish your Express page (make it available to anyone with the link) or Invite a specific Adobe account. If you choose to publish your page, you will need to update the link every time you add a journal entry.

Headers and Banners in Adobe Spark

Making your headers and banners shine can give your website or profile the professional boost it needs to get noticed. Adobe Spark is an easy to use program in the Adobe Sweet where you can easily create graphics, websites, and social media posts that will be sure to stand out.

In this quick tutorial, Claudio Zavalla Jr. teaches you how to create eye-catching headers and borders for all of your blogs and social media accounts.

One Minute Tutorial! Paragraph Styles in InDesign

Simplify text formatting in your InDesign document by using paragraph styles! This tutorial explains how to create new paragraph styles in your document and how to use them to make changes throughout your entire document automatically.