Cutting Out an Image in Photoshop

In this tutorial, I will be using the following image to demonstrate how to cut an image in Adobe Photoshop.

Photo by Manja Vitolic on Unsplash

Step 1) Open the file in Photoshop and save it as a Photoshop file

Saving as a psd file will ensure that the quality of the image is not decreased every time you save.

Step 2) Duplicate the background layer
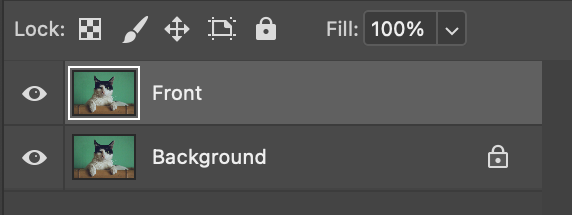
Right click on the background layer and select ‘Duplicate Layer.’ This is the layer we’ll be working on. Click on the ‘eye’ icon of the Background layer to hide it while you’re working.

Step 3) Select the Polygonal Lasso Tool from the toolbar
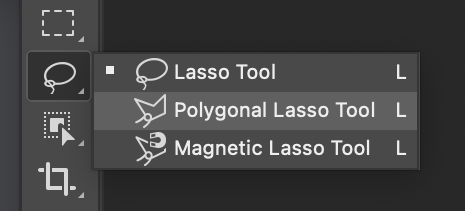
If not listed on the toolbar, look under Lasso (as seen above) by right clicking or holding down on the Lasso Tool icon.

Step 4) Cut out your image
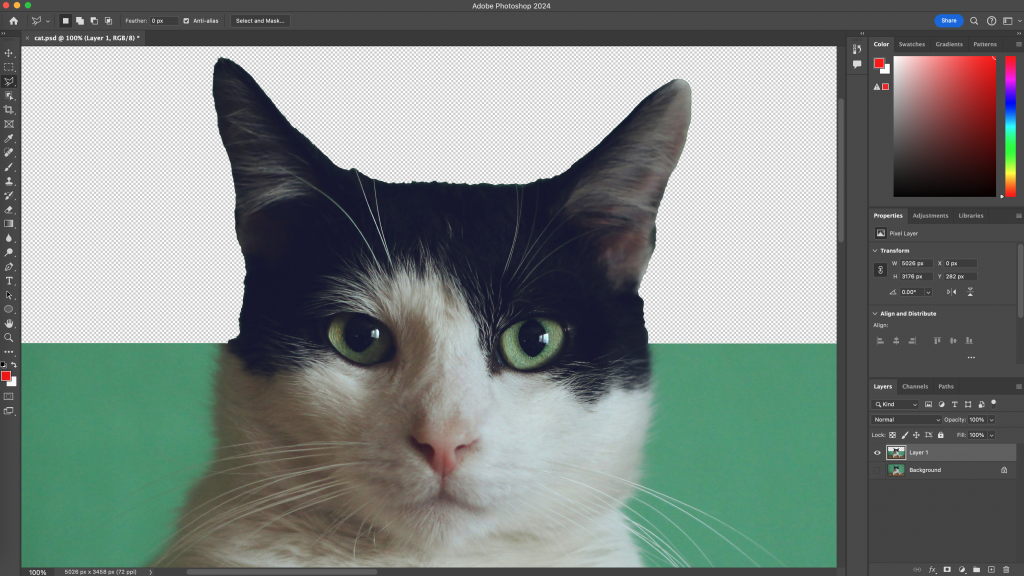
  • Make small approximating points with the Polygonal Lasso Tool to trace over your image.
  • When satisfied with a traced ‘chunk’ of your image, with the Polygonal Lasso Tool still selected, move your cursor past the edge of your image and make two clicks, one about the same height as the last point and another about the same height as your first point. Then move your cursor back to your initial starting point to close the selected area. 
    • Press delete to make the selection transparent.
    • Press ‘Cmd + D’ to deselect the area.

Tip 1) Work close
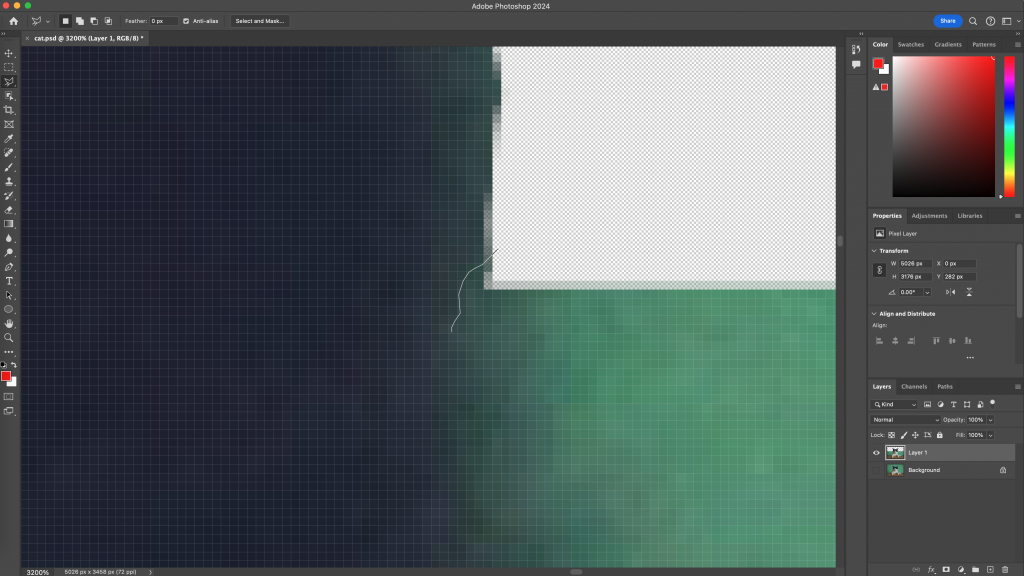
Zoom in so that you can see the individual pixels as you’re tracing your image. This way you can’t see any ‘rough edges’ and your end product looks more clean. It also makes it easier to see what you are doing.

Tip 2) Work in chunks
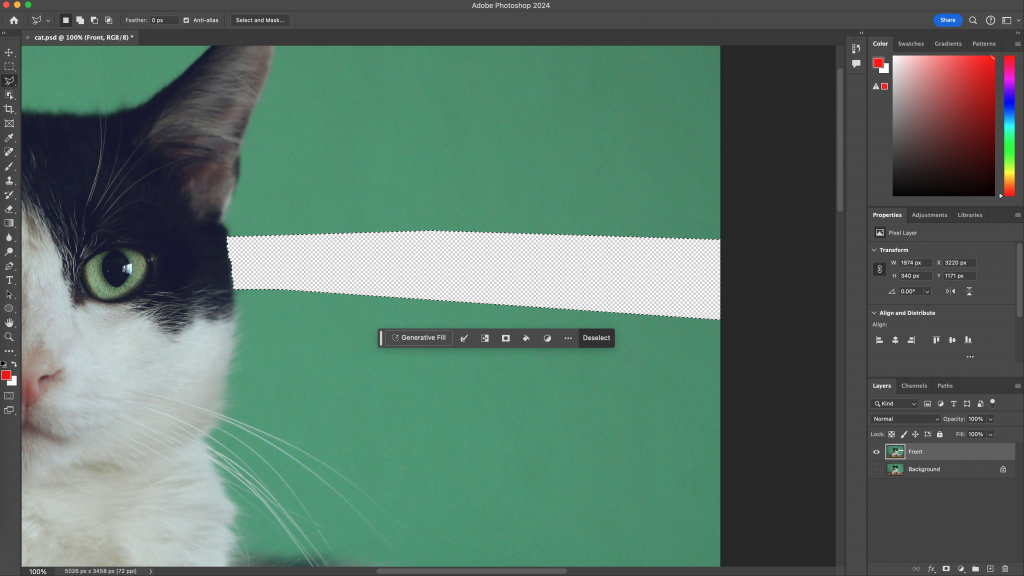
Working in chunks ensures that if you make a mistake when placing your points, you don’t have to deselect a large amount of work and start over.

Tip 3) It’s better to cut more than too little
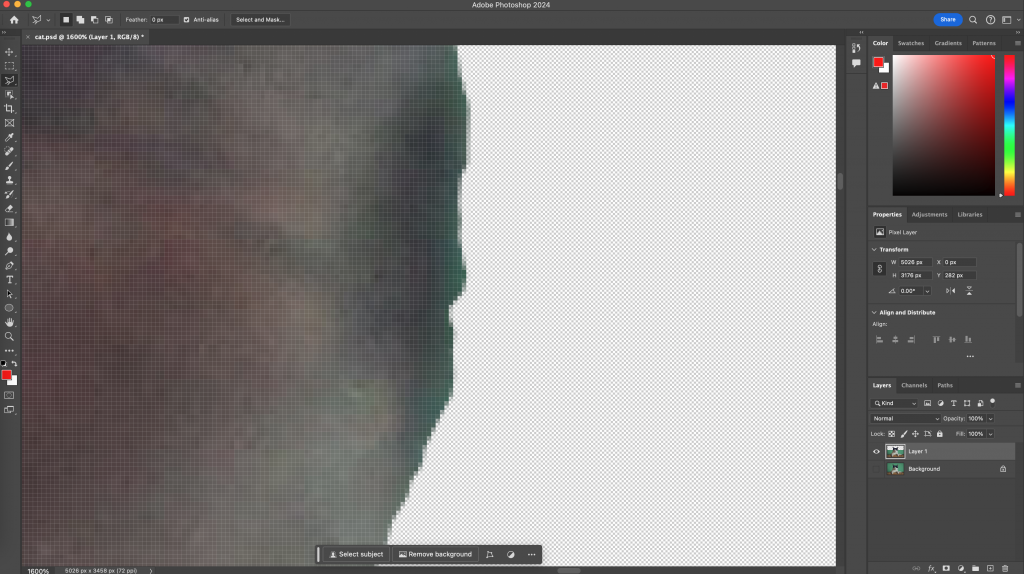
It’s easy to notice a ‘ring’ around your image when you haven’t cut enough. It’s difficult to notice when you’ve cut a little too far in. See the green around the cat’s fur?

Trick 1) If you cut too much, paste from the Background layer

  • Select the Background layer and click the ‘eye’ icon to make it visible.
  • With the Polygonal Lasso Tool selected, trace over the part you want to add back in and do ‘Cmd + C’ and ‘Cmd + V.’
  • The pasted portion should show up in your Layers. Select it and the Front layer. Right click and select ‘Merge Layers.’

Trick 2) Quick deselection by double clicking

If you need to quickly deselect an area due to a mistake, double clicking will instantly close the area and you can deselect using ‘Cmd + D.’

Resizing an image in Photoshop

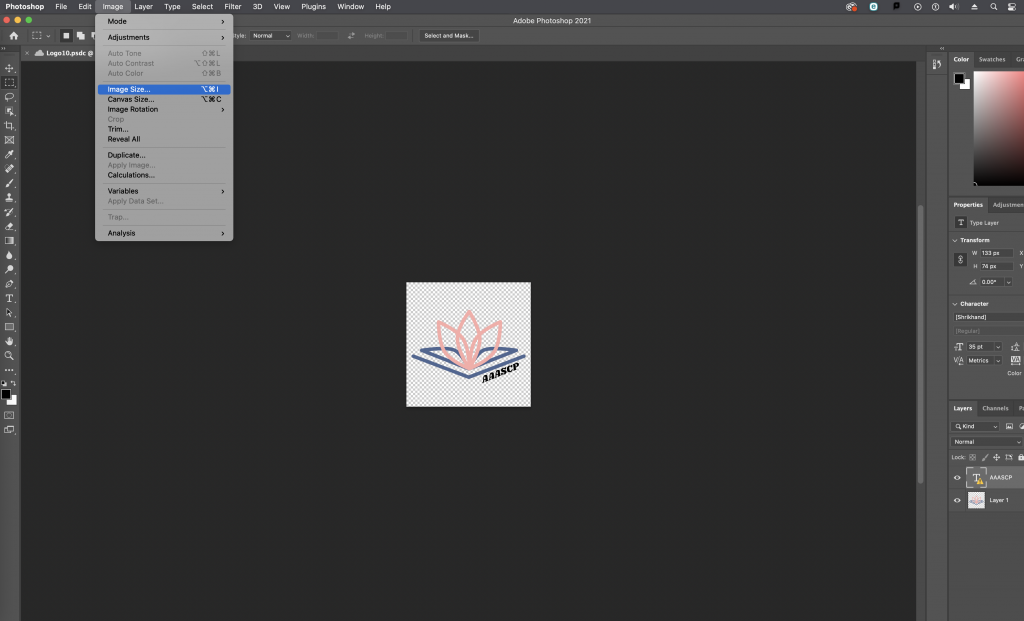
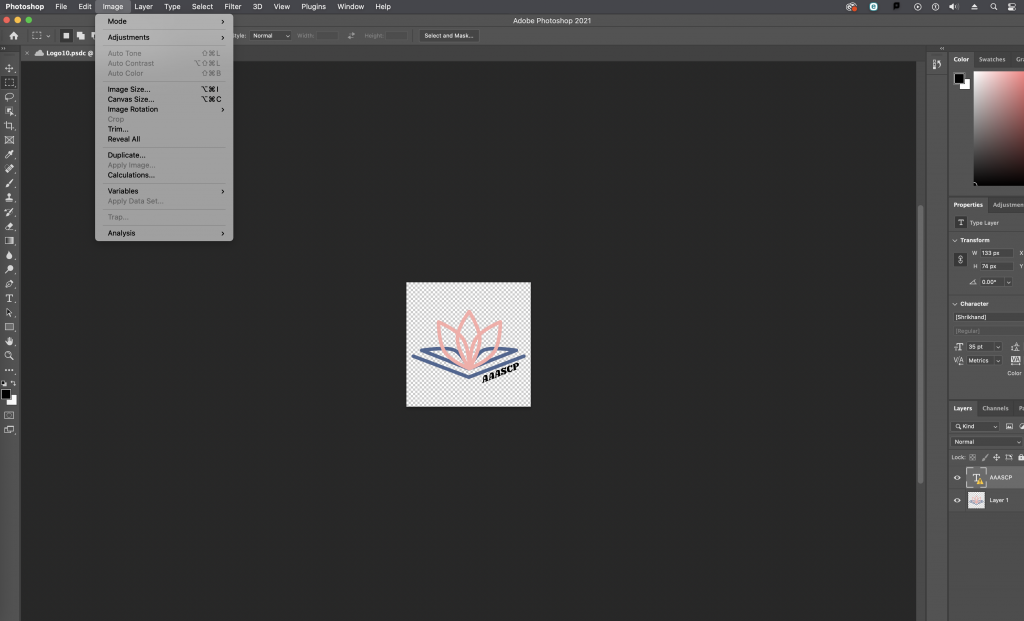
Step 1. Click on the Image dropdown link in the top navigation bar.

Screenshot of the dropdown items for the Image menu

Step 2. Click on Image Size

The Image Size link is shown in blue

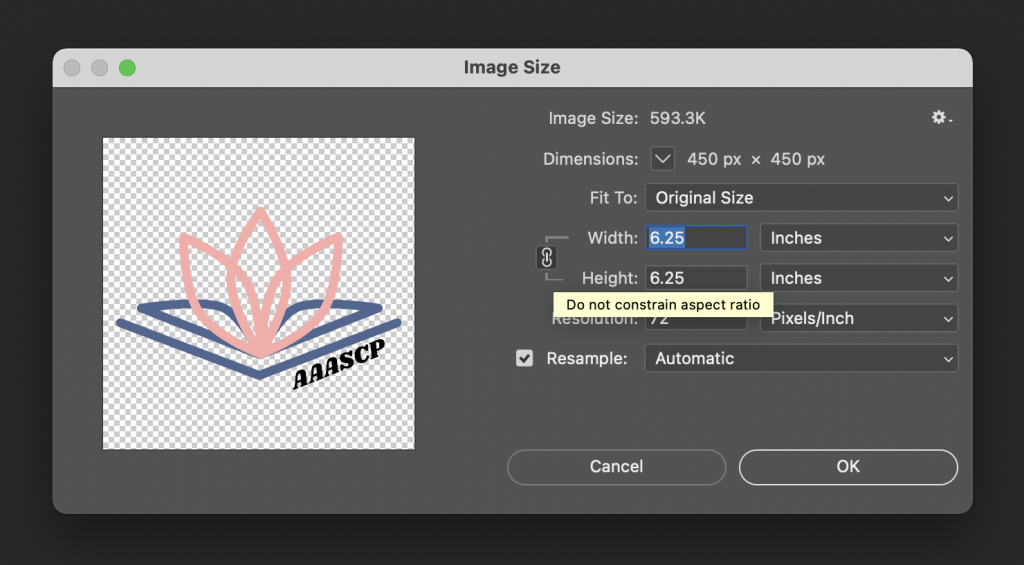
Step 3. Change the dimensions

Note: Click on the link icon on the left of “Width” and “Height” in order to keep the aspect ratio of the content in the file. This is activated when the link icon has the same background and lines (pointing to Width and Height) shown as above. In this case, the content in this file is the logo and “AAASCP” text. No matter how I modify the image dimensions, the content will not warp into a different shape.


Additional Resources:

How to Change Images to Black and White in Photoshop

Printing a color image in black and white can make it look washed out or flat on paper. Instead, use these methods to make your image black and white in Photoshop and have more control over how the final image looks!

Method #1: Use a Black and White Adjustment Layer

This method is non-destructive, meaning the layer simply covers the colors instead of removing them from the image permanently.

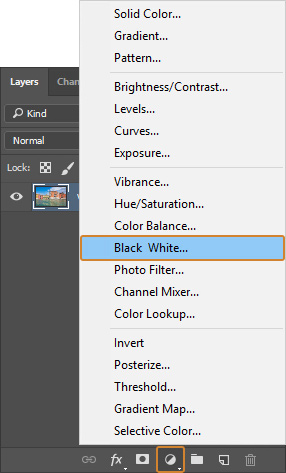
  1. Make a black and white adjustment layer. From the Layers Panel, click on the New Adjustment Layer icon (half black/white circle) and select Black & White.

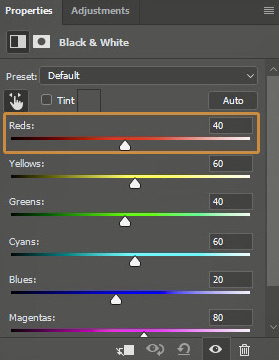
2. Adjust the color sliders. In the Properties Panel, there are six sliders: Reds, Yellows, Greens, Cyans, Blues, and Magentas. These sliders control the brightness of the greyscale version of each color. For example, moving the Reds slider to the right will lighten the pixels that were originally red. This can be used to create contrast and depth in the image.

Method #2: Convert Image with the Camera Raw Filter

This method is destructive, meaning that the image will be permanently changed to black and white once applied.

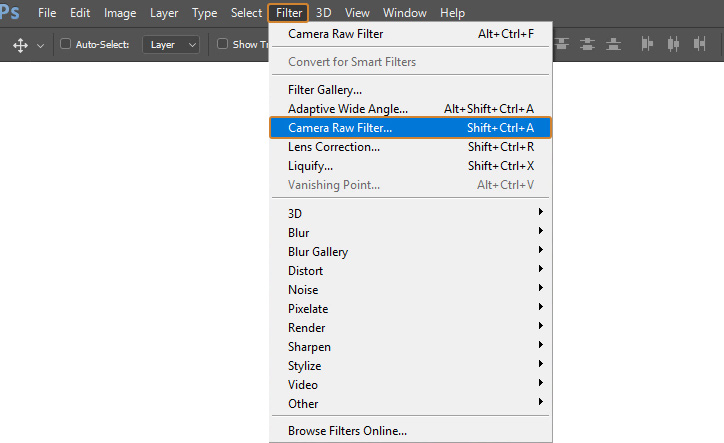
  1. Apply the Camera Raw Filter. Go into Filter and select Camera Raw Filter.

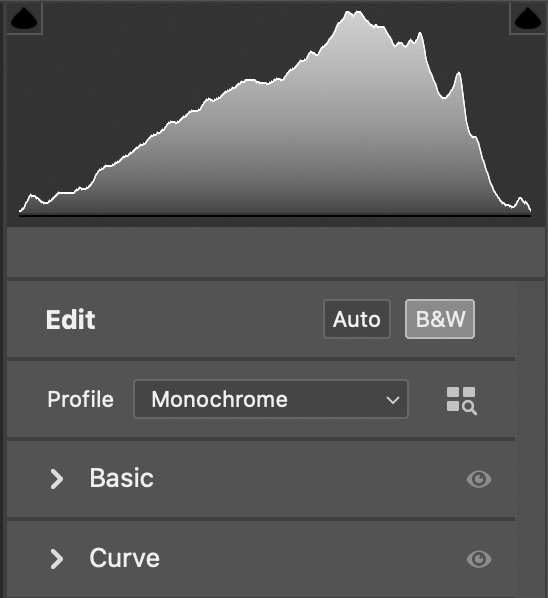
2. Convert image to black and white. Either click on the B&W button or select Monochrome from the Profile drop-down menu.

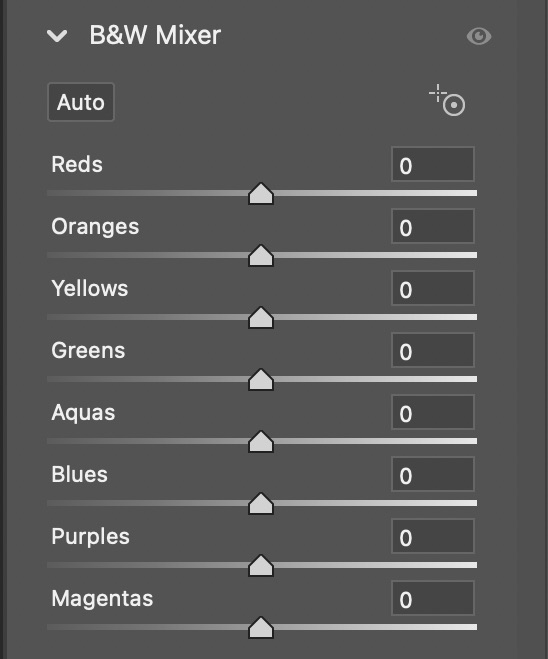
3. Adjust the color sliders. Under B&W Mixer, there are eight sliders: Reds, Oranges, Yellows, Greens, Aquas, Blues, Purples, and Magentas. These sliders control the brightness of the greyscale version of each color. For example, moving the Reds slider to the right will lighten the pixels that were originally red. Because of the two additional sliders, you have more control over the image compared to using a black and white layer.

Locking and Unlocking Layers in Adobe Applications

All the adobe applications have a lovely feature called the layer lock. Layer locks are used to prevent working on the wrong layer. It’s frustratingly easy to work on layer thinking it’s a different one entirely. Fully locking layers or partially locking layers prevents you from making changes to the layers that are already completed.

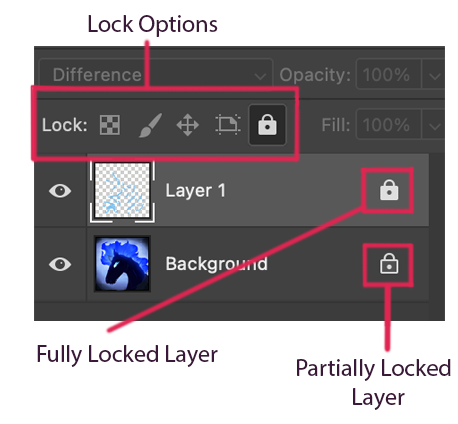
From left to right in the Lock Options: Lock Transparent Pixels, Lock Image Pixels, Lock Position, Lock All, and Full Lock.

Fully locking your layer locks all four of the lock options available as well as preventing you from making selections. These are “Lock Transparent Pixels”, “Lock Image Pixels”, “Lock Position”, and “Lock All”.

The Lock Transparent Pixels does what the title suggests and prevents the user from changing any of the transparent pixels on your layer. A shortcut for this is the forward slash key (/).

The Lock Image Pixels prevents the user from painting or editing any of the layer. You can still move, transform, or select items on your layer.

The Lock Position prevents the user from moving or transforming anything on the layer, however it allows anything else.

The Lock All option prevents everything except making selections on the layer.

To apply a lock option to a layer of your choice, you must first make sure you’re on the layer. Select the layer you want to lock and click one or more of the lock options. If you select the Full Lock option (far right), the other four options will turn grey because they are unnecessary with the Full Lock option selected.

One Minute Tutorial! The Select and Mask Tool

It can be difficult to manually trace an image featuring an object with hair or fur. That’s where the select and mask tool comes in. Watch this tutorial to learn how to use the select and mask tool to cut out an object with a tricky silhouette in Adobe Photoshop.

What is LinkedIn Learning/Lynda?

LinkedIn Learning/Lynda is a site that offers video courses taught by experts about business skills, software skills, and for what you are probably here for… creative skills!

As Simmons students, we have access to the site which is a great resource for learning and freshening up on skills. There are courses on Adobe programs, specific skills and techniques, networking, productivity, industry standards, the list goes on.

In order to access the site, head over to lynda.com (LinkedIn Learning) and follow the “sign-in” link. From there, choose the option “sign in with your organization portal” using your Simmons login and password.

Voila!

The full courses can be rather long, but they are broken up into digestible sections that are a few minutes long.

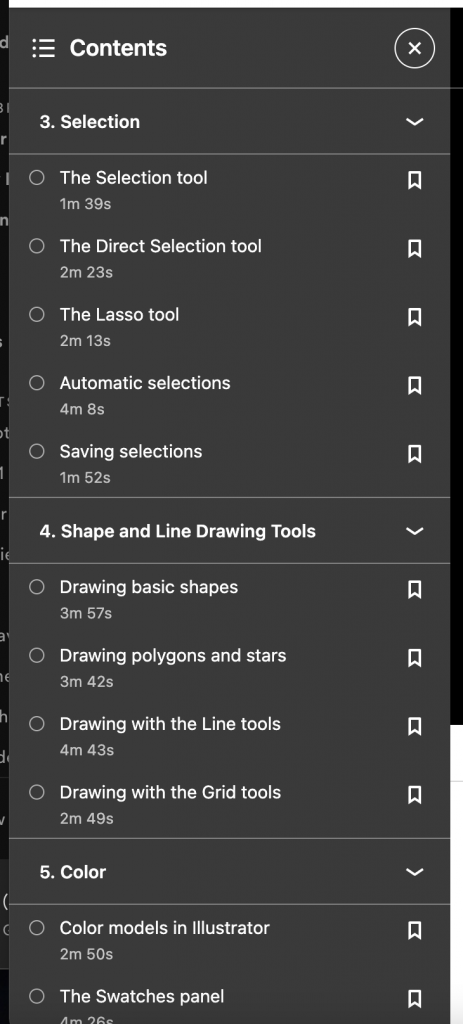
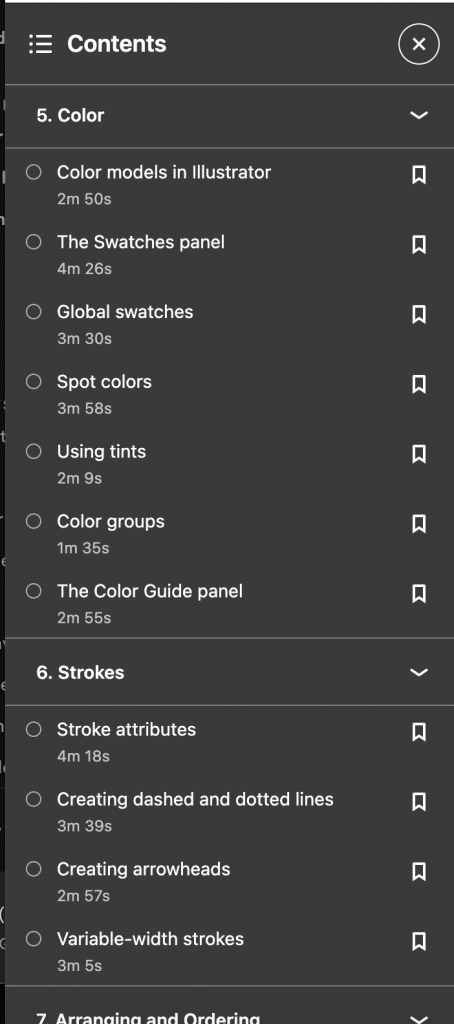
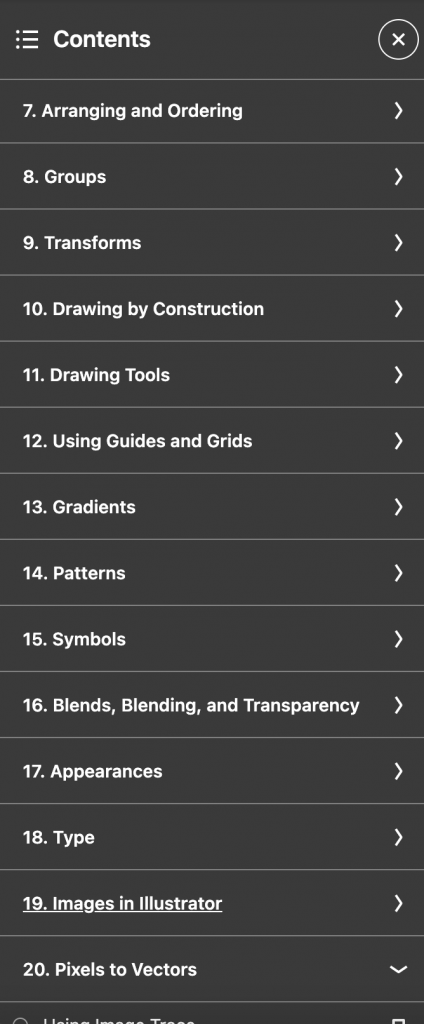
Take this Illustrator 2021 Essential Training course for example.

The full course is 5.5 hours…

But the sections are only a few minutes each.

If you are looking to learn something specific, you can browse through the contents of the course and jump to where you need to be.

Per usual, the Lab Agents are always here to help you out and walk you through any issues you may be having. Happy learning!

How to easily make lines thicker/thinner in Photoshop

So you’ve used the pen tool to make some cool line art, or you’ve made it in ProCreate and brought it over to Photoshop and you realize the lines aren’t as thick/thin as you need them to be…

Don’t panic – theres a quick fix for that.

(It works for images you have scanned in too!)

The process doesn’t take longer than 30 seconds, and this 2 minute video teaches you exactly how to do it.

Procreate & Brushes

In Comm 246: Digital Imaging for Design you will be using the iPad and the app Procreate. There are also some Brushes you may hear Prof Grabiner refer too. Check below for how you can get them for yourself.


Procreate

Procreate is an iPad specific drawing app. You can get it from the app store for $9.99. It’s totally worth it if you like drawing, making some small graphic design projects or GIFs and other easy animations. You can exported you work as a .psd file so you can edit in Adobe Photoshop on your computer.

You can buy it in the app store the link is here:


Procreate Brushes

There are two types of brushes that we have for the CommLab iPads below are links to where you can get them for yourself if you want.

Bardot Brushes
https://bardotbrush.com/
Genevieve’s Design Studio Watercolor Toolbox
https://www.genevievesdesignstudio.com/