
If you’re a beginner at zine-making, this tutorial is for you. Learn how to make your first one in just six simple steps!
Headers and Banners in Adobe Spark
Making your headers and banners shine can give your website or profile the professional boost it needs to get noticed. Adobe Spark is an easy to use program in the Adobe Sweet where you can easily create graphics, websites, and social media posts that will be sure to stand out.
In this quick tutorial, Claudio Zavalla Jr. teaches you how to create eye-catching headers and borders for all of your blogs and social media accounts.
Animated Video Templates on Powtoon
Powtoon is an amazing website the offers free templates for animated videos.
Edit in-website, add your own text, and export your videos with help from easy-to-follow instructions as you go. Whether you’re creating a news briefing, an educational video, or anything else these templates are easy to use and customize.
Here’s a tutorial on how to edit a video template:
Burning and Dodging in Photoshop
Here is a quick and easy tutorial on how to dodge and burn in Photoshop!
Understanding Creative Commons Licenses
Whether you’re creating a zine, podcast, or collage, it’s more than likely you’ll build off of an already existing idea or creation. Maybe you need a photo of someone or you need to use a particular song–whatever it is, it’s important to give credit where credit is due. In other words, it’s not super cool to steal others’ work. Ethics are important.
Thankfully, there are guidelines in place to make sure work is properly attributed while still allowing creators to create. These guidelines are widely known as Creative Commons licenses, and each one has a different meaning. Check out the info below to see what license you need to best attribute borrowed work the next time you start creating.
Types of Licenses:
- CC BY
- You can distribute, remix, adapt, and build upon others’ work, including commercially, as long as credit is given.
- CC BY-SA
- All permissions of a CC BY but you must also license your new creations under the identical terms as the original creator.
- CC BY-ND
- You may reuse others’ work for any purpose, including commercially but it cannot be shared with others in adapted form, and credit must be provided to the original creator.
- CC BY-NC
- You may remix, adapt, and build upon others’ work non-commercially and must also acknowledge the original creator but you don’t have to license your derivative works on the same terms.
- CC BY-NC-SA
- You may remix, adapt, and build upon others’ work non-commercially, as long as you credit the creator and license their new creations under identical terms.
- BY CC-NC-ND
- You can only download others’ work and share it if you credit them. You may not change the work in any way or use it commercially.
Check out the Creative Commons website for more information on licenses and attributions for creative work!
Halftone Effect in InDesign: Two Ways
The halftone effect can spice up any of your designs and the process is pretty simple. The layer can be used on all sorts of designs including both text and images. One of my favorite ways to use it is to place it over photos when I’m making zines.
Learn how to perfect the halftone effect in under ten minutes with this video!
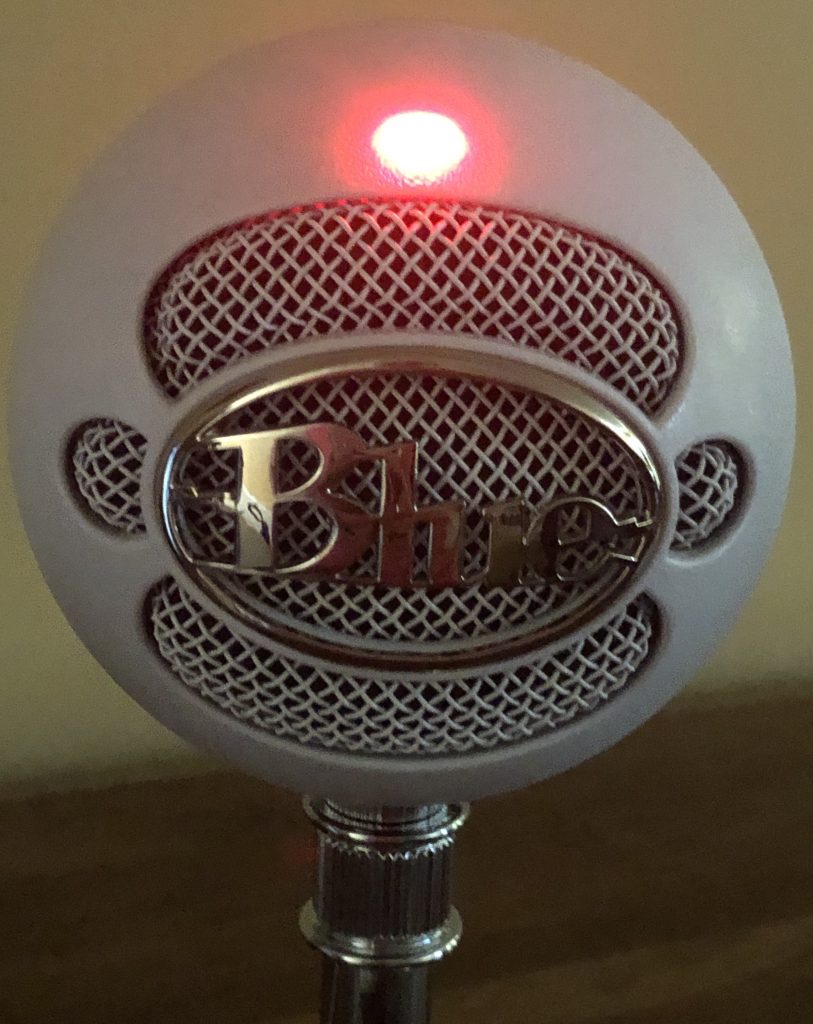
Snowball Mic Set-Up
The Snowball mic is one of the easiest and simplest mics to use for audio recording. Better yet, it producers top-tier sound with little fuss.
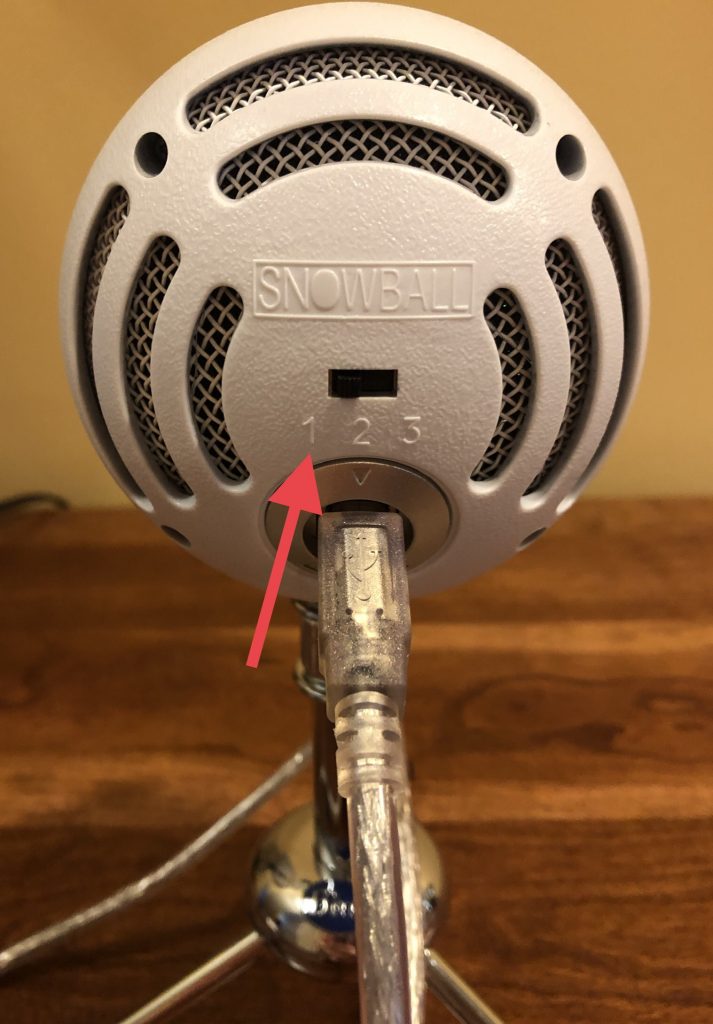
When you get your Snowball mic, the first thing you want to do is assemble it.
- Screw the tripod into the mic base
- Plug the provided cable into the back of the microphone and the other end into your laptop
- A red light should turn on at the top of the mic. This means the mic is on.
3. Select your desired recording setting
- Narration (best for audio recording)
- Music (best for recording music)
- Meeting Room (best for recording large areas)
When you open Audition, the Snowball mic should appear as the Host audio track. This means you’re ready to record, all you have to do is hit the red button in Audition and get started!
Here is a helpful video that goes over Snowball mic set up:
Animated Transitions in Premiere Rush
Check out this super quick video on how to create animated transitions in Adobe Premiere Rush. These tools help add life to your videos in ways that basic transitions can’t. Try it out!
Improving Sound Quality in Voice Memos
For many first-time audio producers, the Voice Memos app is a great resource to quickly record audio on the go. It is simple to use, just hit the red button and speak! With a good recording set up, your recorded audio can be production-ready.
However, there’s not always time to make a blanket fort or makeshift recording booth. Maybe you’re on the go or somewhere that’s windy or noisy. Don’t worry! Here are two quick tips that will improve your Voice Memos audio.
1.) Turn on Enhanced Audio
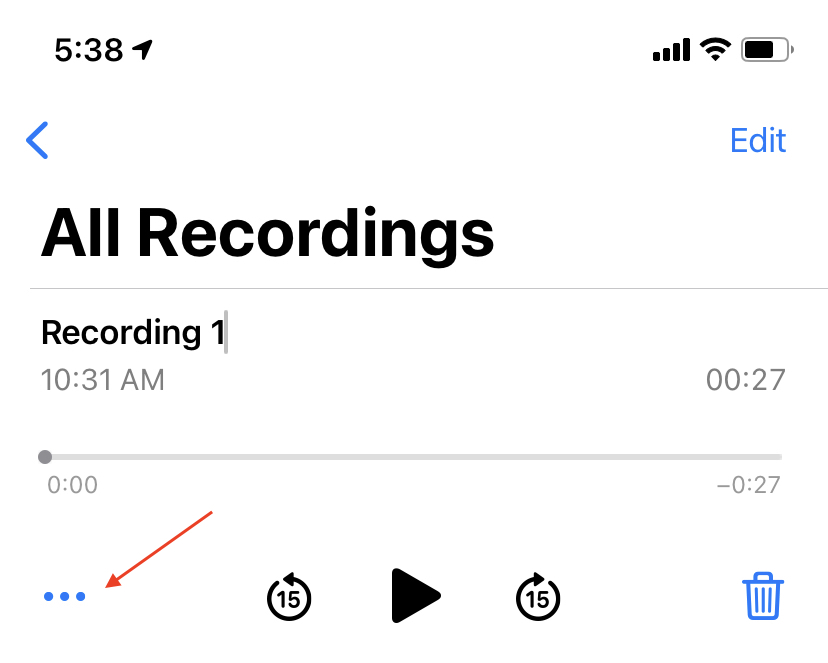
- First, open the Voice Memos app and record.
- Next, hit the three dots in the bottom corner of the recording.
- Click “Edit Recording”
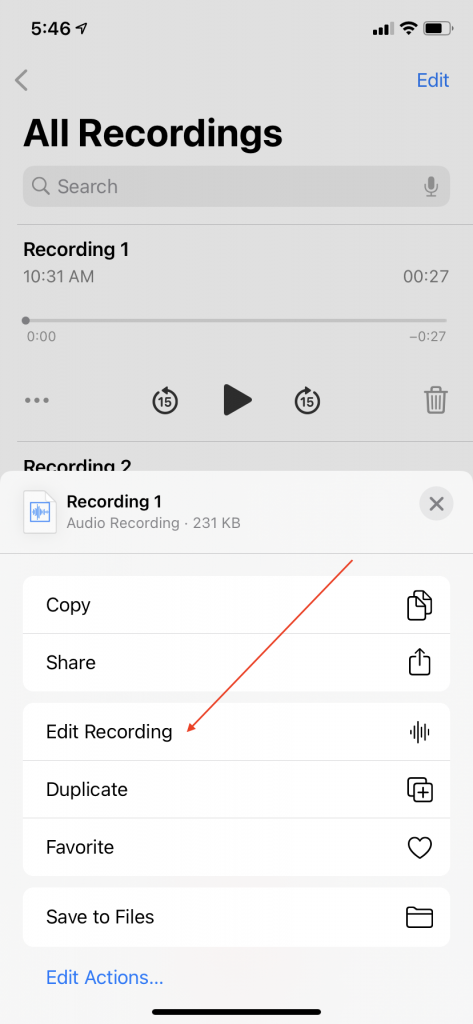
- Then, click the blue magic wand button above your recording. The button will be highlighted in blue when it is on.
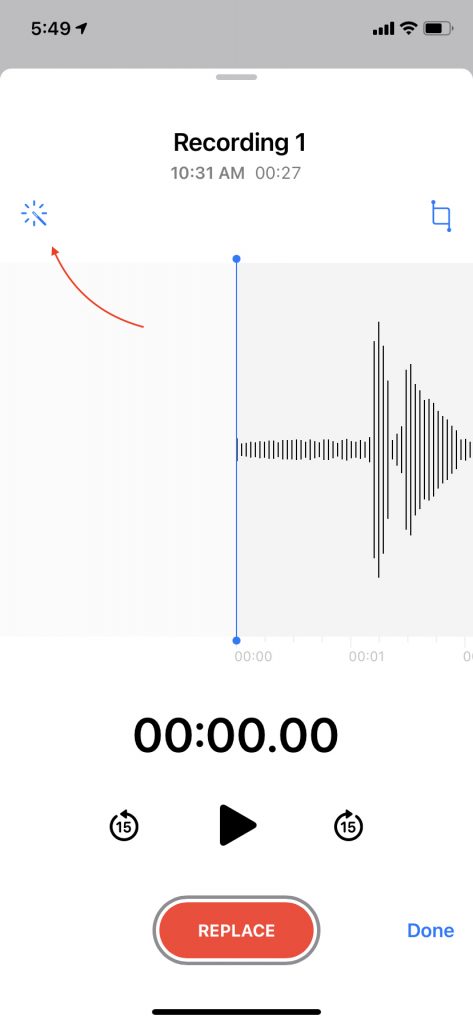
And that’s it! This little wand will help clean up your audio in just one click!
2.) Put a piece of tape over your mic
It’s really that simple.
All you need is a small piece of ordinary tape. Stick it over your phone’s microphone to cut down harsh wind or noise sounds when recording outside!
Saving A Damaged File in InDesign
You’ve worked hard. Your poster is beautiful. You go to save and export it on your laptop and–OH NO! Your file is corrupt!
Don’t panic. Your file is not destroyed. As long as you can open the file, there is hope.
Follow these simple steps to save a corrupt file in InDesign.
Step One: Open your file in InDesign
Step Two: Click ‘File’ then ‘Save As’ or ‘Save a Copy’
Step Three: Make sure to save it on your desktop
Step Four: Click ‘Format’ then select ‘InDesign CS4 or older (IDML)’
Step Five: Click ‘Save’
Saving a file as an IDML file will clean up any unneeded software junk from previous InDesign file versions. The result is an identical, non-corrupt file ready for the world to see!
Check out this video by Pariah Burke for a quick and detailed instruction: