This tutorial walks you through multiple set-ups for your zine, the marble effect, and font design in InDesign.
Download the templates and fonts to replicate the design. The marble effect can add a unique, contemporary feel to all your zines. Configuring your template first will help your zine look professional and uniform.
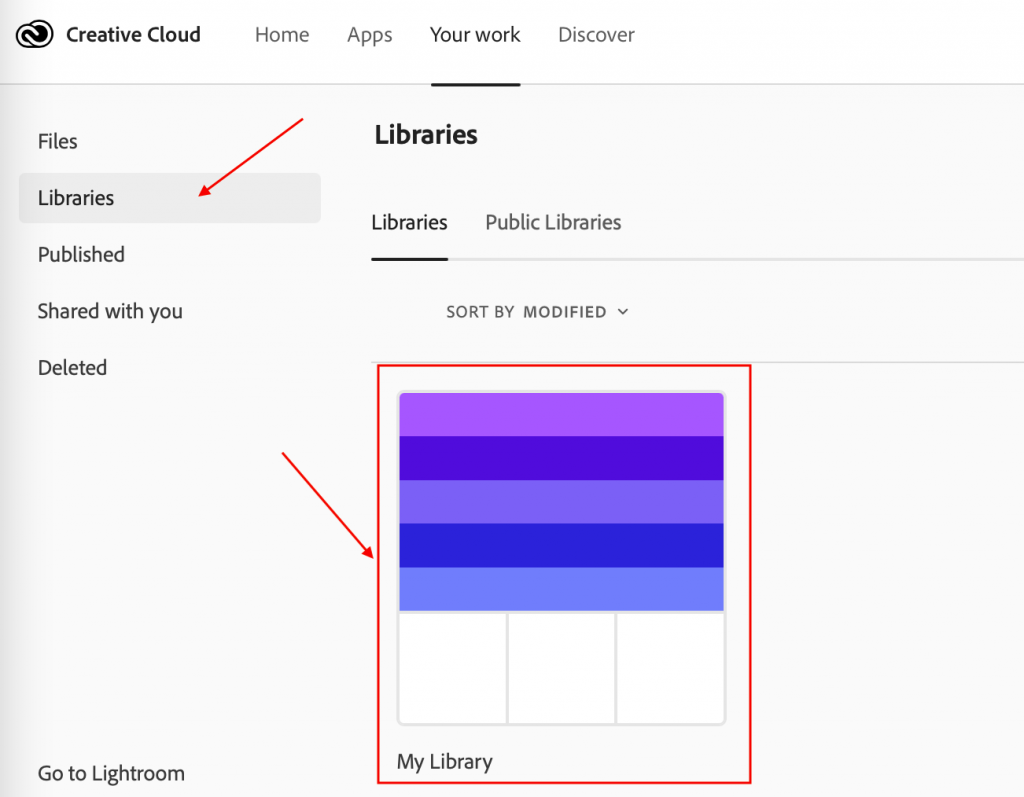
The first step to accessing the CC libraries to find something saved there is to open the Creative Cloud. You can either do this through launching the app or by going to the Creative Cloud website. Once that is done, navigate to “Your work” tab. In both the app and the website it will appear in the top left corner of your screen.
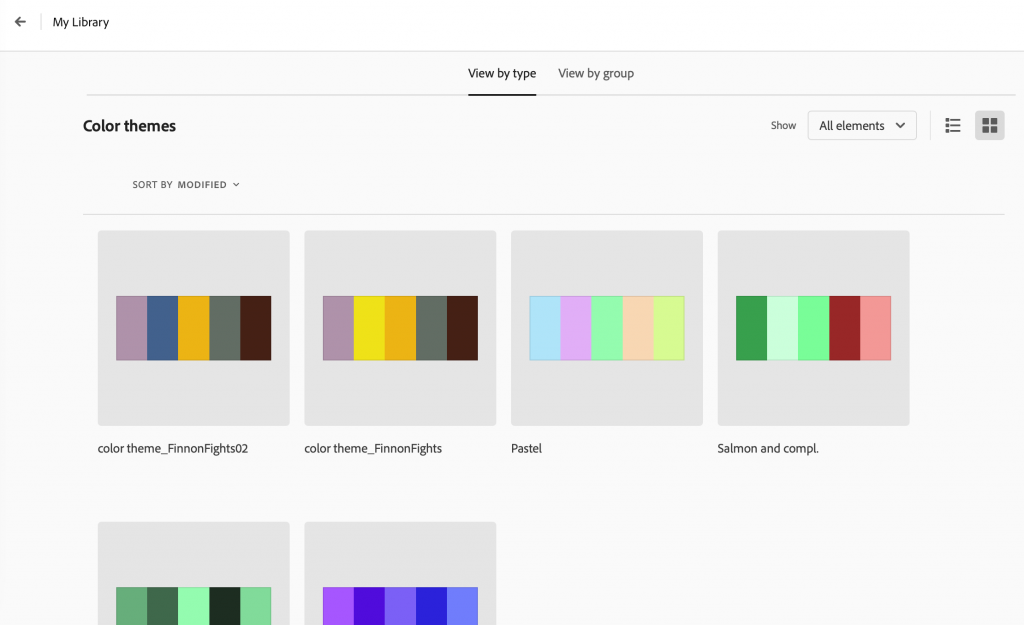
Now in the “Your Work” tab, select “Libraries”. From there, select the library of your choice (mine is “My library”). In the app version, this step is unnecessary as it will automatically pull up your libraries to choose from without first having to select the “Libraries” tab.
That is where your palette is stored. (See the Color Wheel post for more information on the color palettes).
All these screenshots were taken from the online version of the Creative Cloud, however the app is very similar in layout. The only major difference is that you do not have to select Libraries after going to the “Your Work” tab as it will automatically show them.
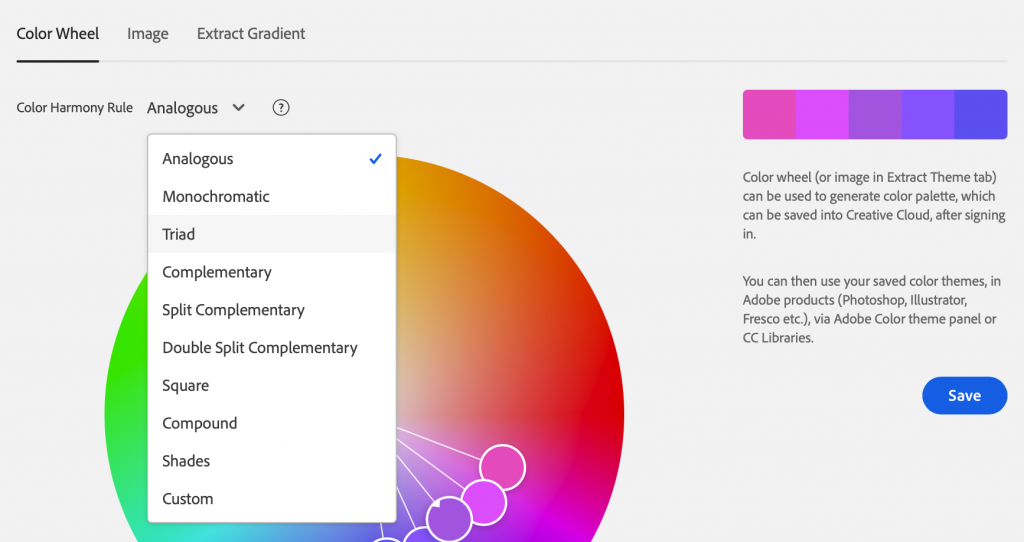
Using the Adobe Color Wheel is a simple way to quickly create a color palette to work with. As stated on their site, the color wheel can be used to generate a color palette which can be saved into Creative Cloud and used for your projects.
On the color wheel page, you can change colors by clicking on points within the wheel itself or by adjusting the sliders at the bottom of the page. With the color wheel, you can choose between Analogous, monochromatic, triad, complementary, split complementary, double split complementary, square, compound, shades, and a custom choice.
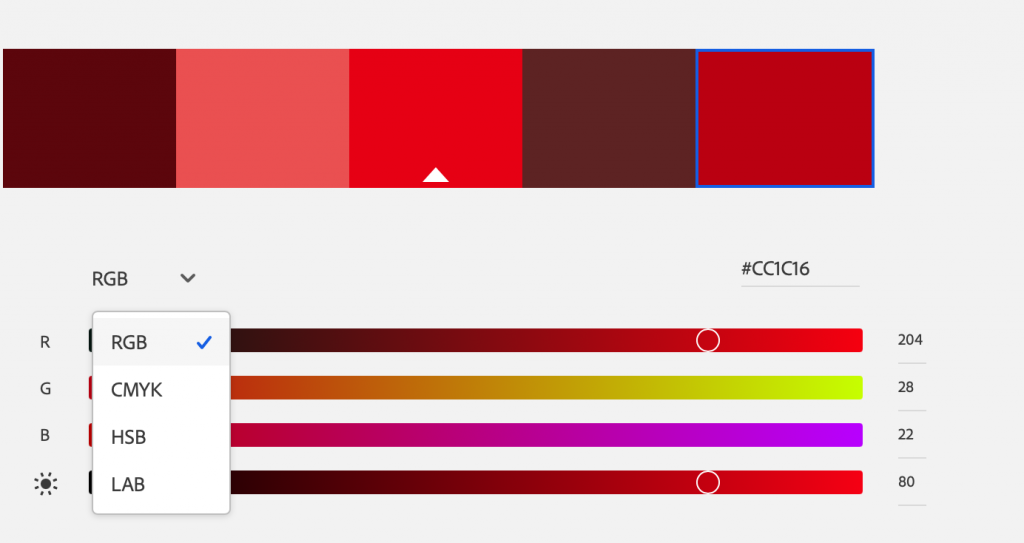
The sliders also have a number of options to choose from including RGB, CMYK, HSB, and LAB.
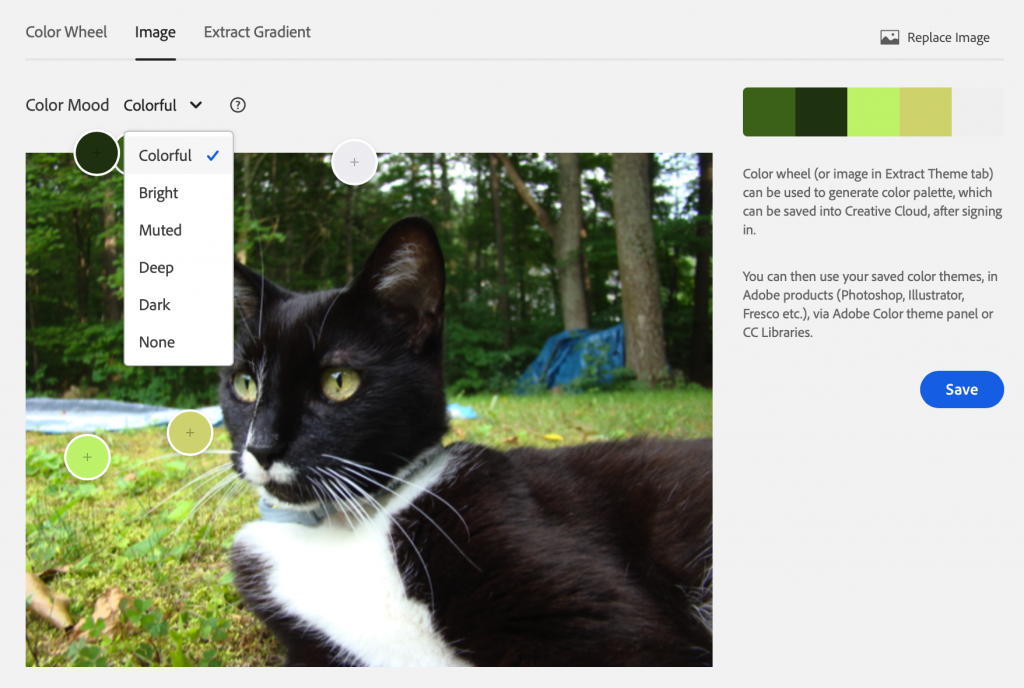
At the top of the page, it lists “Image” and “Extract Gradient” next to “Color Wheel”. In those tabs, you can generate a color palette from an uploaded image. You can change the mood of the auto generated color palette which will change the points selected as color references. By clicking and dragging the color points, you can also manually change individual colors in the palette.
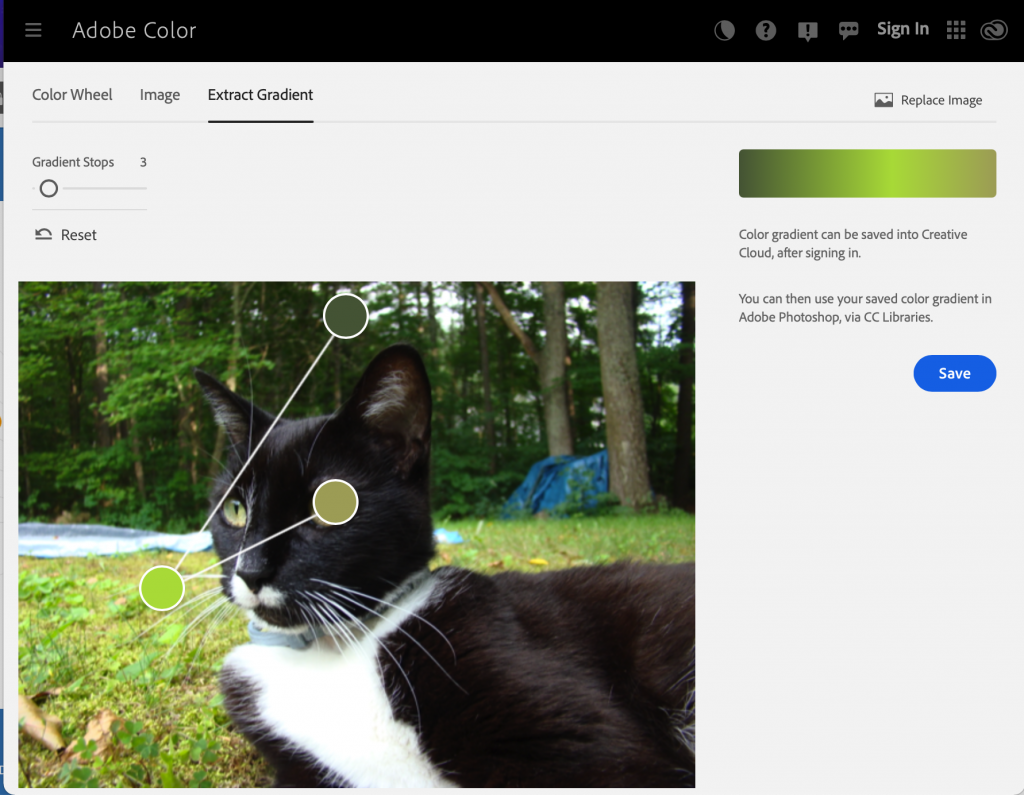
You can also generate a color gradient from that image. Just select an image and it will auto generate a palette or a gradient. You can move the selection points and change the selected colors to create a palette that suits your needs. You can also increase the number of “Gradient Stops” with the slider in the top left corner.
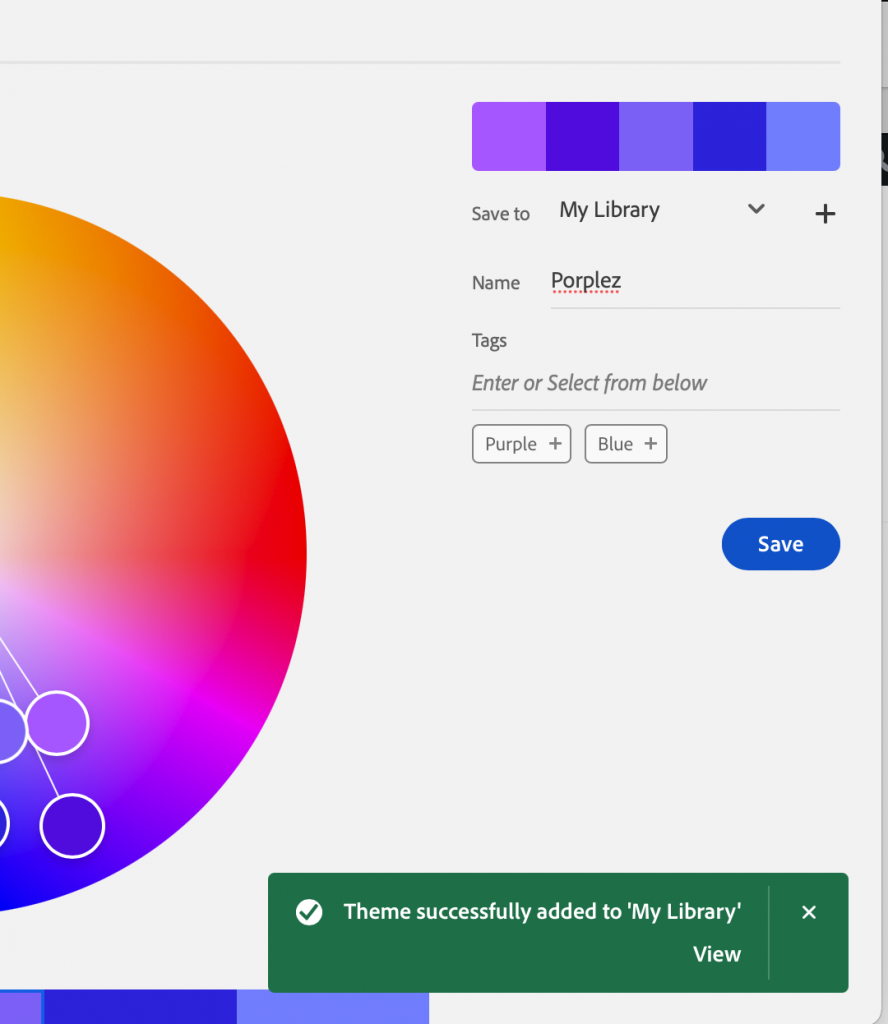
When you’re ready to save the palette, make sure you’re signed in first. Then, go back to the “Color Wheel” tab and you will have the option to name your palette and add tags.
After you’ve named it and hit “Save”, you will get a little green popup stating that the Theme has been successfully added to ‘My Library’.
Whether you’re creating a zine, podcast, or collage, it’s more than likely you’ll build off of an already existing idea or creation. Maybe you need a photo of someone or you need to use a particular song–whatever it is, it’s important to give credit where credit is due. In other words, it’s not super cool to steal others’ work. Ethics are important.
Thankfully, there are guidelines in place to make sure work is properly attributed while still allowing creators to create. These guidelines are widely known as Creative Commons licenses, and each one has a different meaning. Check out the info below to see what license you need to best attribute borrowed work the next time you start creating.
Types of Licenses:
CC BY
You can distribute, remix, adapt, and build upon others’ work, including commercially, as long as credit is given.
CC BY-SA
All permissions of a CC BY but you must also license your new creations under the identical terms as the original creator.
CC BY-ND
You may reuse others’ work for any purpose, including commercially but it cannot be shared with others in adapted form, and credit must be provided to the original creator.
CC BY-NC
You may remix, adapt, and build upon others’ work non-commercially and must alsoacknowledge the original creatorbut you don’t have to license your derivative works on the same terms.
CC BY-NC-SA
You may remix, adapt, and build upon others’ work non-commercially, as long as you credit the creatorandlicense their new creations under identical terms.
BY CC-NC-ND
You can only download others’ work and share it if you credit them. You may not change the work in any way or use it commercially.
Check out the Creative Commons website for more information on licenses and attributions for creative work!
The halftone effect can spice up any of your designs and the process is pretty simple. The layer can be used on all sorts of designs including both text and images. One of my favorite ways to use it is to place it over photos when I’m making zines.
Learn how to perfect the halftone effect in under ten minutes with this video!