Want to add more spice to your objects in InDesign? Try out the effects panel! This video goes over each of the various effects in InDesign and how to apply the same effect to multiple objects.
Motion Tracking in After Effects
Have some text or an object you want to stick to a moving object in your video? Instead of manually creating key frames for the element to follow along, use the motion tracking feature in After Effects. Check out this short video to learn how!
One Minute Tutorial! Perspective Text
The perspective grid tool can be a bit intimidating at first, but it can also be incredibly powerful. This tutorial shows how to use a perspective grid to create perspective text in Adobe Illustrator.
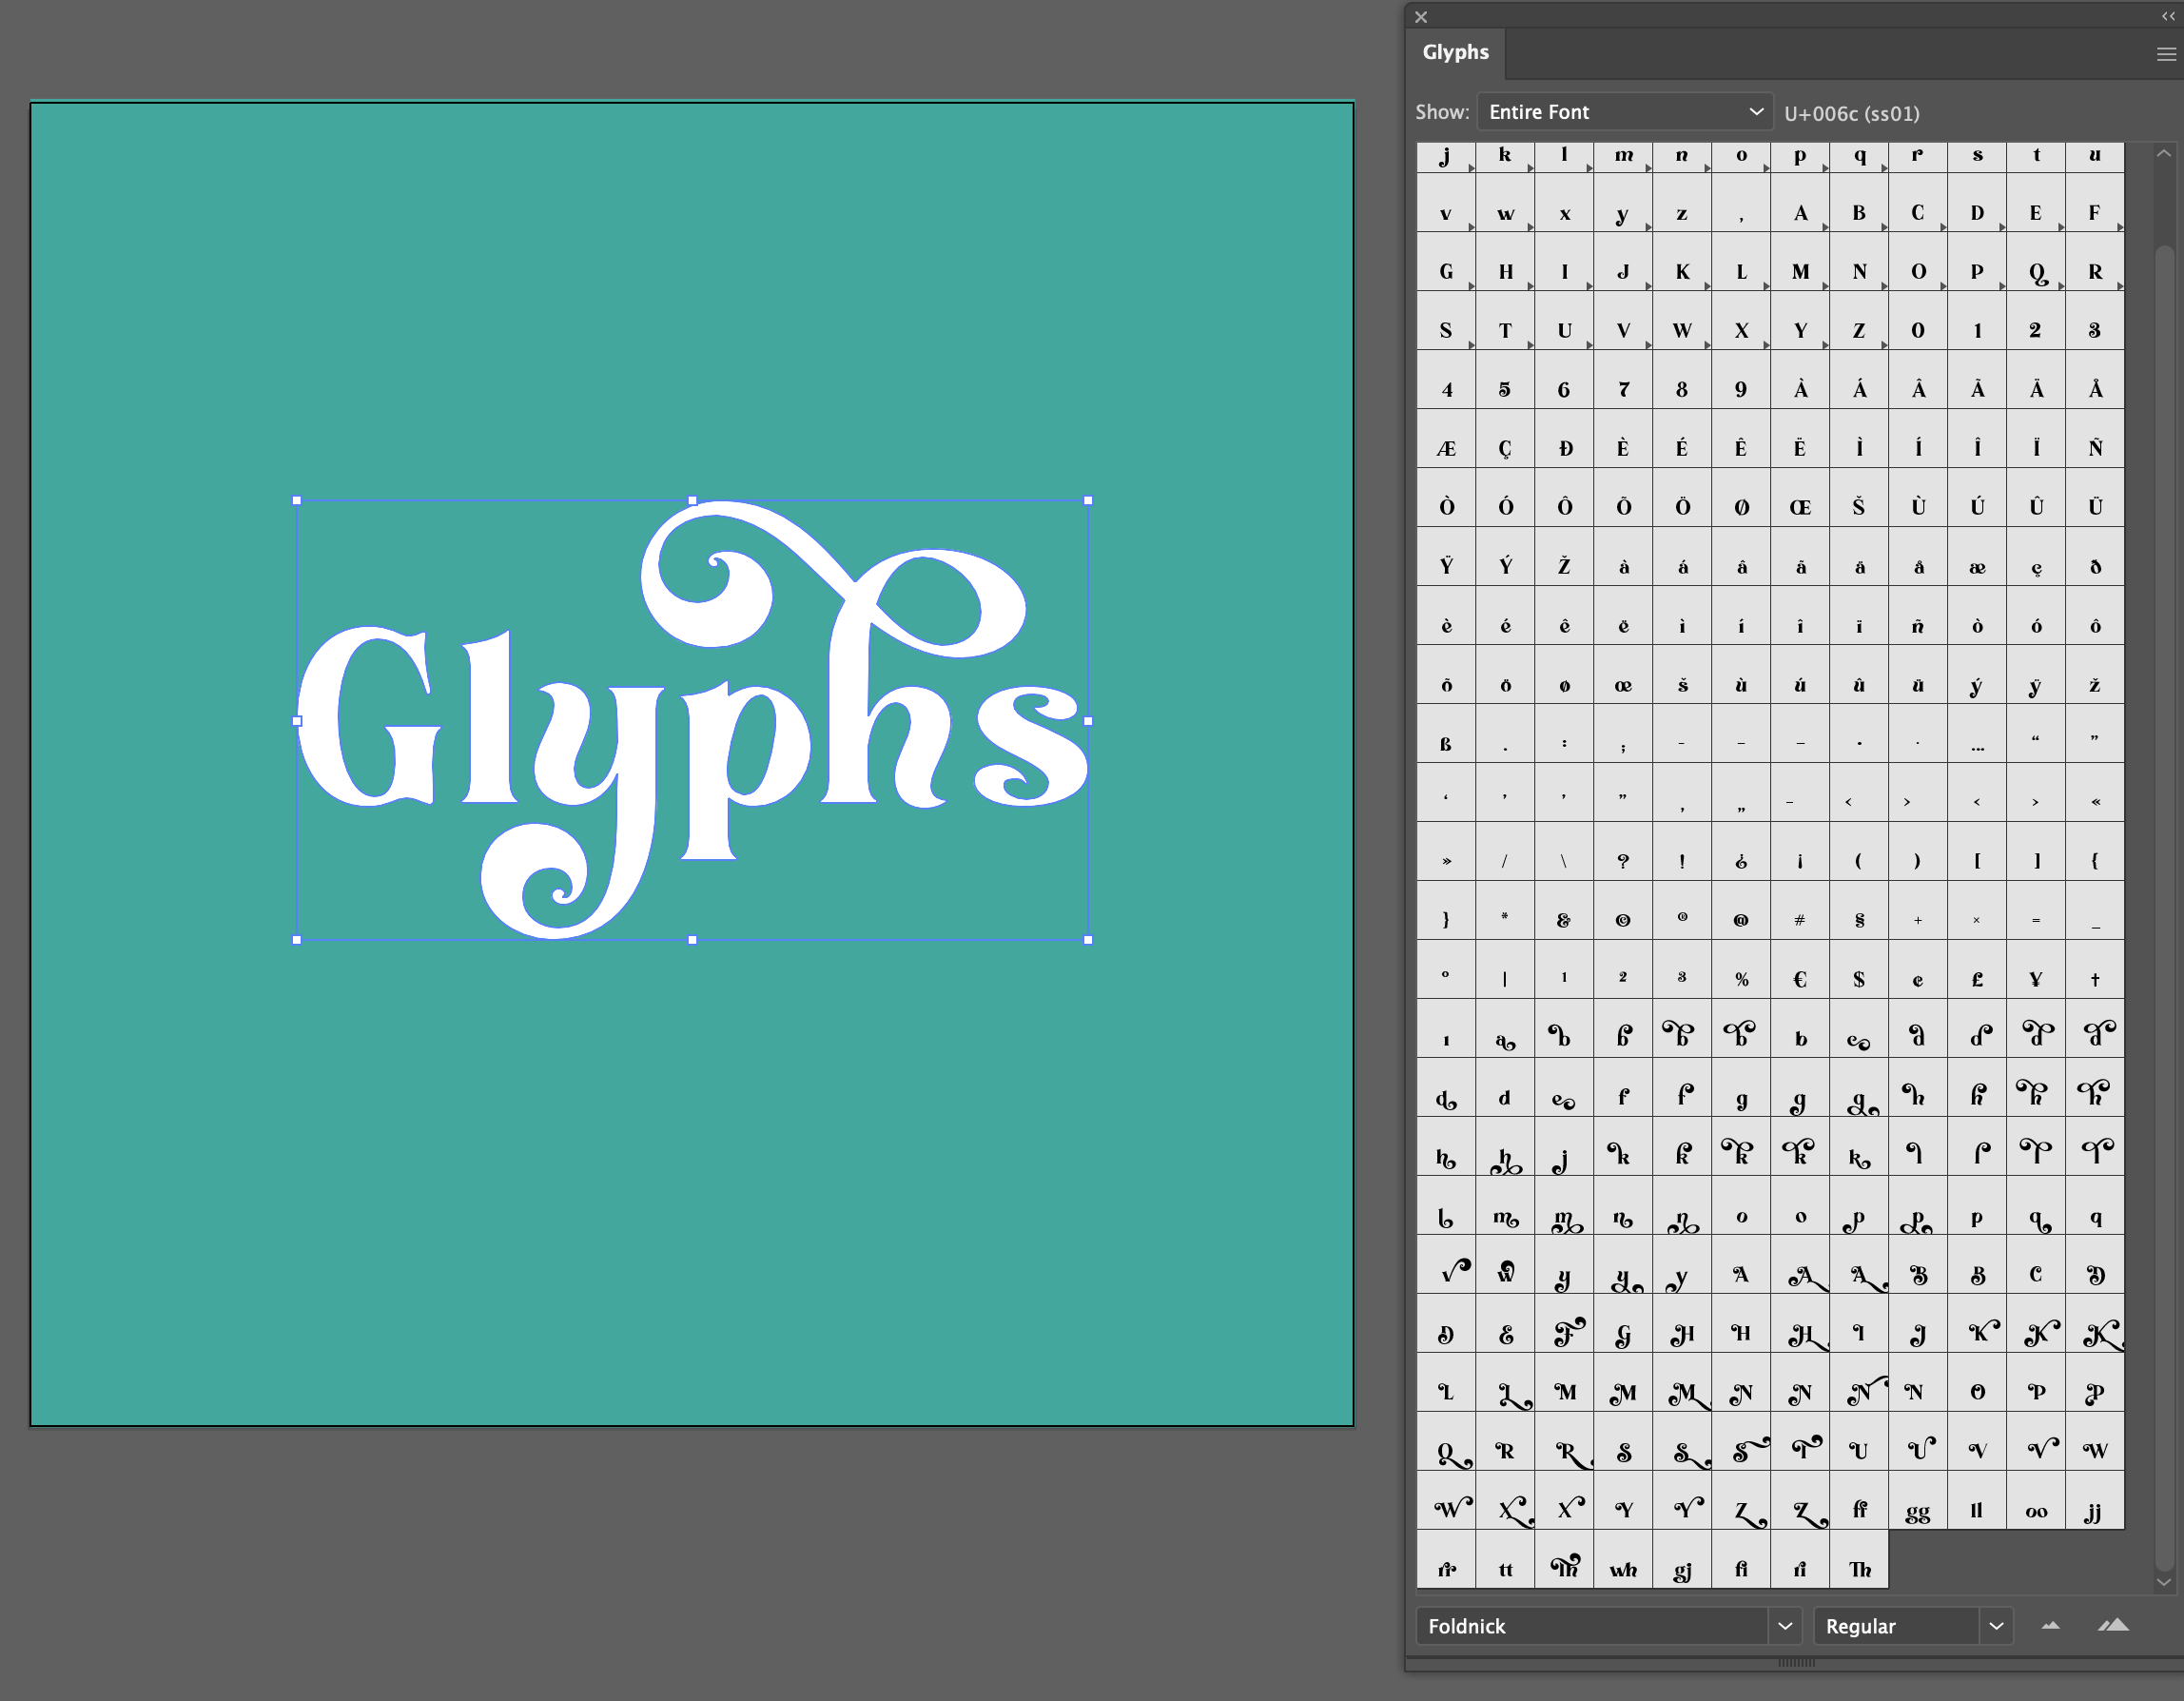
Glyphs Panel – Adobe Illustrator
Opening the Glyphs panel allows you to see all the typographic options such as small caps, flourishes, and more. Learn how to find alternative special characters to amp up your logo design or typography in the video below.
Note: not all typefaces support these OpenType features. The example below contains a wide library of alternates and ligatures.
Free Photo Resources!
When creating content often times it’s helpful to use photos and videos. However, many of the quality photos online are copyrighted – i.e. it’s illegal for you to use them without permission!
In order to avoid legal trouble, check out these resources for open-domain photos you can use for all of your creative projects.
- Flickr: great community-sourced photos, search by name, photographer, or subject
- Creative Commons: search by domain laws or subject
- Library of Congress: great for archival photos and videos
- Adobe Stock: available to Comm students through Adobe suite, good for basic photos
Creating Spreads in InDesign
Whether you’re making a table of contents or spec book, creating spreads is a helpful tool that can enhance your design skills. Check out this tutorial to learn how to create spreads in InDesign step-by-step in under five minutes!
Wrapping Text Around Objects in InDesign
Here is a quickly tutorial on how to wrap text around objects, shapes, and images in InDesign.
Locking and Unlocking Layers in Adobe Applications
All the adobe applications have a lovely feature called the layer lock. Layer locks are used to prevent working on the wrong layer. It’s frustratingly easy to work on layer thinking it’s a different one entirely. Fully locking layers or partially locking layers prevents you from making changes to the layers that are already completed.
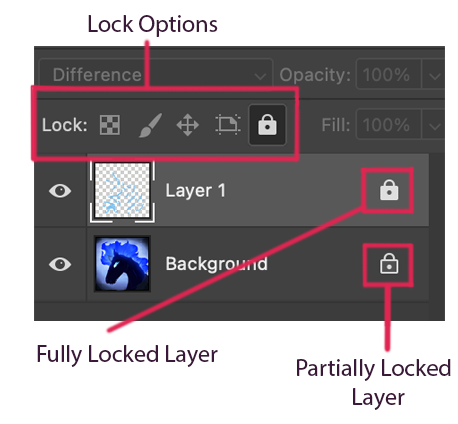
Fully locking your layer locks all four of the lock options available as well as preventing you from making selections. These are “Lock Transparent Pixels”, “Lock Image Pixels”, “Lock Position”, and “Lock All”.
The Lock Transparent Pixels does what the title suggests and prevents the user from changing any of the transparent pixels on your layer. A shortcut for this is the forward slash key (/).
The Lock Image Pixels prevents the user from painting or editing any of the layer. You can still move, transform, or select items on your layer.
The Lock Position prevents the user from moving or transforming anything on the layer, however it allows anything else.
The Lock All option prevents everything except making selections on the layer.
To apply a lock option to a layer of your choice, you must first make sure you’re on the layer. Select the layer you want to lock and click one or more of the lock options. If you select the Full Lock option (far right), the other four options will turn grey because they are unnecessary with the Full Lock option selected.
Match Fonts in Photoshop
Ever find an image with the perfect font, but have no clue what font it is? You’re in luck! Using the match font feature in Adobe Photoshop, you can automatically search your font library for a matching or similar font.
This three minute video demonstrates how to use this feature to search for a matching font to the one in an image.
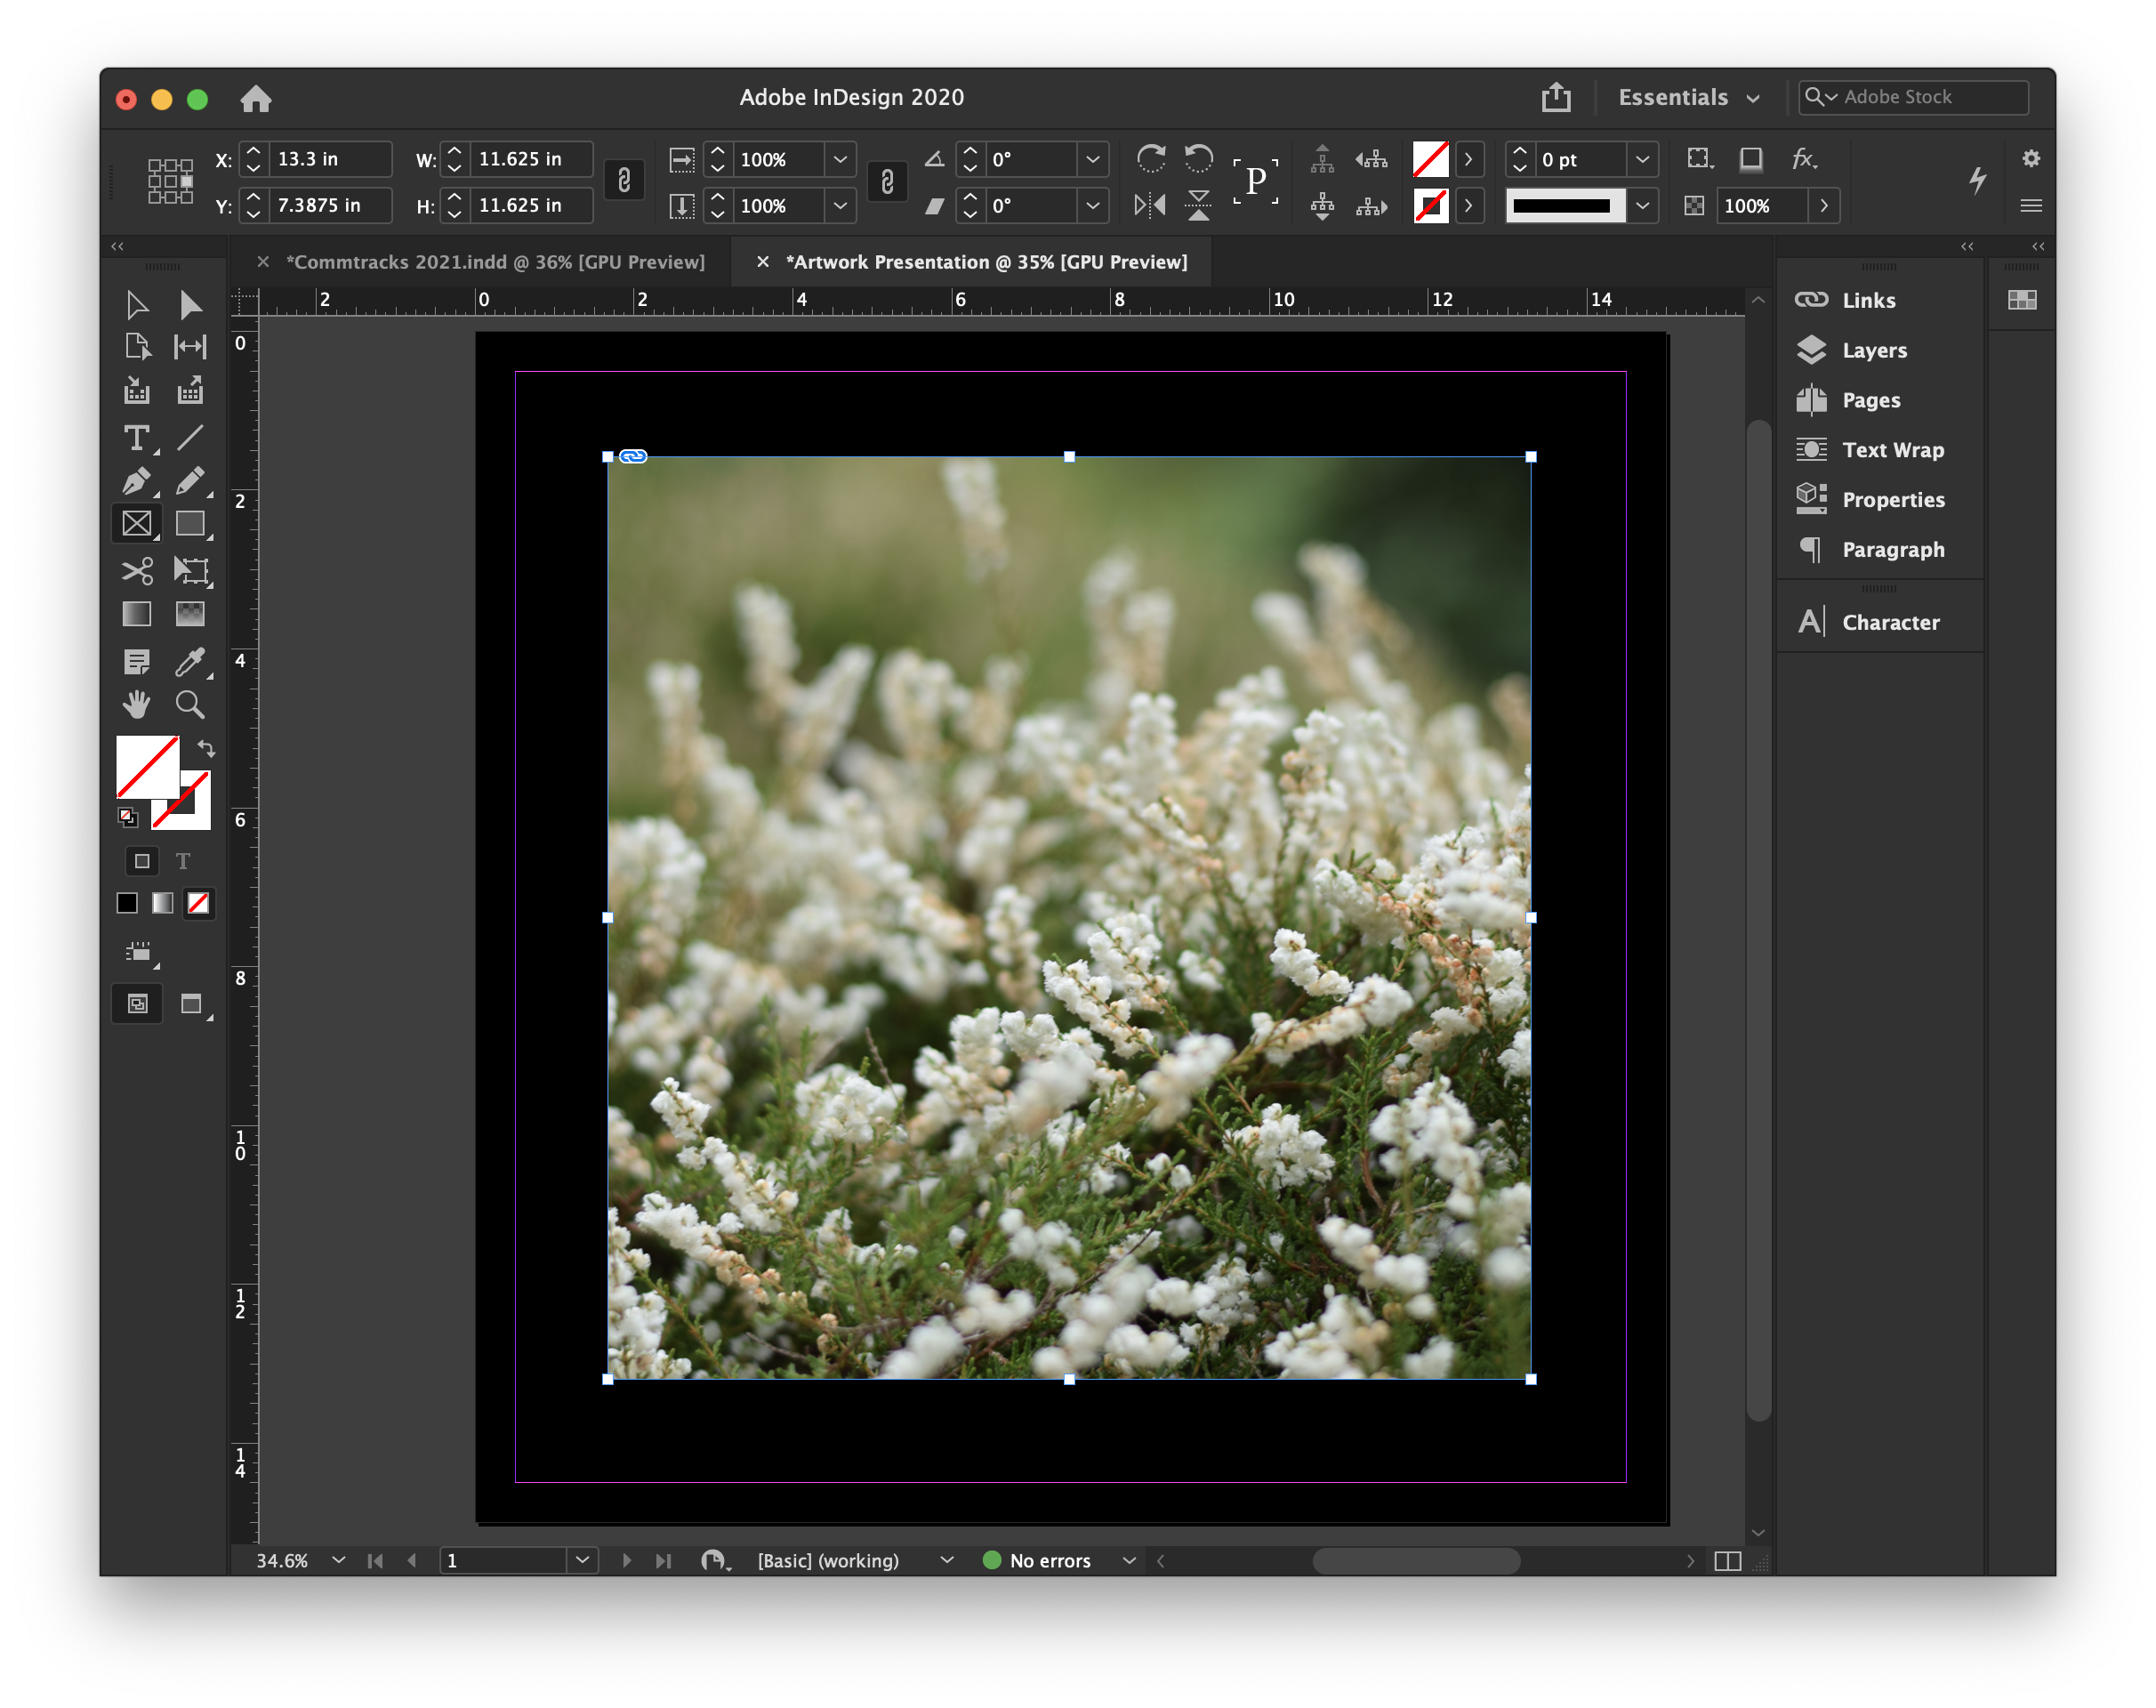
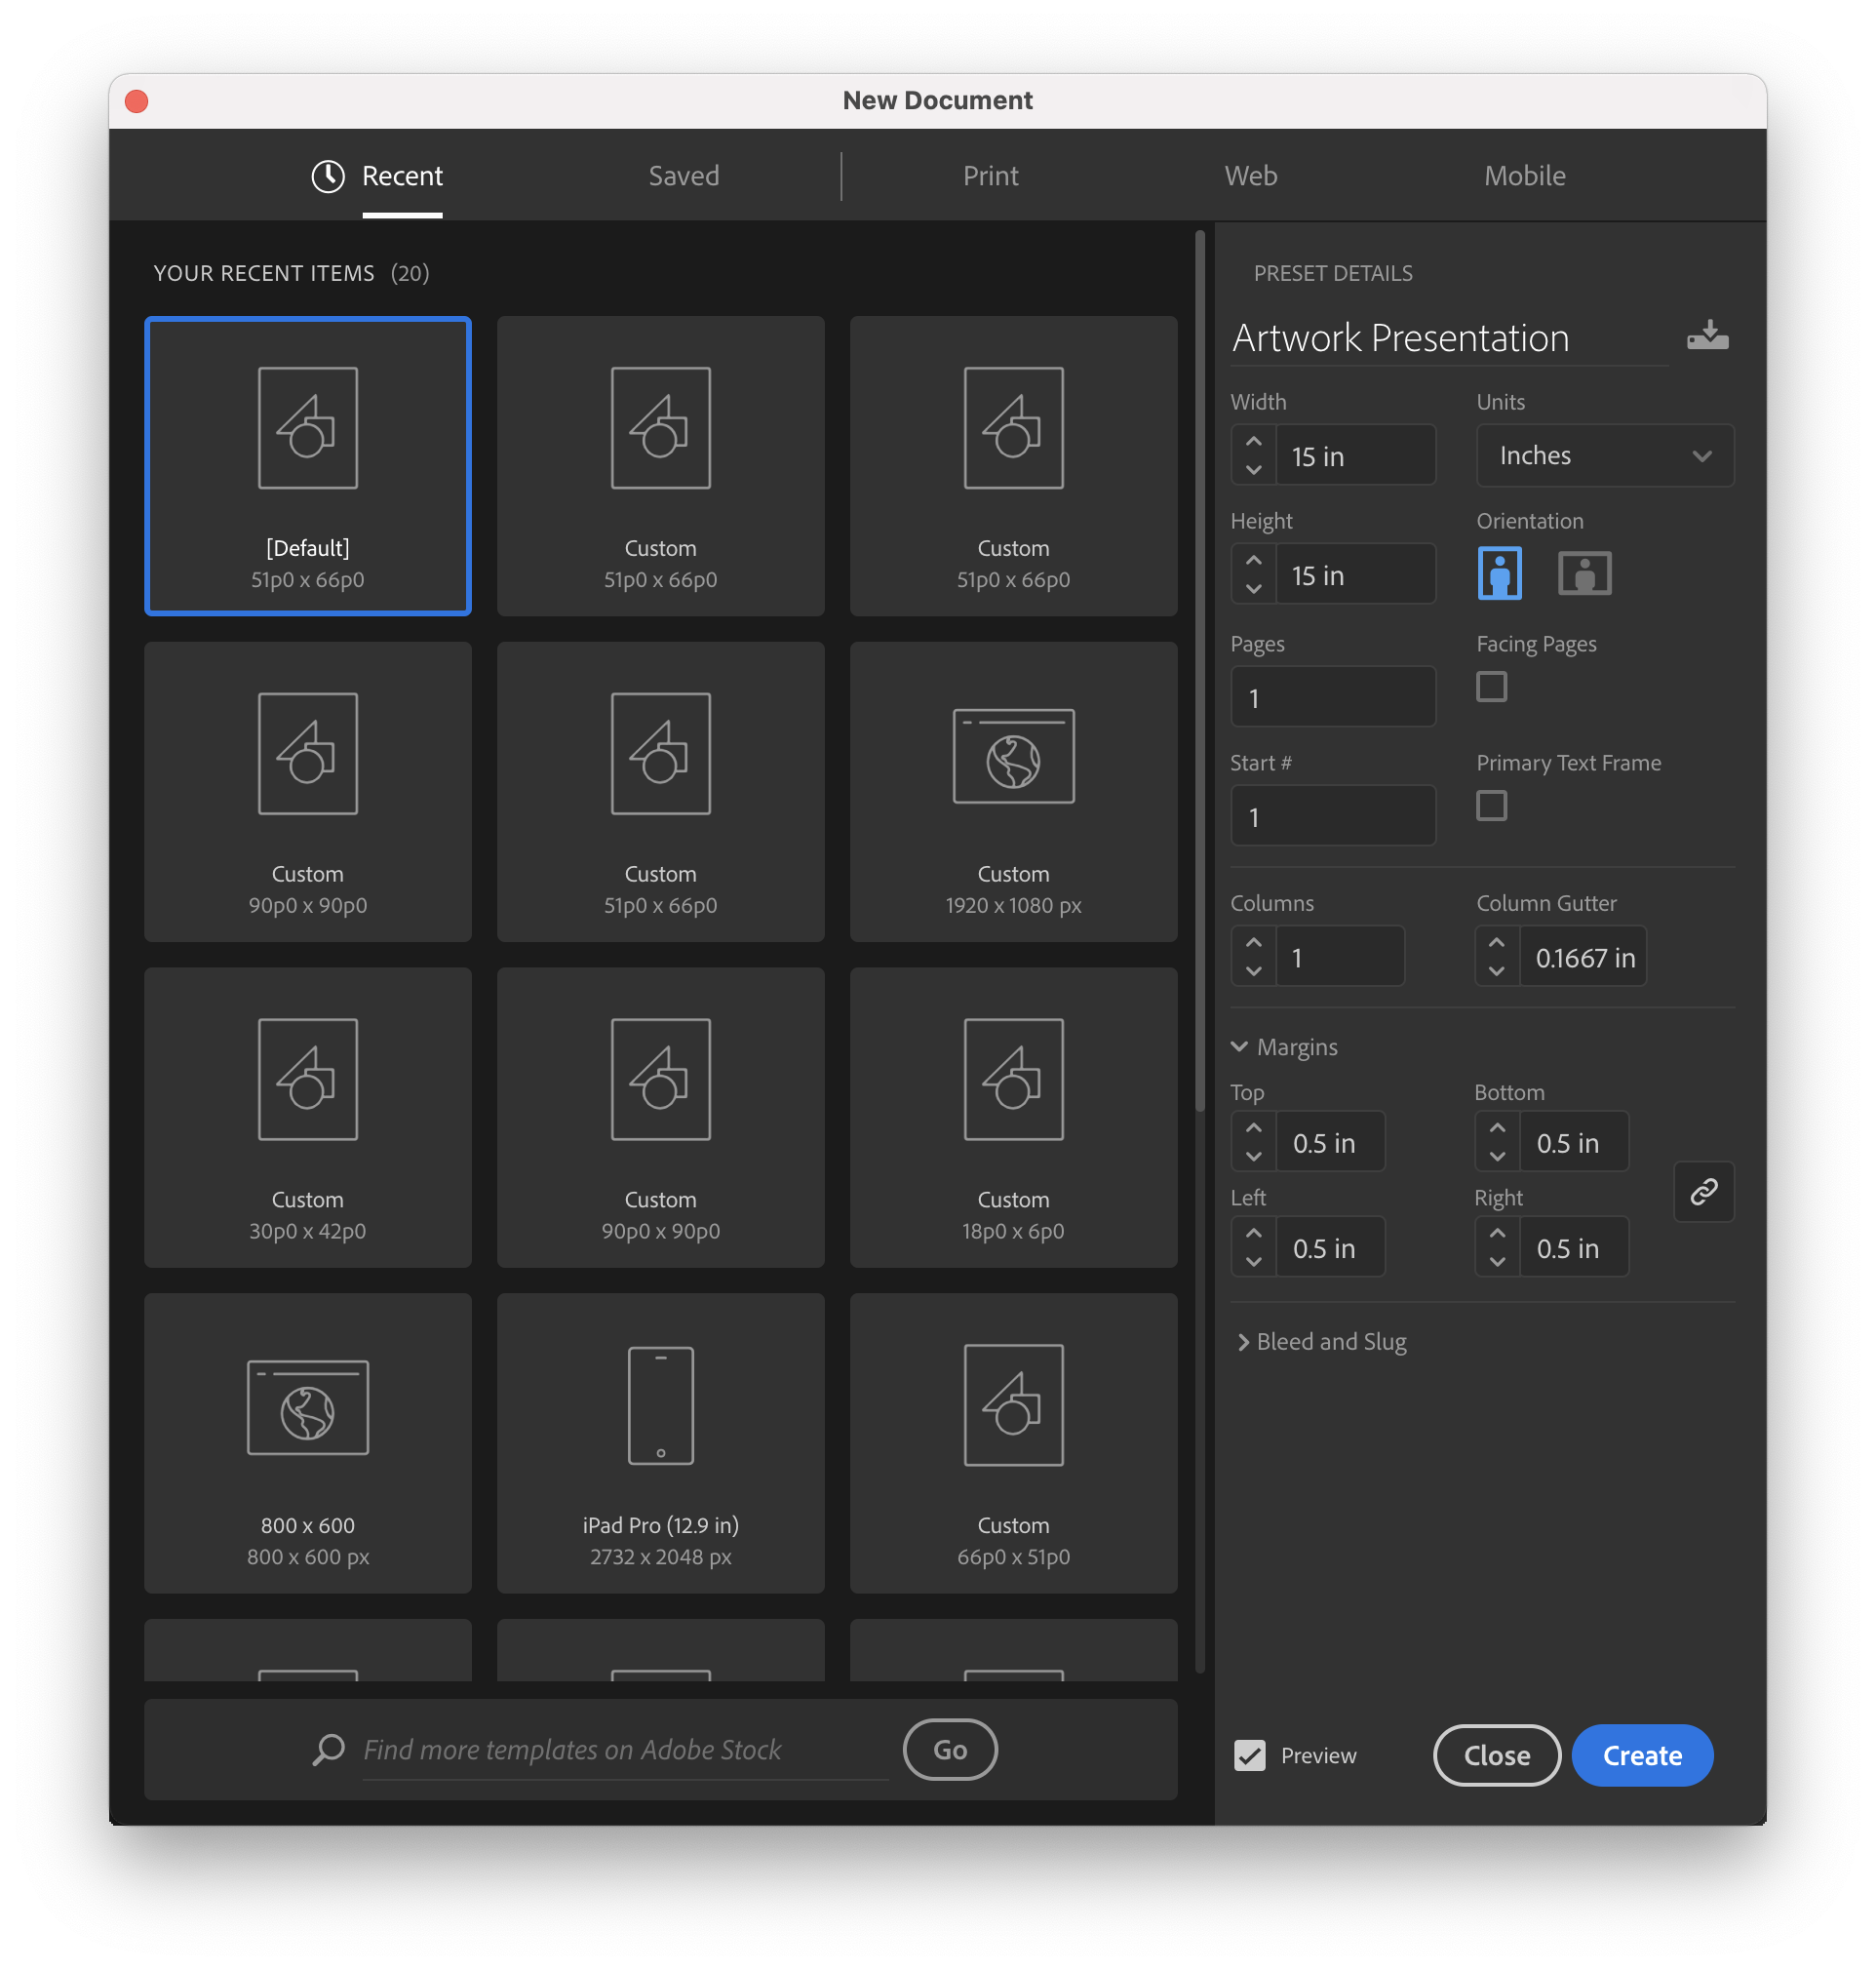
Artwork Presentation in InDesign
Open up InDesign and enter in your values for your document settings. If you are placing your photograph or artwork onto a 15×15 inch black square, see the image below for the preset details. Once you’re happy, click “Create”.
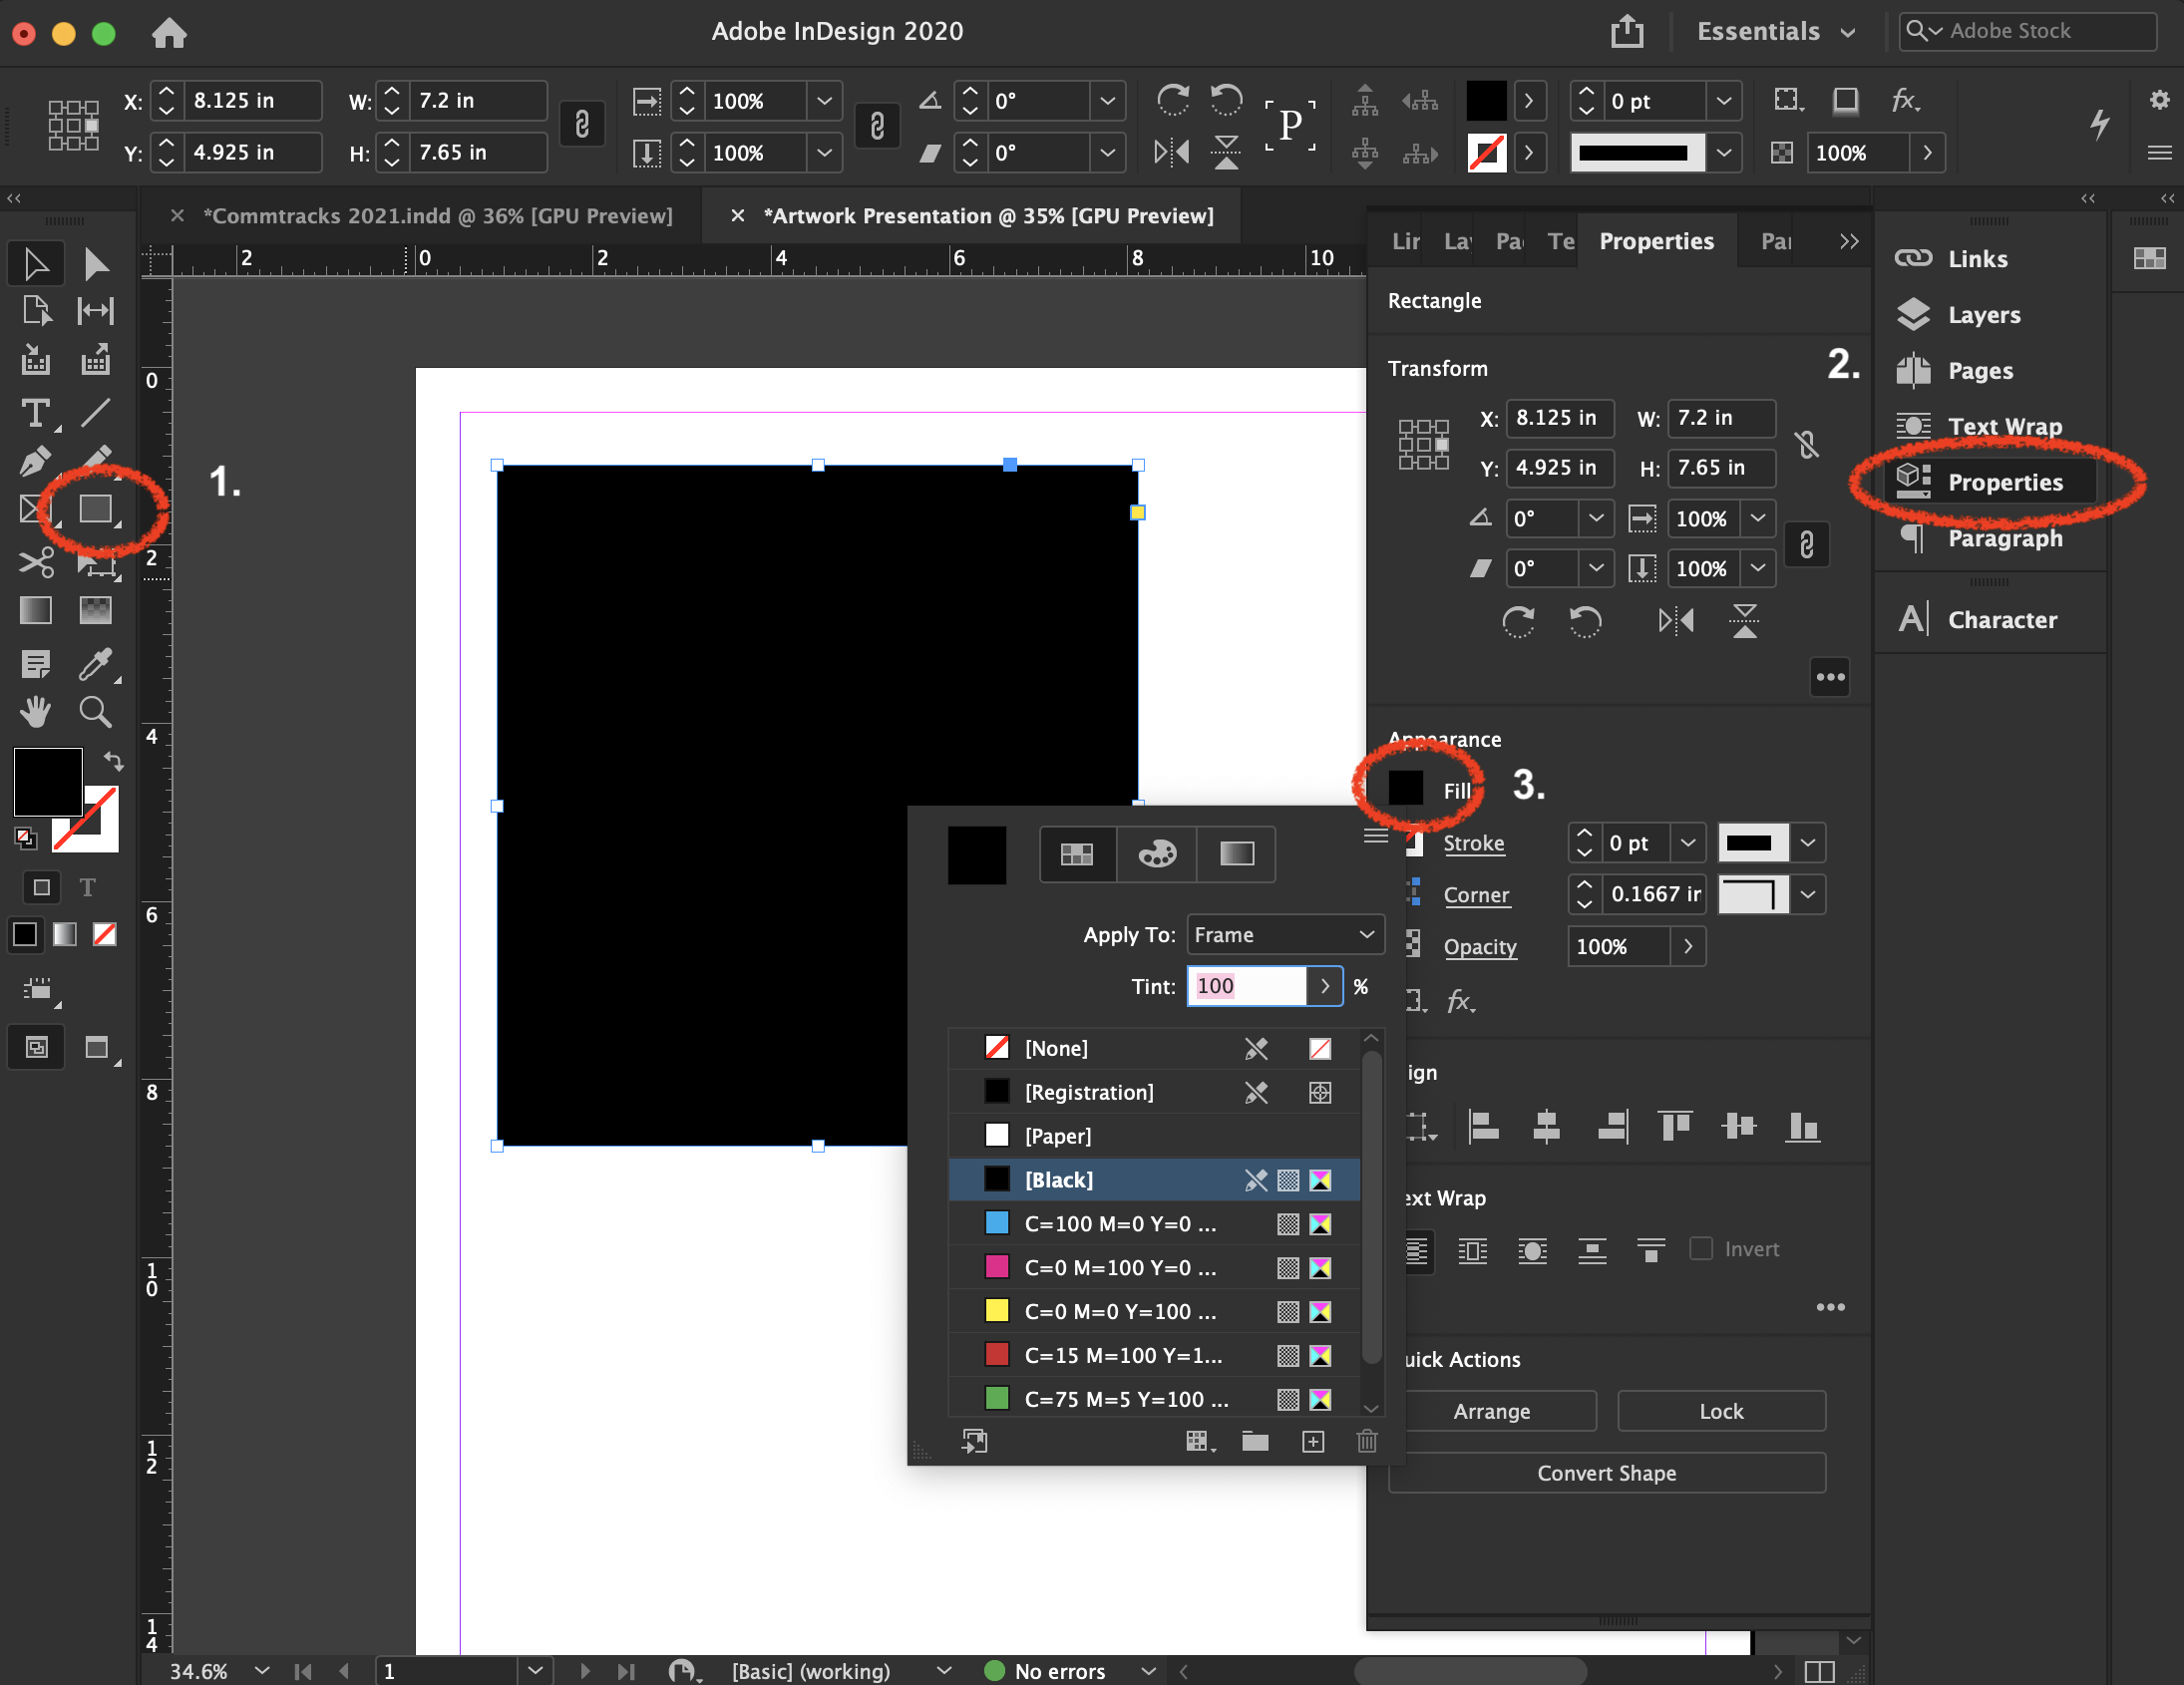
With the rectangle tool, create a square to cover your whole board, go into the “Properties” panel and set the color to your what you need.
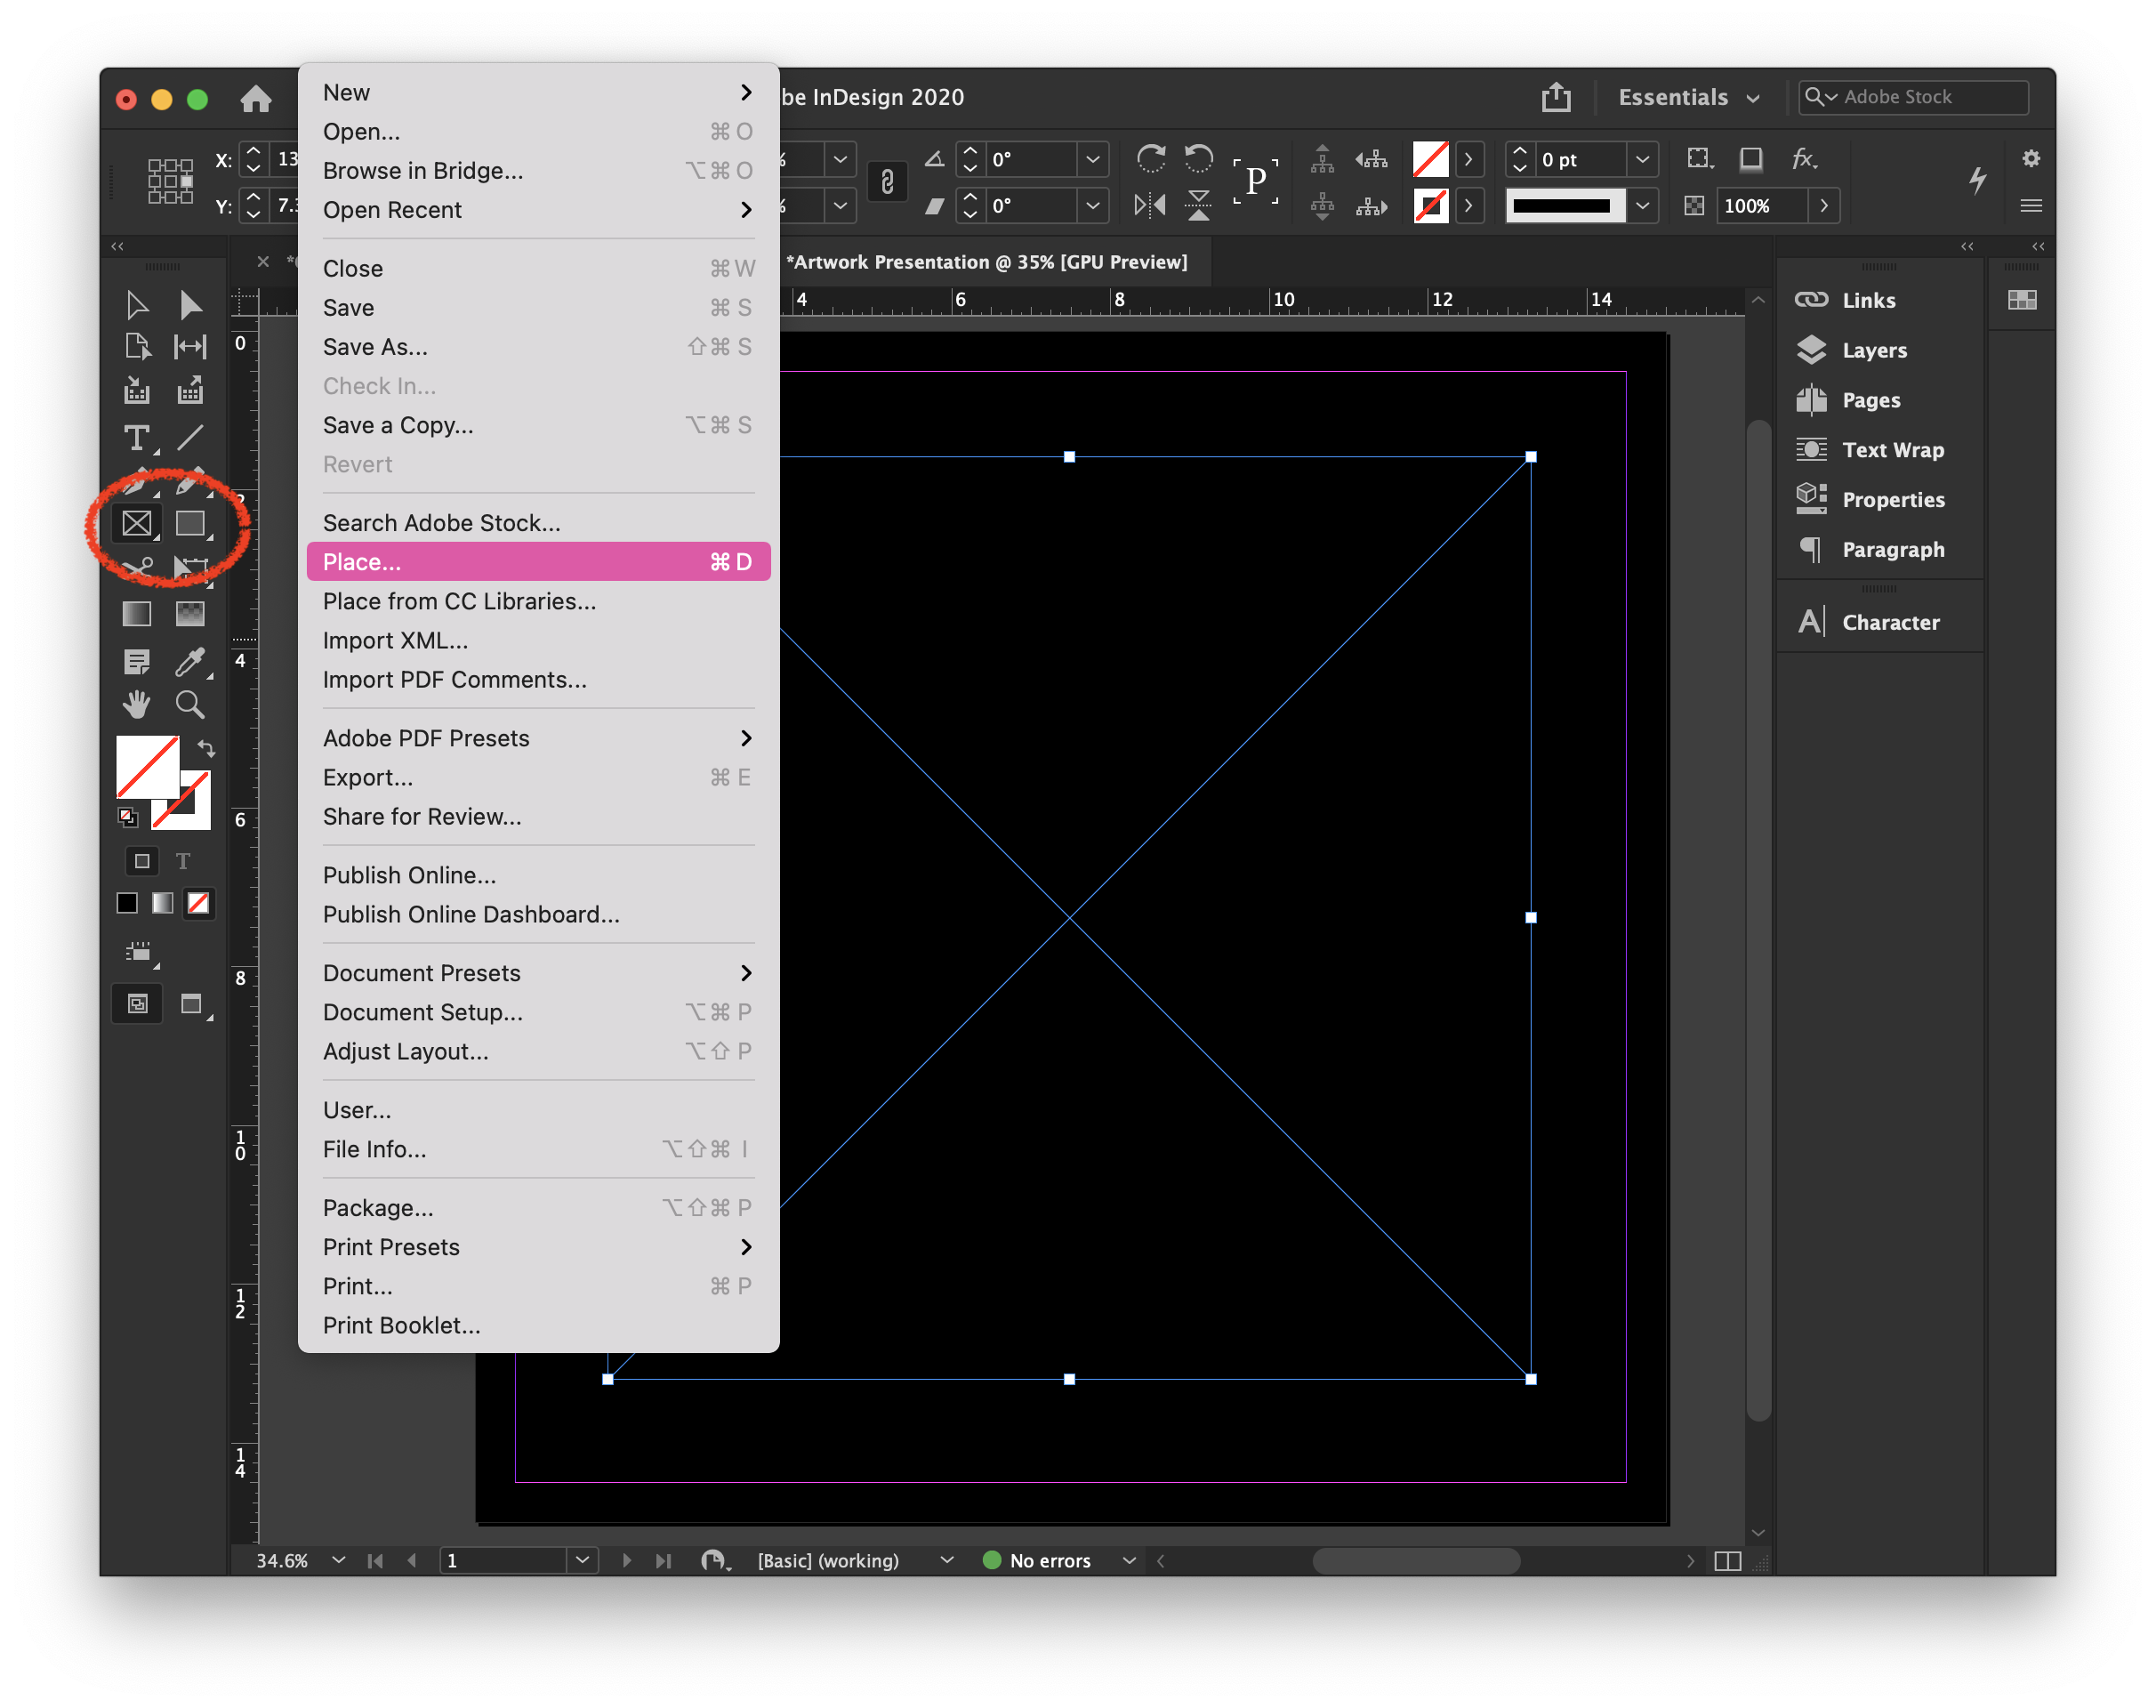
To place your artwork or photography, select either the Frame Tool or Rectangle Tool, hold “SHIFT” as your click and drag where you want your image to be. Click “File” and “Place” to insert your image (or Command/Control+D).
Use the “Align” tool under the “Properties” panel to center your elements. Now you’ve successfully placed your work into InDesign.