Google Drive is a useful tool for creating, saving, and transferring files. But did you know you can also use Google Drive directly from your desktop and edit your Drive files in other programs?
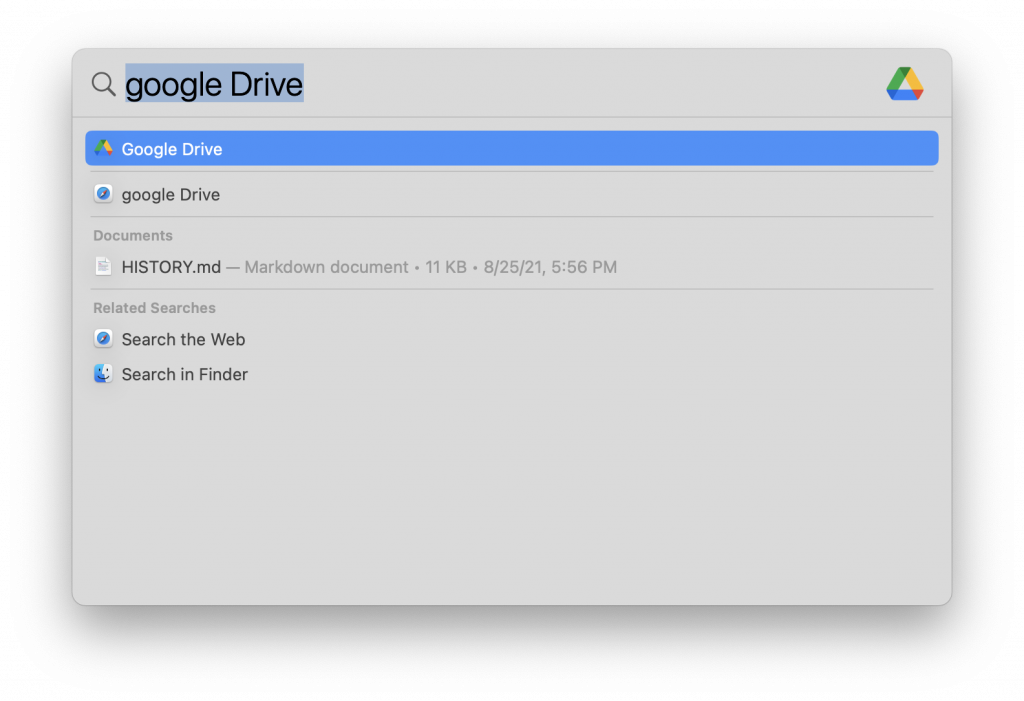
Google Drive is already installed on Simmons computers. You can easily find the app via the Spotlight search tool, or in the Applications folder.
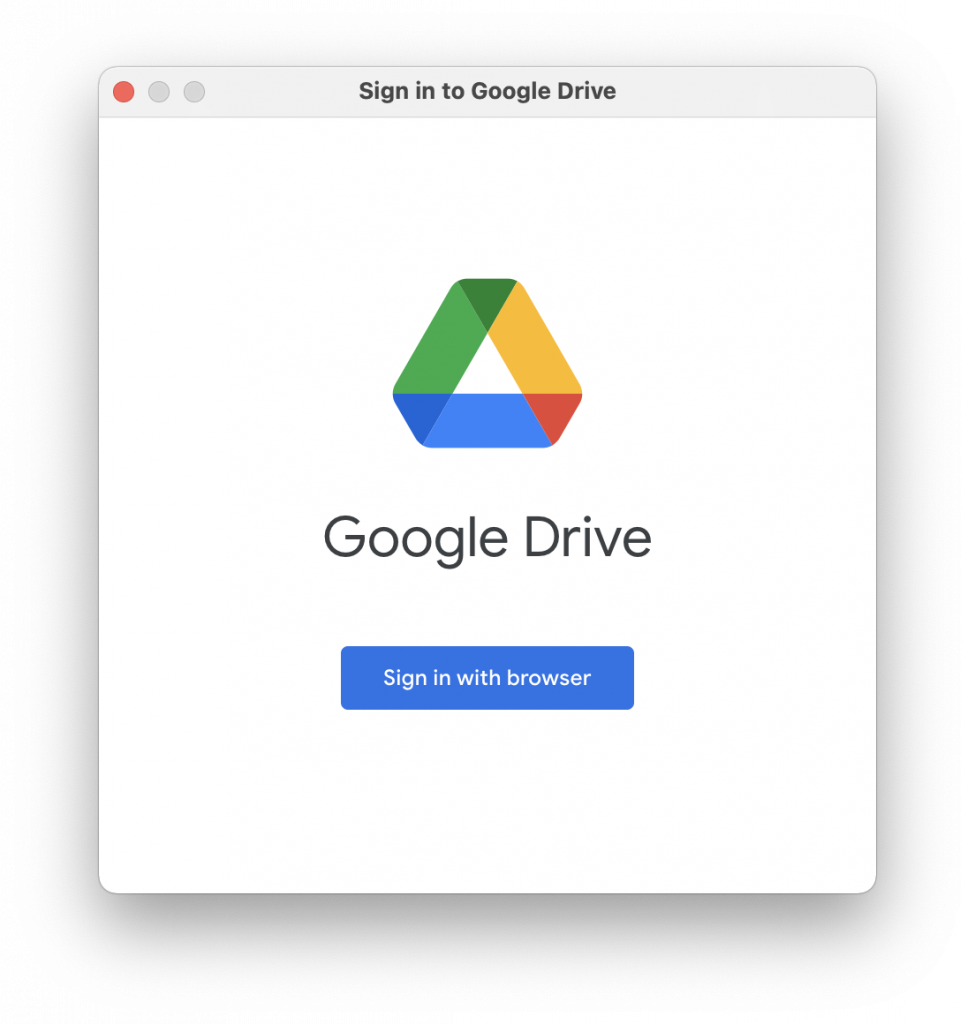
Once you open Google Drive, click Sign in with browser. It will open a browser window; if you are already signed into your Simmons account there you can choose it now.
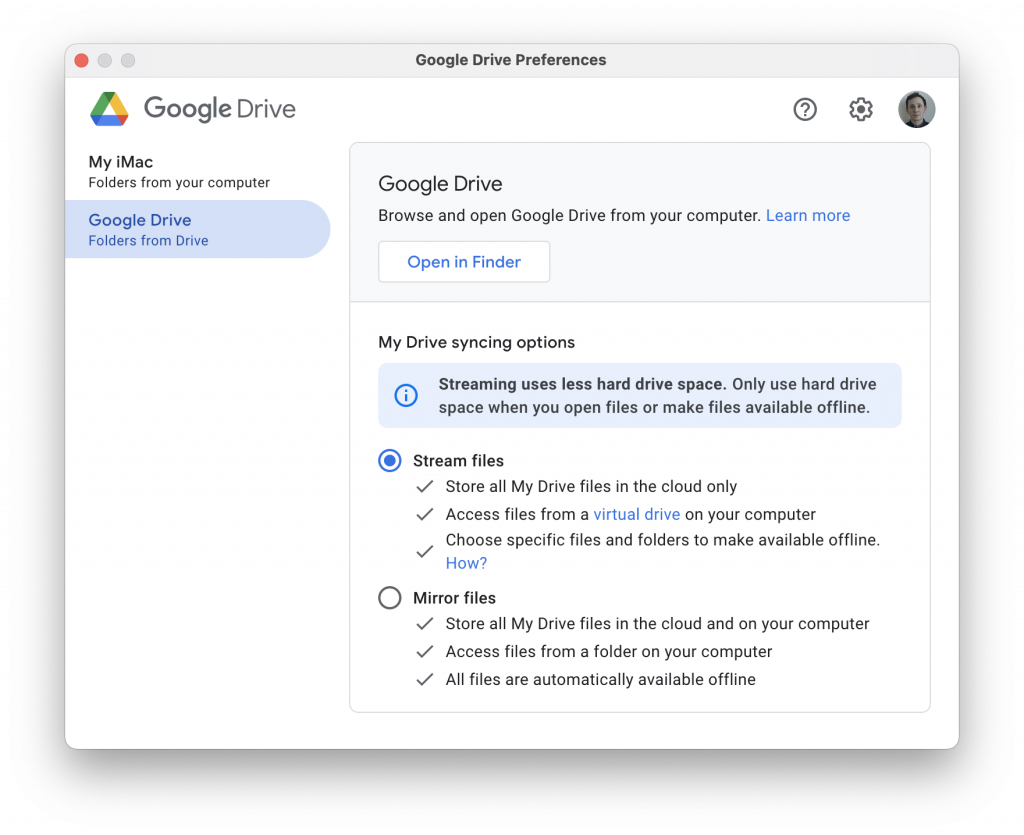
When you return to the Google Drive application, you should see a preferences window. If not, you can find it by clicking on the Google Drive icon in the menu bar. Select Stream files.
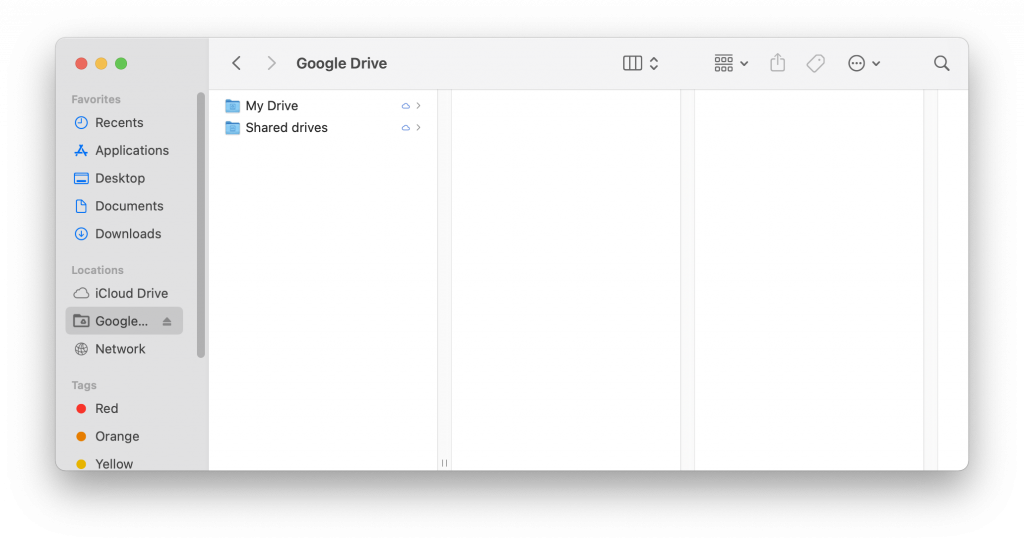
Open a Finder window and find the folder named Google Drive under Locations. All your Google Drive files will be located here. When you save your changes to a file here, they will be automatically updated to your Google Drive so you don’t have to upload anything!
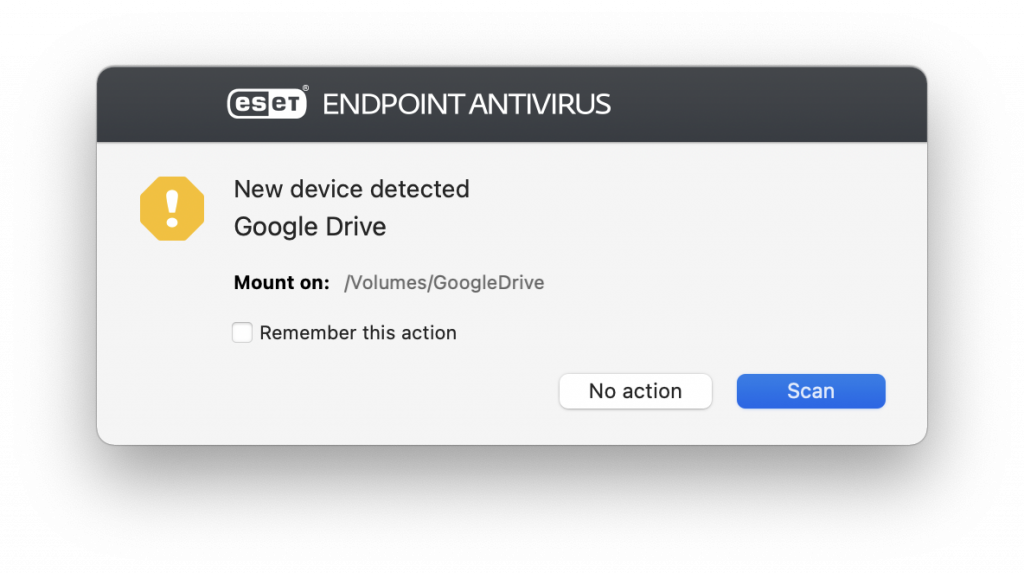
Once you finish signing in, your computer may ask if you want to scan Google Drive. This is because it treats the drive as an external device. Click No action.
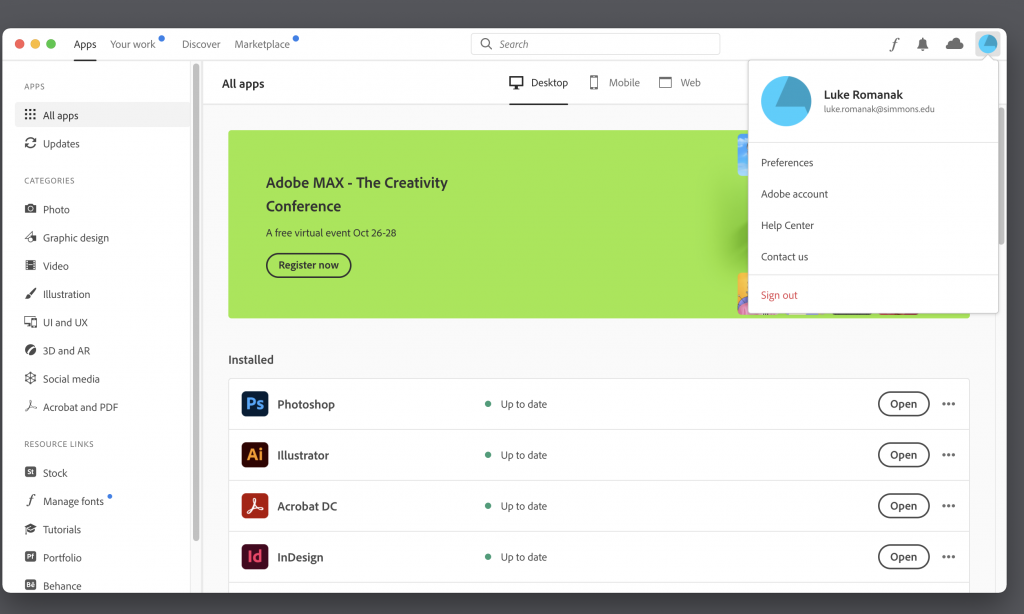
If you want to use Photoshop, InDesign, or any other Creative Cloud apps at Simmons, you’ll first need to log in to Creative Cloud through your Simmons account.
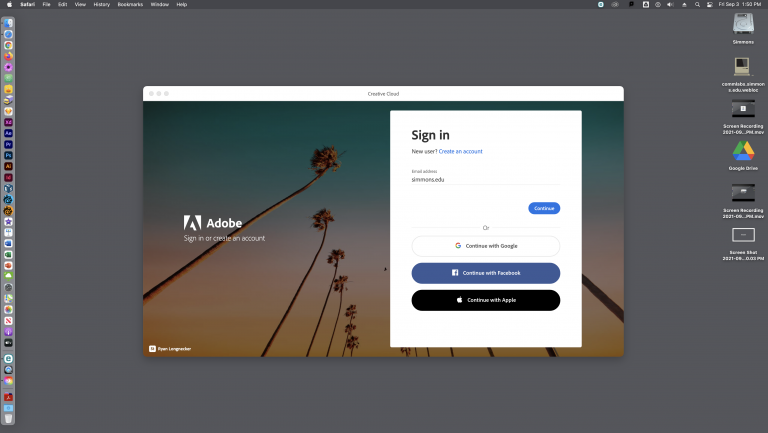
Open the Creative Cloud app and you will see the Sign In prompt. Do not enter your Simmons email address or username yet! All you have to type here is simmons.edu and hit Continue.
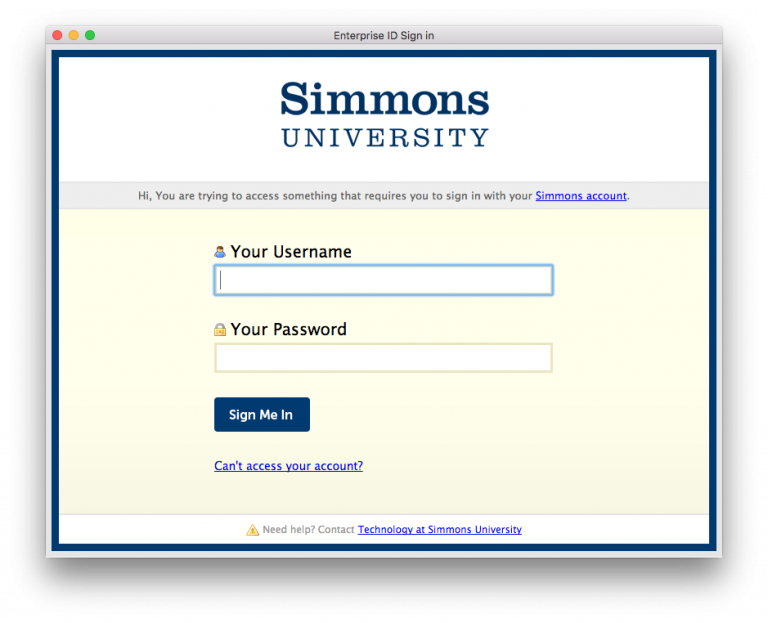
When you reach the Simmons sign on screen, you can enter your Simmons username and password. Complete Duo authentication if necessary.
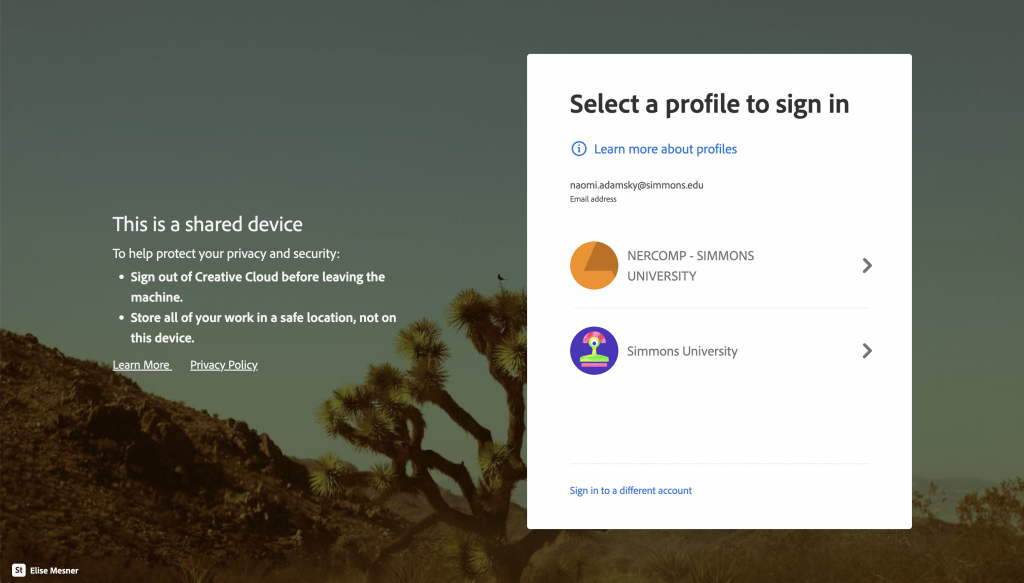
Once you sign in you will be prompted to select a profile. You will want to select NERCOMP.
Once you finishing signing in, you can access all the Creative Cloud apps from the Creative Cloud window!
Open terminal. My preferred way is to use the Spotlight Search. Command + Spacebar brings up spotlight search. Then type in “terminal”.
(A screenshot of the Spotlight Search bar pulling up Terminal)
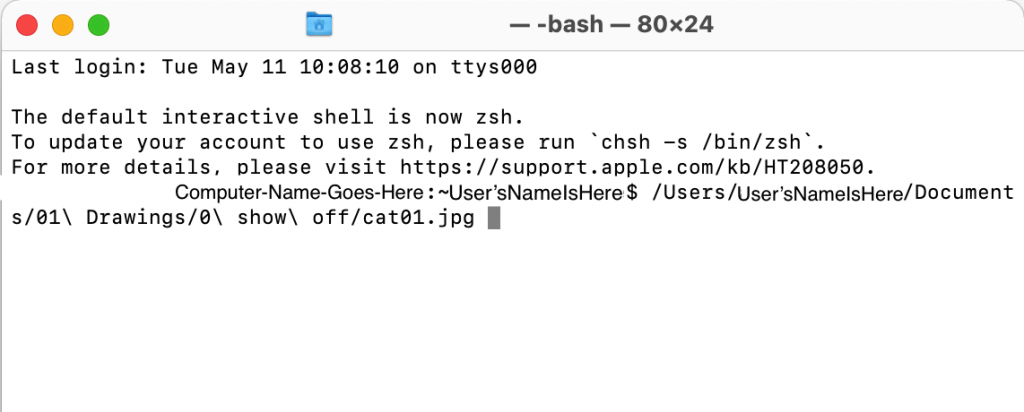
Open terminal. Then drag the file you wish to know the path of into the terminal.
(A screenshot of the terminal after I have dragged and dropped a file into it)
Your terminal should look something like the screenshot above. the path beings after the user is specified (~User’sNameIsHere$). For example, the path is /Users/User’sNameIsHere/Documents/01\ Drawings/0\ show\ off/cat01.jpg in this case.
You’ve made it through the semester. Your assignments are done, your projects are finalized, and you’re proud of the work you’ve done. YAY! But wait, before you log off, archive your work. This is a great way to maintain your portfolio and keep your work organized for future use.
Follow along for best practices to archive your semester’s work.
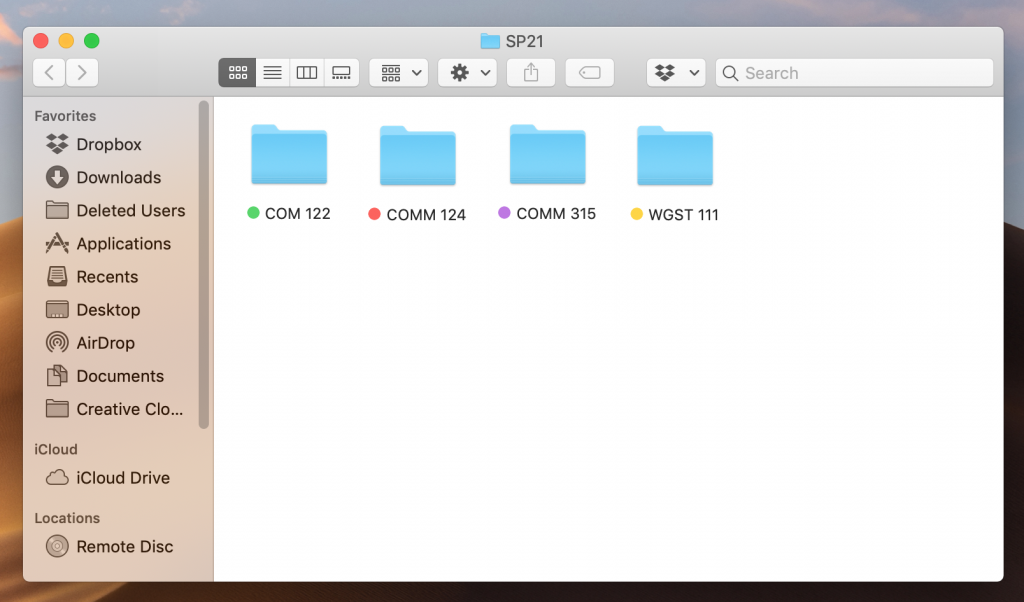
Start by creating a folder for your work from this semester
This will be the home for your semester portfolio. Once you have the main folder, you can create other specific folders for each class/group of work you’d like to categorize. Label the folder with the semester and year: SP21 = Spring, 2021
2. Create class folders
Next, create a folder for each class you took this semester that you want to be archived. Designate each folder with a different color. Use the same steps as above to create a new folder. Once the folder is created, left-click it and selected a color for the folder. Place all class folders in the semester folder.
3. Create “info” sheets
Once you have a folder for each class, make a document for each folder that says what is in the folder. You can follow the format below or create your own.
Name
Class Title
Semester, Year
Assignment
Date
Short Description (length, what it’s about, category)
Personal Column Final
05/01/21
750 words, LGBTQ voting, op-ed
4. Collect your materials and rename them
Export and download your work, one class at a time, onto your computer (PDF, JPEG, MP3 file, etc). Rename the files. I like to follow this layout for file names: LAST NAME_FIRST INITIAL_assignment name, ex: SHERBURNE_L_personal column final
5. Make it your own
While this tutorial specifically outlines semester portfolio organization, you can also use these steps to organize your work for jobs and research. Simply swap out class names for “Job Application Materials” or “Thesis Research” and create the inner folders according to how you want your work organized
Job Application Folder Ideas
Cover letters
Resumes
Cover Letters
Research Folder Ideas
Lab Data
Report Outlines
Source Lists
Argument Drafts
6. Upload to a flash drive, iCloud or Google Drive
You’ve done all the work to create your portfolio, now you want to make sure it stays safe. Exporting your portfolio to a flash drive, or uploading it to iCloud or Google Drive are easy ways to keep digital archives of your newly organized work.
Backing up your work is essential in our current day and age. There are so many ways that files can be lost or damaged that it is nearly guaranteed that it will happen at some point or another.
Another great reason to back up your files is because devices have limited storage. If the internal storage is full, this can cause many issues. Being able to clear out the less used files while still knowing that you have them stored in a back up is the perfect solution for that situation.
How To Geek has an excellent article that outlines not only why you should have multiple backups but also provides you with several different ways to back up your files.
Backblaze has a quick video that gives an overview of the different forms of back up that you can use and mentions pros and cons for each.
This video does imply that dropbox, google drive, or other similar online drives aren’t good backup solutions. And while you shouldn’t rely on them as your only form of backup (for the reasons stated in the video) they are still valid options for backing up your work as they are secure and easy to access.
A lack of space on your computer can cause a number of problems. Because of this, one of the first things I check when attempting to find the source of an issue is the storage space available.
How to check storage for Mac:
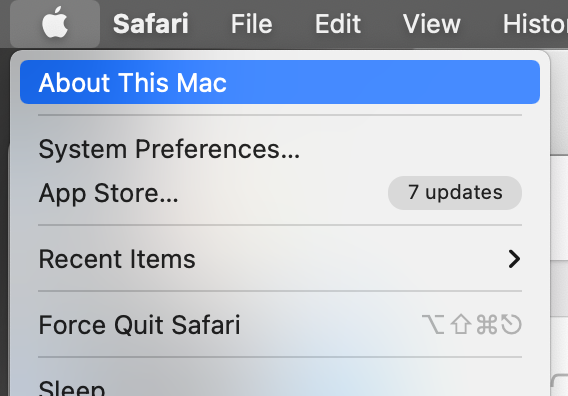
Open the apple symbol in the top left corner of your screen. Select “About This Mac”.
(Picture shows the Apple symbol drop down menu with “About This Mac” highlighted).
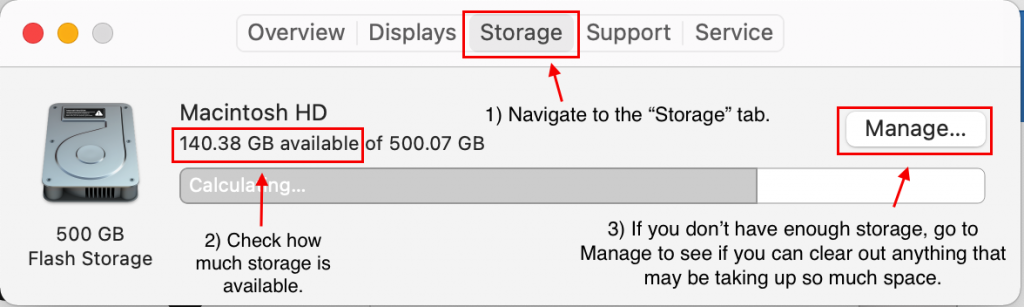
Once “About this Mac” is opened, navigate to the “Storage” tab. The amount of storage you still have available is shown above the bar that color codes the percentages of storage being used by specific categories.
(Picture shows annotated screenshot of the Storage tab in the About This Mac window).
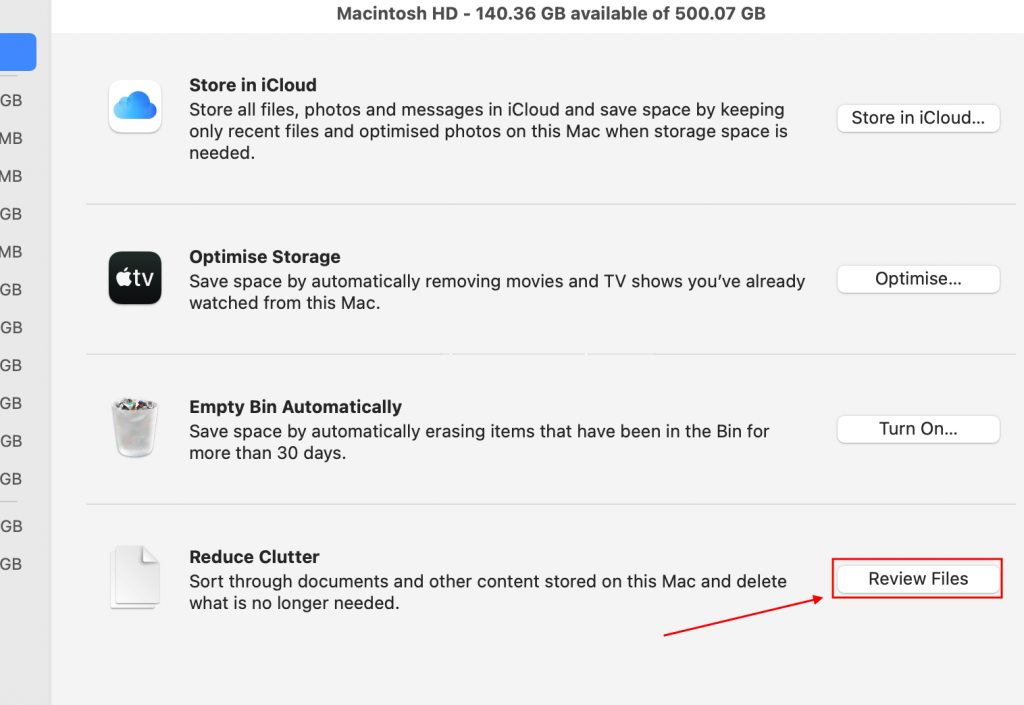
If you are out of storage, the best solution would be to back up your device and then to remove unnecessary files from your device. A short term solution would be to select “Manage…” which will open up a new window.
From there, select “Review Files” and you will be presented with the option to sort through your documents and permanently erase those files which are unnecessary.
For Windows 10, there are two ways to check the storage space availability:
First, open file explorer. This can be done by opening any folders or by tapping the file folder icon.
From there, click “This PC” in the navigation column on the left side of the window.
In “This PC”, you should see a section dedicated to Folders and one to Devices and Drives. Select one of the disks or drives in the Devices and Drives section will show you how much storage you have.
Alternatively, you can find the amount of storage on your device through the system settings. To begin, click the Start button and then the Settings icon.
In the settings window, navigate to “System” and then “Storage”. This will show you information about your primary hard drive and more details about how your storage is being used. Similar to the “Review Files” option in macs, this is where you will be given options for sorting through and managing the files and other uses of your storage.
When creating content often times it’s helpful to use photos and videos. However, many of the quality photos online are copyrighted – i.e. it’s illegal for you to use them without permission!
In order to avoid legal trouble, check out these resources for open-domain photos you can use for all of your creative projects.
Flickr: great community-sourced photos, search by name, photographer, or subject
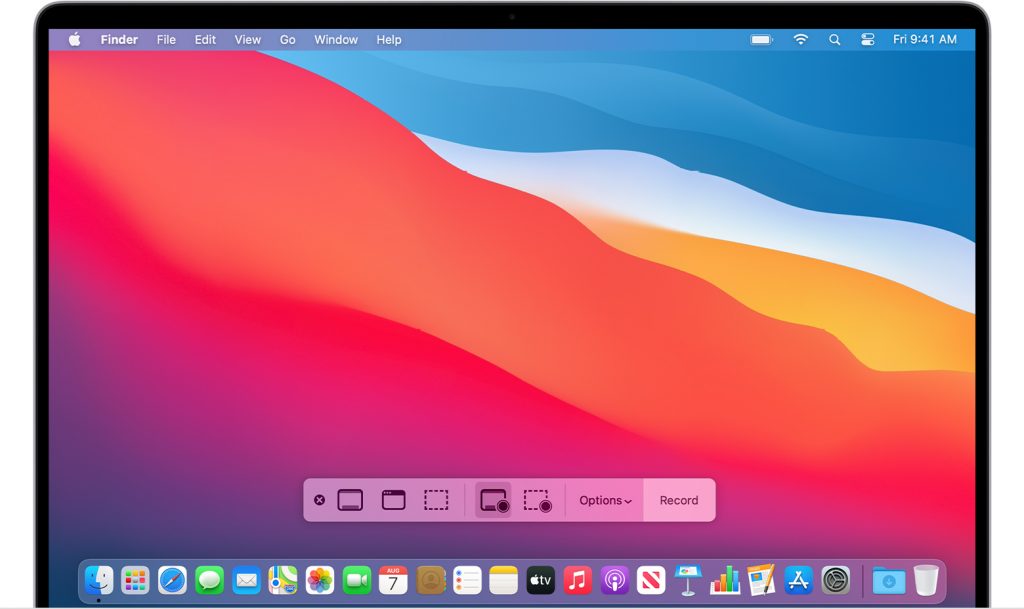
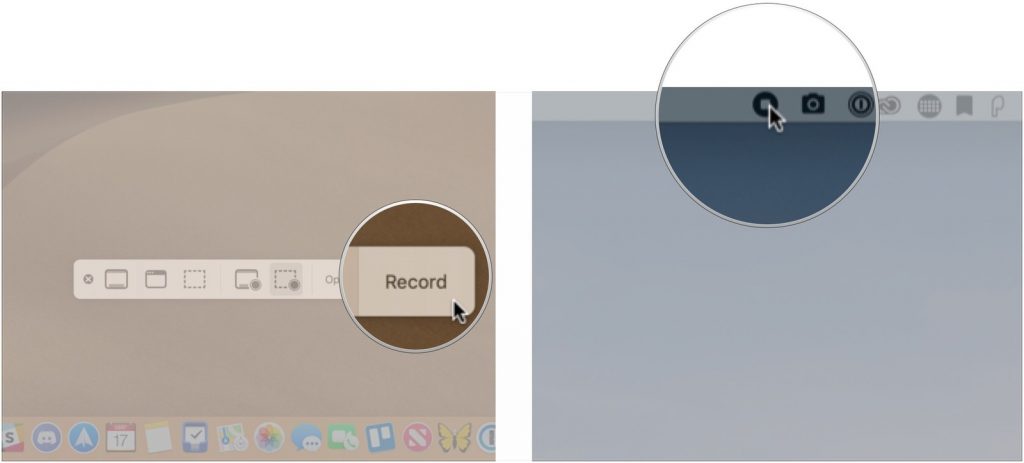
Follow these simple steps to screen record on your MacBook.
Press and hold down the Shift, Command, and 5 buttons at the same time
2. The screen recording bar will pop up on the bottom of your screen with 5 options to choose from (left to right)
Capture entire screen
Capture selected window
Capture selected portion
Record entire screen
Record selected portion
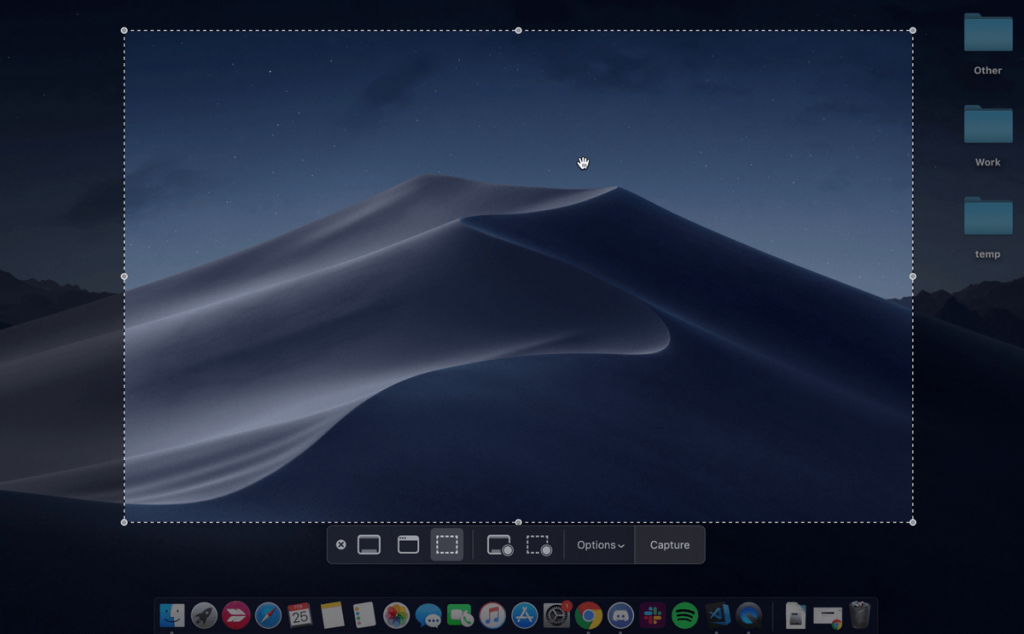
3. Taking a photo
To take a screen grab, simply click your mouse pad. You can adjust the size of the screen grab by clicking on capture selected portion before taking the photo.
4. To take a screen recording
Simply hit the record button. Your laptop will automatically start recording your screen.
5. To stop recording
Press the stop button on the info bar at the top of your screen.
The screen grabs and recordings will appear on your desktop after you’re done.
Everyone with a mac is at the very least mildly familiar with the general setup of Mac computers and their filing system. However it’s lesser known that Mac computers have hidden files.
This is to prevent the user from accidentally destroying their operating system. But what if you need to access these hidden folders? This tutorial will give you a couple of ways to unhide your hidden files, but be very careful. It can be very easy to mess up your operating system while altering these files.
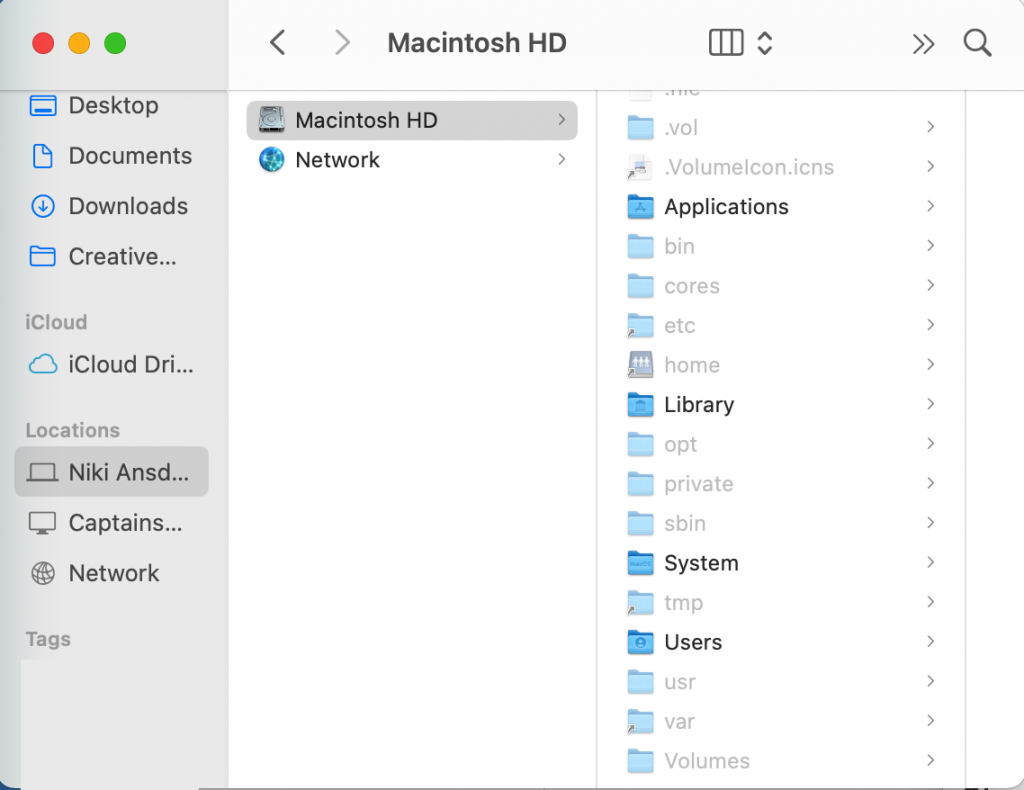
There are a number of ways that one can go about finding hidden files, but the easiest is to use the keyboard shortcut. To do this, you have to open up Finder and navigate to Macintosh HD (Locations => name of your computer => Macintosh HD) and press command+shift+period. You should now be able to see your hidden files.
The hidden files will appear transparent or washed out in comparison to your normal files.
To hide them once more, simply press command+shift+period again.
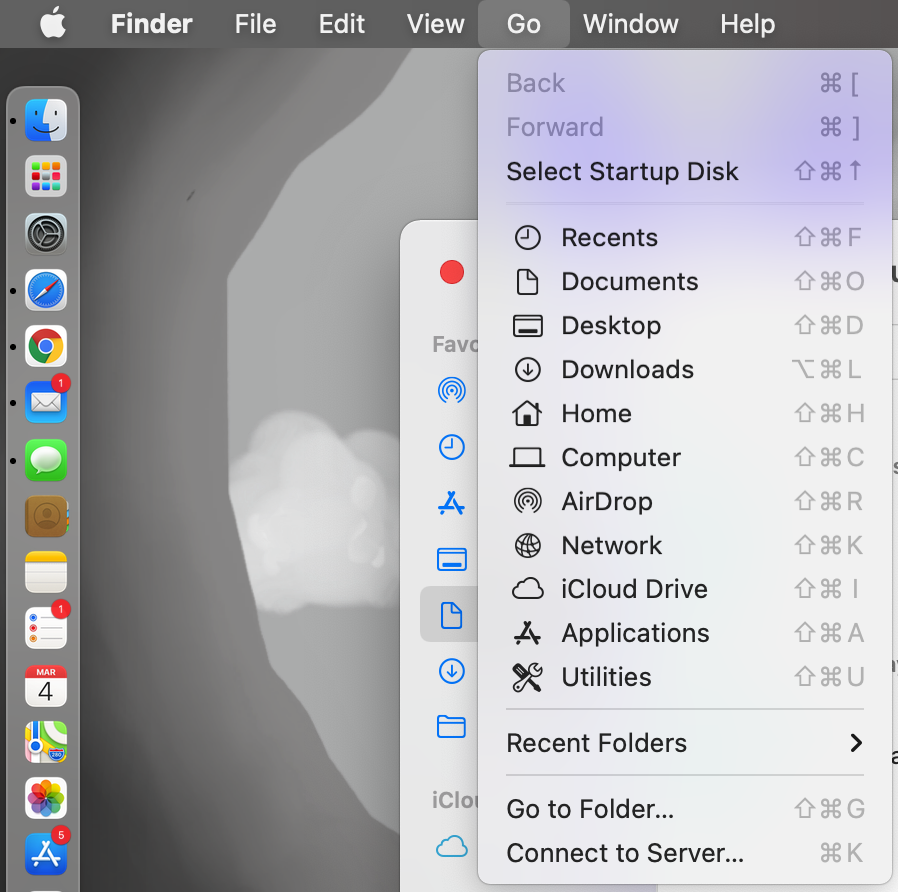
If you know that the file you’re looking for is in the hidden ~/Library folder (which is not the same as the Library folder you see in the screenshot above) you can go directly to it using the Go tab at the top of your screen. While there, hold down the alt/option key.
While holding alt/option, the Library folder should show up under Home and above Computer in the Go list. (Not shown in screenshot)
This will take you directly to the hidden Library folder.
Another way to find hidden files is through Terminal commands. You can find the Terminal in several ways, but the simplest is to use Spotlight Search. To find the terminal, first open Spotlight Search with command+space bar and then type in Terminal.
Once you have Terminal open, write the following:
defaults write com.apple.Finder AppleShowAllFiles TRUE (then Press Enter for a new line) killall Finder
To hide files again, write the same thing as above, but instead of “TRUE” use “FALSE”.
And there you have it. Those are the two and a half easiest ways to find hidden files on your mac computer. (I count the Go shortcut as the half).
Need to clear up some space? Let’s just throw some files in the bin then! But the problem is, that still hasn’t cleared up the space. So long as the trash has yet to be emptied, those files are still sitting on your computer, taking up space.
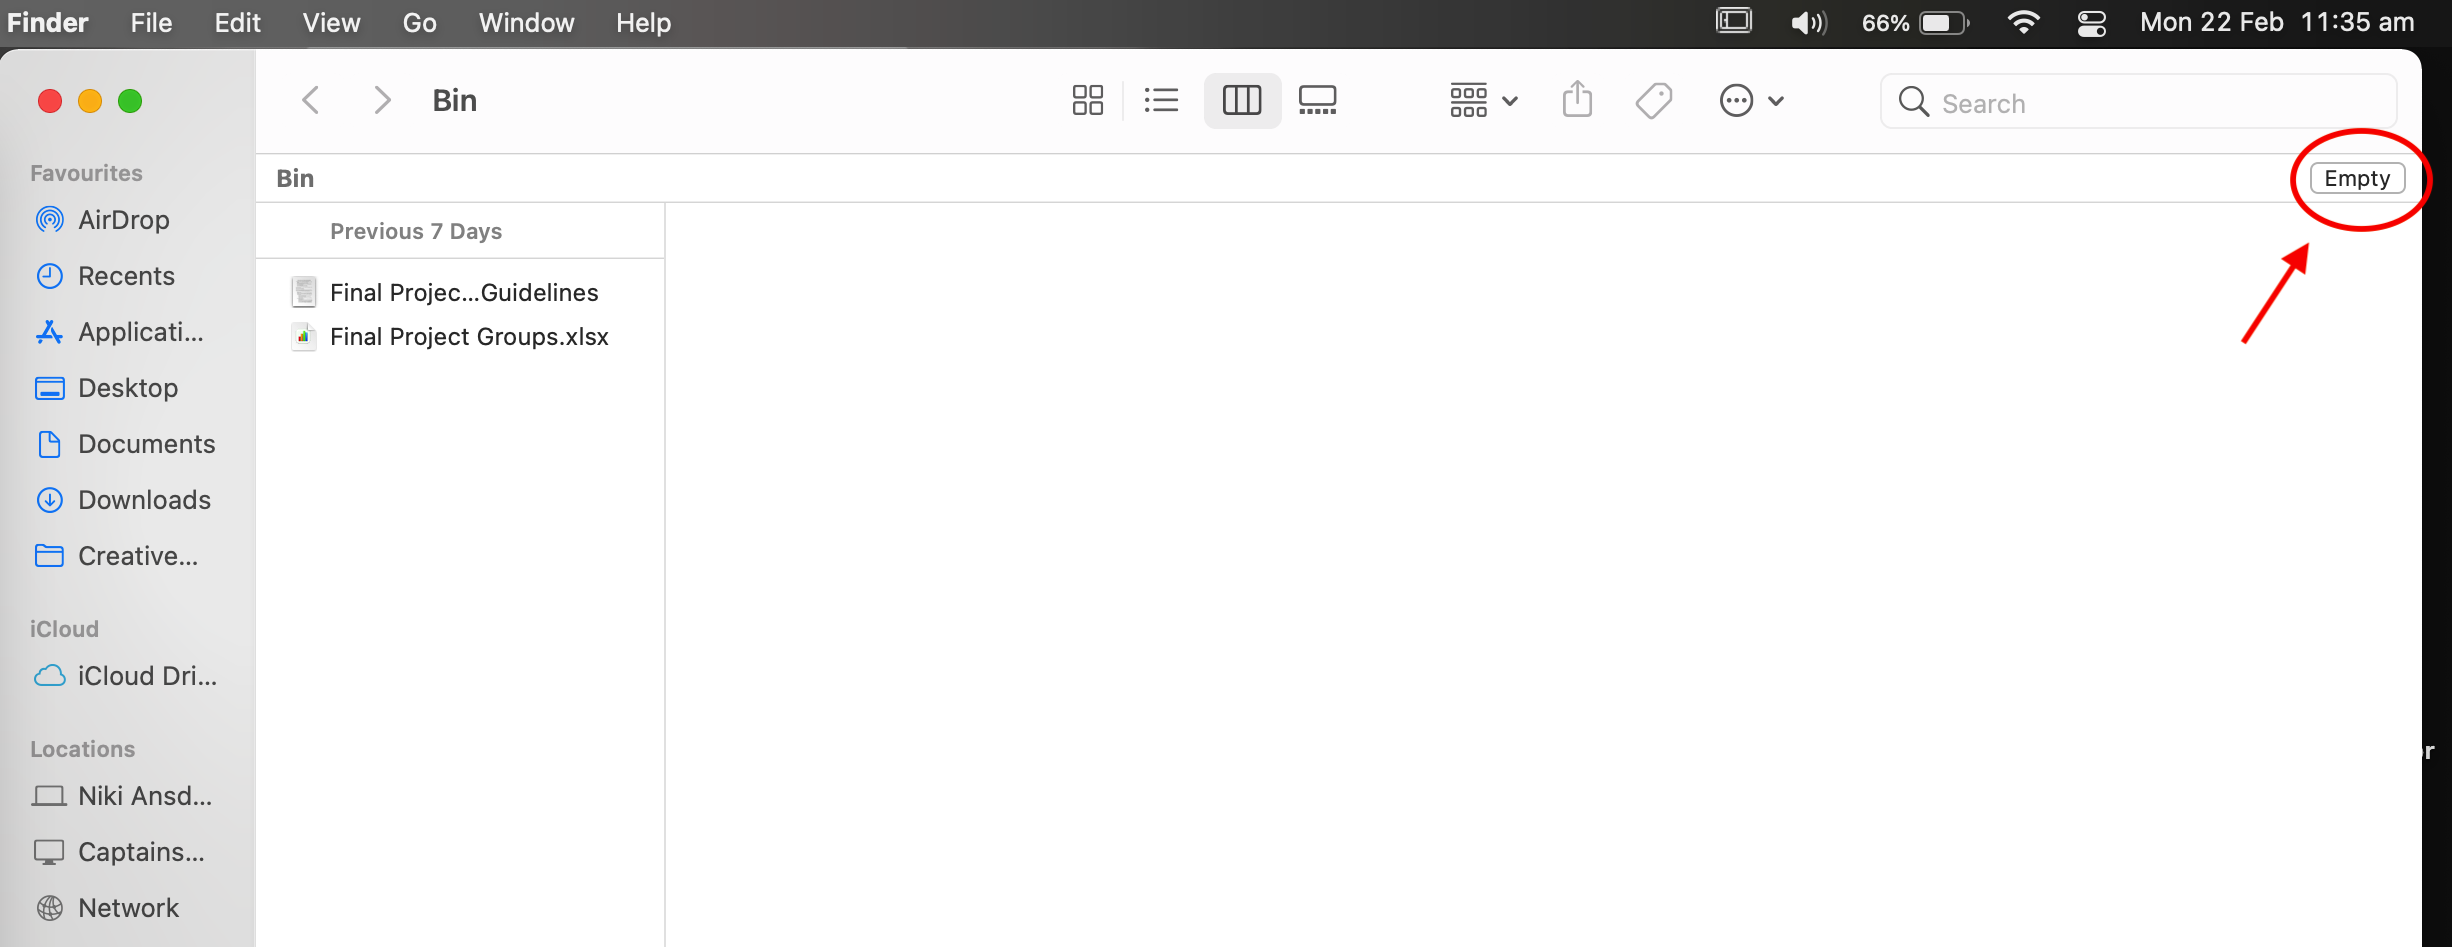
So how do you fix that? It’s fairly simple. If you have a mac, start with opening your trash bin.
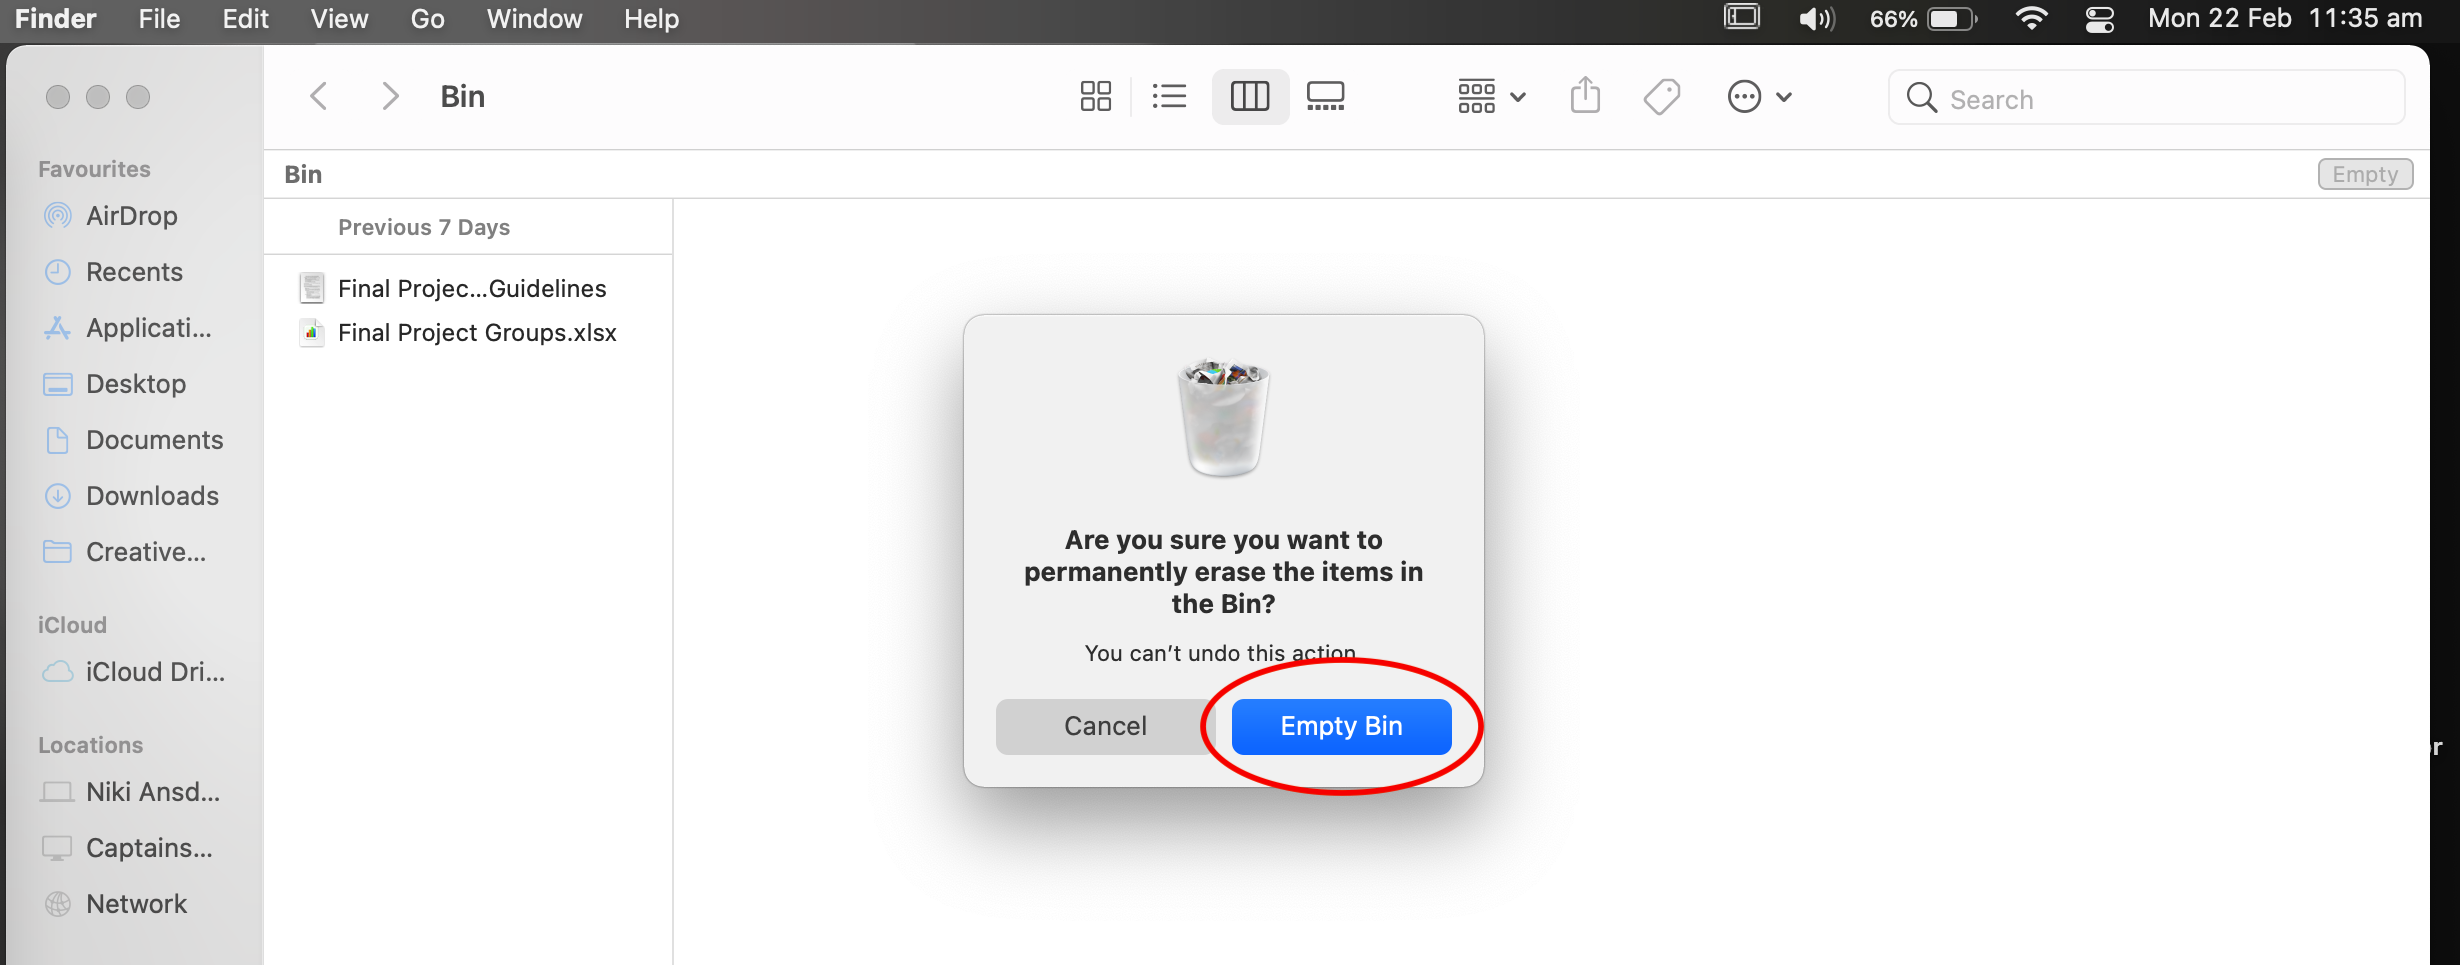
On macs, when you open your trash, it’ll look something like this.
Click on the empty button in the top right corner.
It should ask for conformation before deleting your files. This can be changed in finder preferences.
Click the Empty Bin button and voila! You have emptied your trash and have gained all that space.
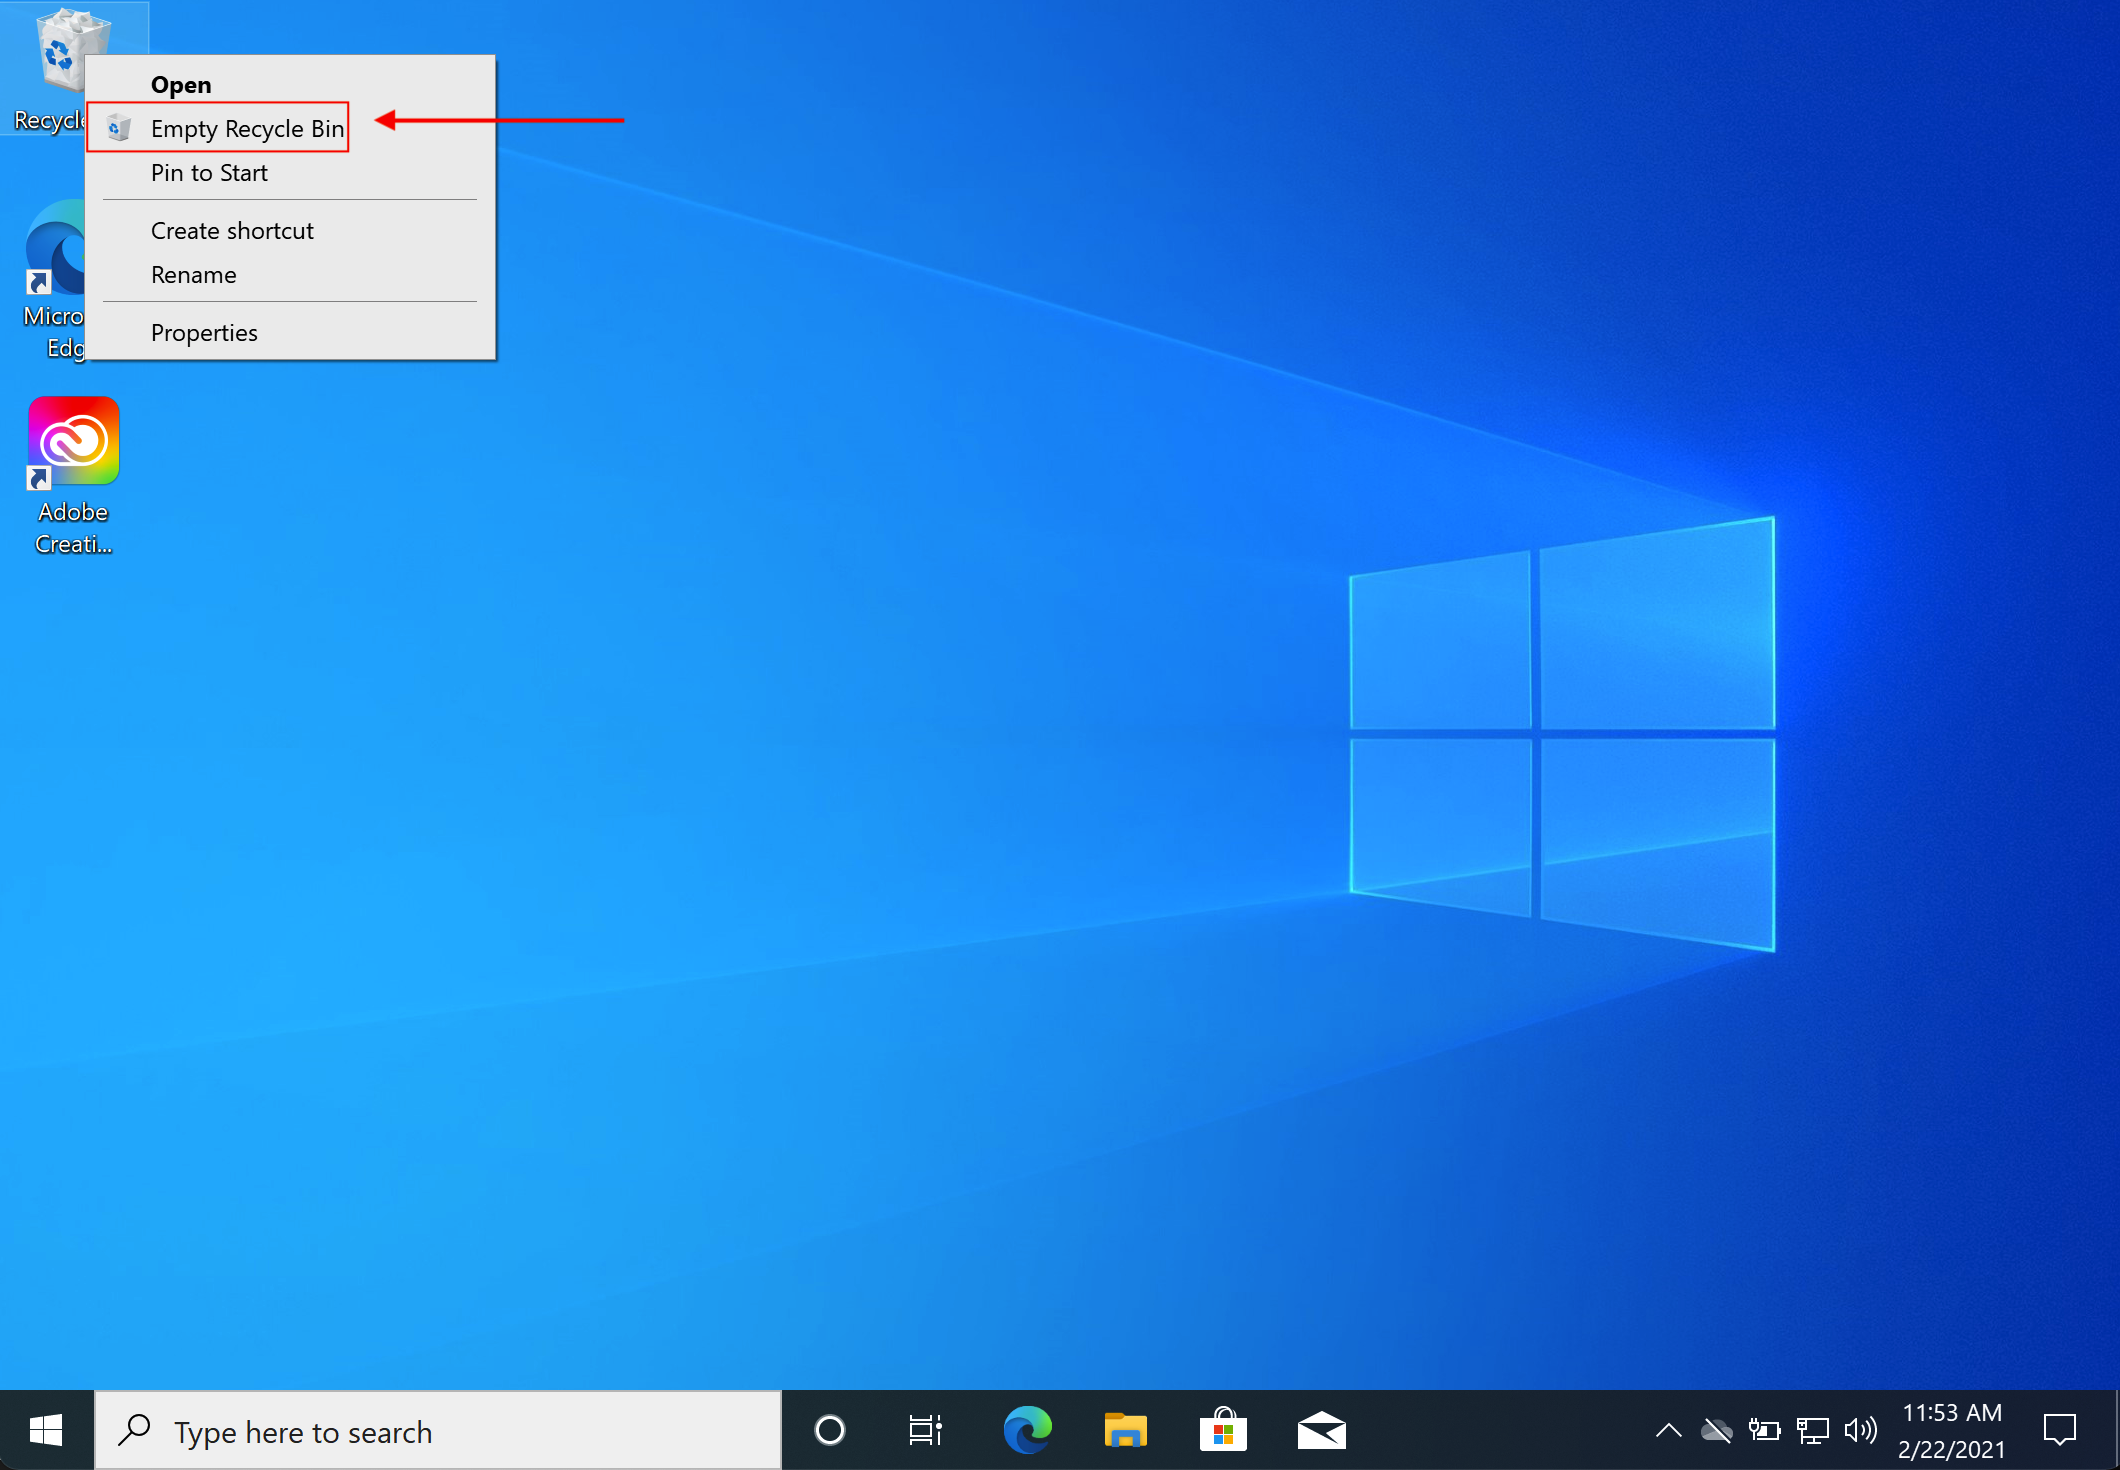
But what about for a Windows computer? (specifically windows 10 but I’m sure it can be applied to other iterations too) When you open the trash it doesn’t have a fancy empty button.
Well to start, you won’t open the trash, you will instead right click on it and find “Empty Recycle Bin”.
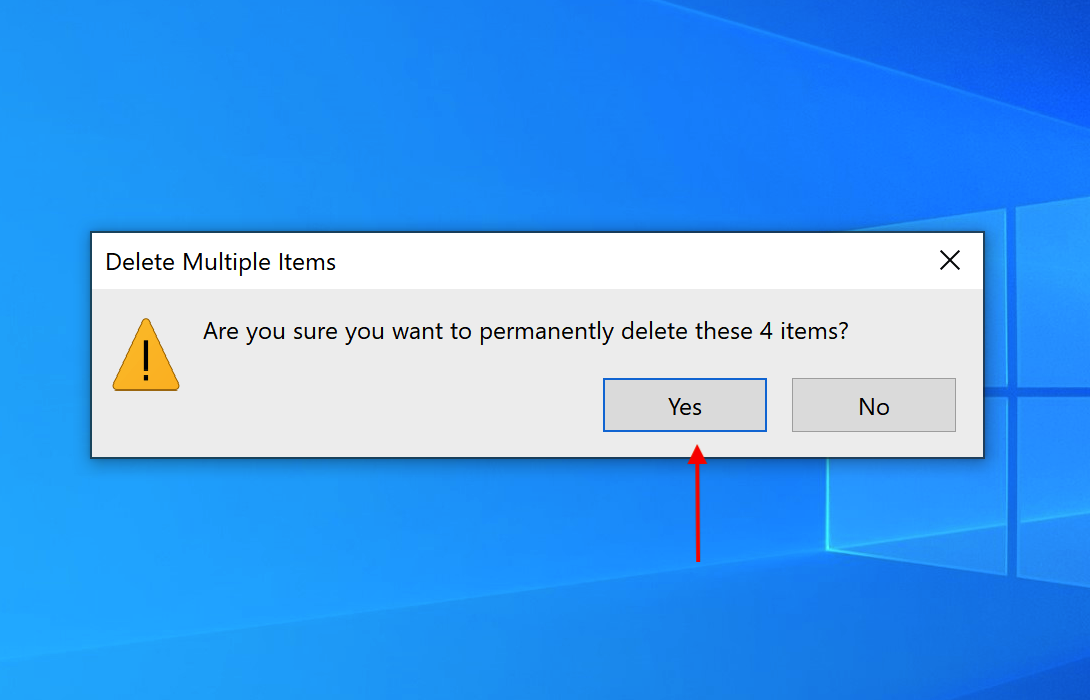
Click on that and a confirmation message should pop up.
Confirm that Yes you do in fact want to permanently delete these files.
And once again, voila, your problem is solved. You have permanently deleted the pesky files that were taking up space. Rather like the physical trash bin, the digital one should be emptied periodically in order to keep the clutter from taking up too much of your valuable space.