Best Practices for Archiving Your Work

You’ve made it through the semester. Your assignments are done, your projects are finalized, and you’re proud of the work you’ve done. YAY! But wait, before you log off, archive your work. This is a great way to maintain your portfolio and keep your work organized for future use.

Follow along for best practices to archive your semester’s work.

  1. Start by creating a folder for your work from this semester

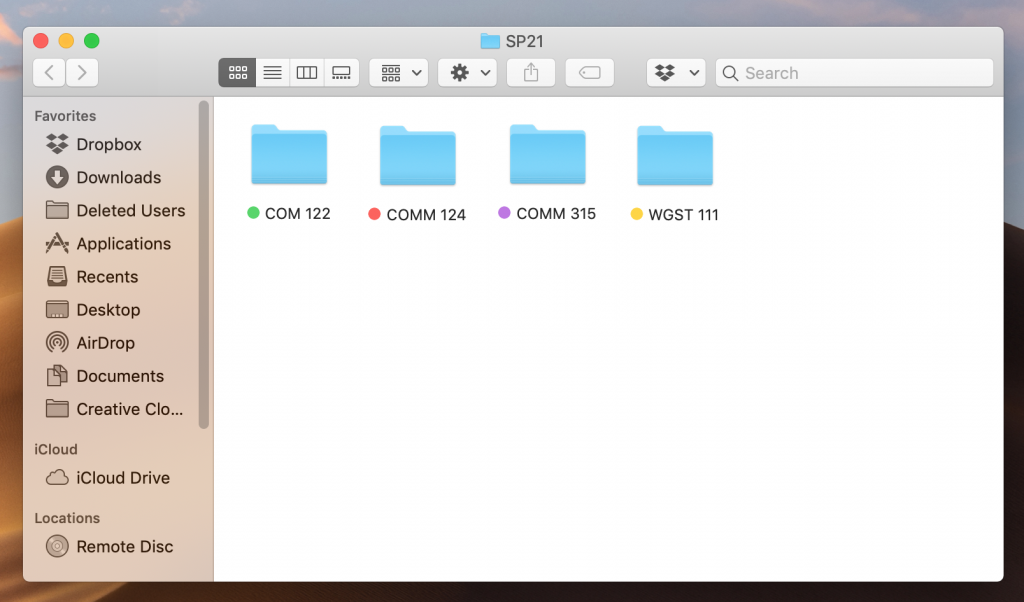
This will be the home for your semester portfolio. Once you have the main folder, you can create other specific folders for each class/group of work you’d like to categorize. Label the folder with the semester and year: SP21 = Spring, 2021

2. Create class folders

Next, create a folder for each class you took this semester that you want to be archived. Designate each folder with a different color. Use the same steps as above to create a new folder. Once the folder is created, left-click it and selected a color for the folder. Place all class folders in the semester folder.
3. Create “info” sheets

Once you have a folder for each class, make a document for each folder that says what is in the folder. You can follow the format below or create your own.

Name

Class Title

Semester, Year

AssignmentDateShort Description (length, what it’s about, category)
Personal Column Final05/01/21750 words, LGBTQ voting, op-ed

4. Collect your materials and rename them

Export and download your work, one class at a time, onto your computer (PDF, JPEG, MP3 file, etc). Rename the files. I like to follow this layout for file names: LAST NAME_FIRST INITIAL_assignment name, ex: SHERBURNE_L_personal column final

5. Make it your own

While this tutorial specifically outlines semester portfolio organization, you can also use these steps to organize your work for jobs and research. Simply swap out class names for “Job Application Materials” or “Thesis Research” and create the inner folders according to how you want your work organized

Job Application Folder Ideas

  • Cover letters
  • Resumes
  • Cover Letters

Research Folder Ideas

  • Lab Data
  • Report Outlines
  • Source Lists
  • Argument Drafts

6. Upload to a flash drive, iCloud or Google Drive

You’ve done all the work to create your portfolio, now you want to make sure it stays safe. Exporting your portfolio to a flash drive, or uploading it to iCloud or Google Drive are easy ways to keep digital archives of your newly organized work.

Free Photo Resources!

When creating content often times it’s helpful to use photos and videos. However, many of the quality photos online are copyrighted – i.e. it’s illegal for you to use them without permission!

In order to avoid legal trouble, check out these resources for open-domain photos you can use for all of your creative projects.

  1. Flickr: great community-sourced photos, search by name, photographer, or subject
  2. Creative Commons: search by domain laws or subject
  3. Library of Congress: great for archival photos and videos
  4. Adobe Stock: available to Comm students through Adobe suite, good for basic photos

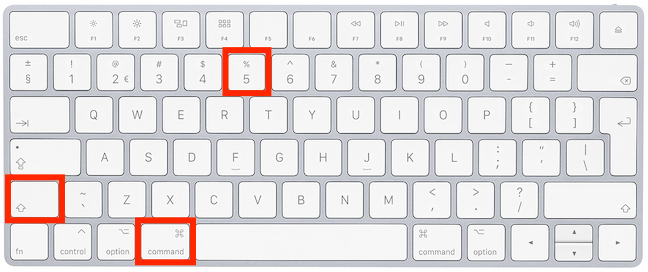
How to Screen Grab/Record on Macs

Follow these simple steps to screen record on your MacBook.

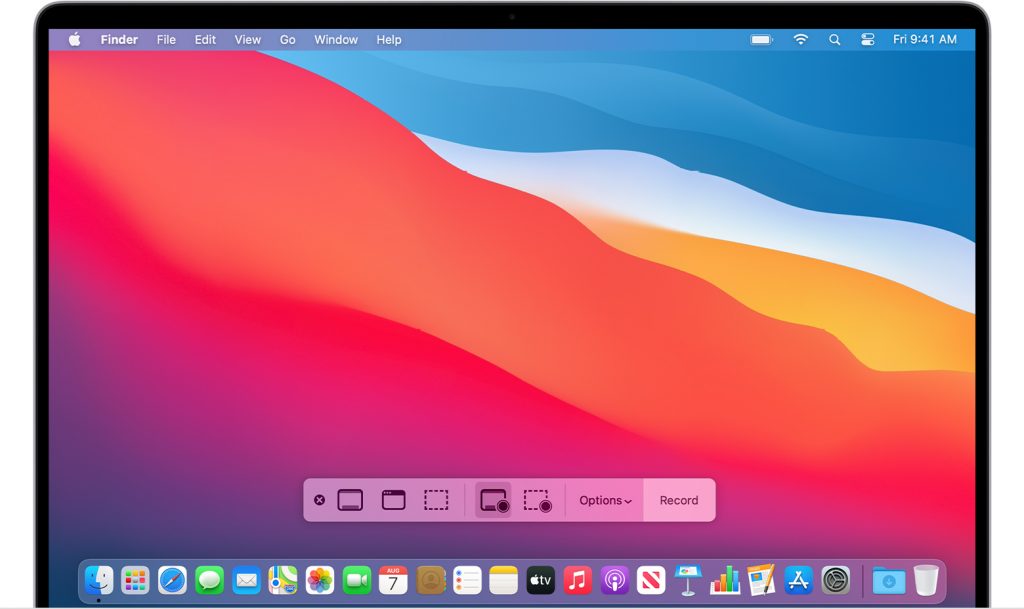
  1. Press and hold down the Shift, Command, and 5 buttons at the same time

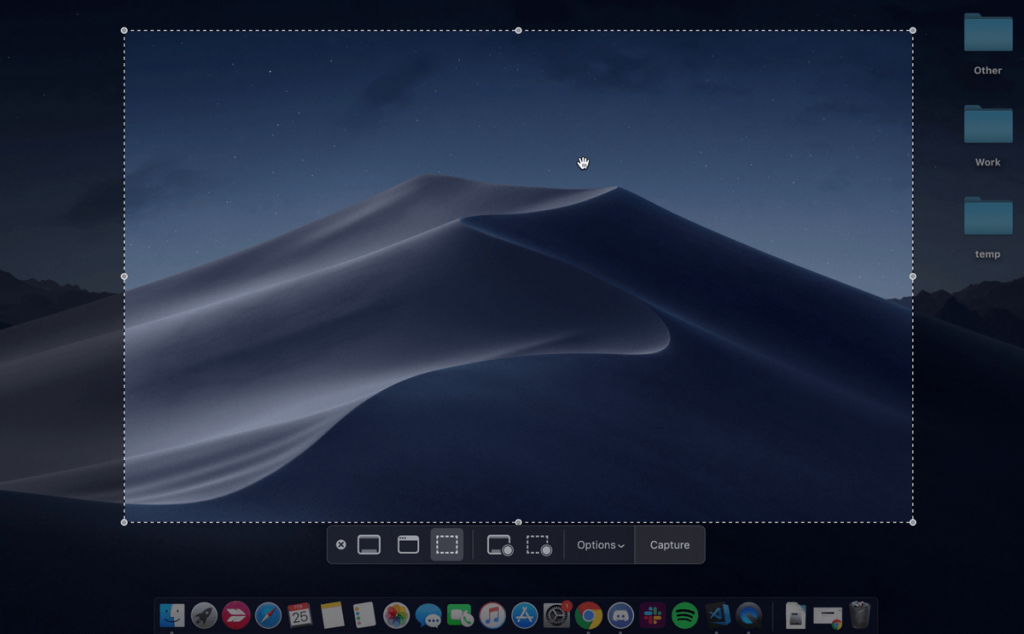
2. The screen recording bar will pop up on the bottom of your screen with 5 options to choose from (left to right)

  • Capture entire screen
  • Capture selected window
  • Capture selected portion
  • Record entire screen
  • Record selected portion

3. Taking a photo

  • To take a screen grab, simply click your mouse pad. You can adjust the size of the screen grab by clicking on capture selected portion before taking the photo.

4. To take a screen recording

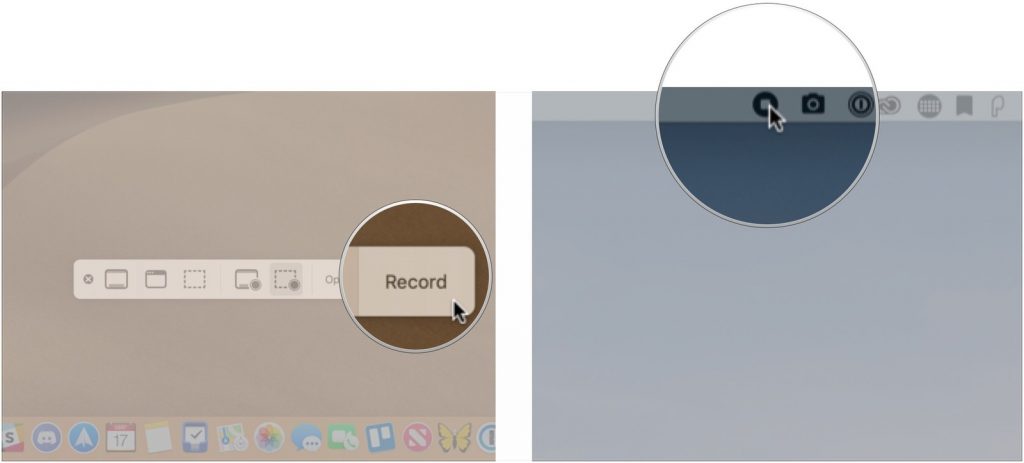
  • Simply hit the record button. Your laptop will automatically start recording your screen.

5. To stop recording

  • Press the stop button on the info bar at the top of your screen.

The screen grabs and recordings will appear on your desktop after you’re done.

7 Basic Tips for iPhone Videography

Here are some basic tips for filming on your iPhone (or any other phone)!

  1. Hold the camera horizontally

This will ensure that your video fills the screen and you’ll avoid a blurred out stretched effect in post production.

2. Shoot twice as much content as you need

Filming on your phone can be a quick and efficient way to capture video but you want to make sure that you’re actually getting the footage you need. By taking extra video, you’re making sure that you have back up if you didn’t get enough footage when out in the field.

3. Use headphones when recording

Using headphones while recording will allow you to hear what your video will sound like in playback. This way you’ll be sure your audio sounds great and won’t have to go out to reshoot.

4. Use a tripod

This is a game changer. Your hands can be shaky when filming even if you don’t notice it. Using a tripod will allow you to have better control of you phone.

5. Watch your video after you record it

This may be a simple step but it relates back to tip number three. Just like playing back your audio makes sure your sound is ok, playing back and actually watching your video makes sure your shots look how you want them to. You can never be too sure!

6. Experiment with different angles

What great about iPhone filming is that its handy and easy to use, just point and shoot. You probably have your phone by you most of the time which makes taking a quick video while out of the house (or in the house) really easy to do. Phones are also small and simple to navigate. Take advantage of the different ways you can use your phone to shoot video.

7. Use tape

Sticky tape, not video footage. By placing a small piece of tape (think Scotch brand or something similar) over your phones microphone you can prevent harsh wind sounds from ruining you videos. The tape acts as a buffer between the wind and the mic and should help when recording outdoors.

Template Set-Up and Marble Effect for Zines in InDesign

This tutorial walks you through multiple set-ups for your zine, the marble effect, and font design in InDesign.

Download the templates and fonts to replicate the design. The marble effect can add a unique, contemporary feel to all your zines. Configuring your template first will help your zine look professional and uniform.

Happy creating!